Cantonese Tag

ONE-POT SICHUAN SAUSAGE (OR ANY SAUSAGE) RICE W HERBS SALAD

THE ABUNDANT FAT AND JUICES FROM THE SAUSAGE WILL DESCEND GODLY AND SEEP DOWN THROUGH THE RICE BELOW, FLAVORING AND AIDING THE FORMATION OF THE HEAVENLY BOTTOM CRUST

If you follow my Instagram, then you’d know that I’m head-deep in rushing towards the finishing line on my cookbook.  Yeah, I’m writing one, and this is probably the first time that I’m mentioning it on the blog, all very anti-dramatic and all.  But I promise to talk more about it when the time comes.

For now, let me quickly leave you with a recipe, well more like a technique almost, that I think everyone who struggles with weeknight meals (or writing a book no less) should have in their repertoire.  Inspired by claypot rice, here’s how to turn any type of fresh sausages and a few cups of rice into a one-pot, steaming, savory, fluffy and crispy wonder.  If you have a few minutes to spare, you can prepare this sichuan-inspired sausage thoroughly studded with fatty guanciale bits (Italian cured pork jowl), burning with toasted chili flakes and tingling wtih sichuan pepercorns.  Or, you can use any other types of your favorite, fresh sausages like sweet Italian, spicy Italian, or fresh Mexican chorizo and etc.  Either way, the abundant fat and juices from the sausage will descend godly and seep down through the rice below, flavoring and aiding the formation of the caramelized, heavenly bottom crust.  Then this steaming and comforting one-pot wonder is complimented by a scallion and tarragon salad cooled by a touch of Greek yogurt.  If you’re anything like me, you don’t even need bowls.

READ MORE

Continue Reading

DIM SUM MONTH FINALE: Tapenade short ribs, plus dim sum party game plan

AT LAST, DIM SUM MONTH FINALE…

WHAT:  Beef short ribs in super garlicky tapenade sauce, an adaptation of a classic dimsum item – pork ribs with fermented black beans but with an American/European twist.

WHY:  The unexpectedly supple texture of the beef (thanks to baking soda) melting gorgeously into a pool of bold and complex mixture of flavors, a revelation that can be easily prepared ahead of time and cooks in under 8 min.

HOW:  For both flavors and accessibility, I have swapped the traditionally used diced pork ribs with the more luscious and rich-tasting beef short ribs, and Chinese fermented black beans with the equally bold and forward black olives.  Trust me, if I may say so myself, the reinvented combination works even better than tradition.  The surprisingly tender and velvety texture of the beef – achieved by adding just a tiny pinch of baking soda into the marinate – disintegrates in your mouth in a medley of perfectly orchestrated flavours that you didn’t even know would go together.  Black olives, strawberry jam, soy sauce, sesame oil, Dijon mustard, and a depth created by using both raw and fried garlics.  It’s easy to put together, and a cinch to cook in a blink of an eye.  You’ll wonder where it’s been your whole life.

Now, simply follow the instructions below on how to throw a hassle-free dim sum party!

READ MORE

Continue Reading

DIM SUM MONTH: GLASS DUMPLINGS W/ MUSHROOMS AND SMOKED GOUDA CHEESE

DIM SUM MONTH STILL CONTINUES…

OK, I know it’s not February anymore, but there’s still a couple more dim sum I want to share so DIM SUM MONTH is oozing into March a bit…

WHAT:  Glass-like translucent dumplings stuffed with caramelized mushrooms and a soft-hearted center of smoked gouda cheese, all in a beautiful tear-drop shape.

WHY:  Because the only tears you’re gonna cry are happy ones when you try this.

HOW:  This wrapper is actually my favorite not only because it’s so beautiful, but it actually freezes well, or should I say better than the more common and popular crystal shrimp dumplings.  It has a pleasantly bouncy and chewy mouth-feel, and it gives the audience a preview to whatever fillings you put inside!  In this case, we’re doing deeply oven-caramelized mushrooms that are bound together by a bit of ground pork and parmigiano-regiano cheese (and a hint of truffle oil if you can splurge), creating an earthy, warm and aromatic cradle that rocks a soft and temperate center of smoked gouda cheese.  Nothing is going to shout “funk!” in this flavor-profile here, only modest but confident display of a well-tolerated harmony.  The only accessory it likes is a brightening dab of heat from this chili sambal romesco sauce.  But the sky’s the limit here.  How about grassy colored spinach filling with a stronger punch of blue cheese, or sweet and red-cheeked carrots or beets and funky goat’s cheese?  Dream wild.

* I believe that the next post will be the final chapter of dim sum month, and I’m going to list out a complete game-plan on what, how and when to prepare certain items ahead of time, and throwing then all together at our virtual dim sum party :)

READ MORE

Continue Reading

DIM SUM MONTH: PORK BELLY BUN W/ PEANUT BUTTER AND CAPER

DIM SUM MONTH CONTINUES…

WHAT:  Super cute and tiny steamed buns stuffed with braised pork belly, pan-fried capers and smooth peanut butter.

WHY:  It’s pork bun in baby form!  It’s pork bun in two-bites size!  It’s pork bun but pop-able!  Dispute settled.

HOW:  The idea is to create an over-the-top, porky, fatty and gooey bun-tasy with a built-in acidic element to balance it all out, and this is what came out on the other side.  Inspired by traditional Taiwanese guabao (which is the former life of David Chang’s infamous “pork bun”), the pork belly is first braised with aromatics and spices until melty and tender, but instead of ground peanuts that’s used in guabao, smooth peanut butter is being introduced.  Just when pork belly and peanut butter – both fatty, gooey and intense – are locking tongues in your mouth, the taste buds get a sharp and pleasant zing of acidity and pickle-ness from pan-fried capers, all swirling and dancing inside this slightly sweet and chewy dough.  What’s more wrong?  Eating just one or more?  I can’t decide.

By the way, most of the recipes in DIM SUM MONTH is designed to be prepared ahead of time.  Make each items and store them in the freezer, and at the end of the month, we’re going to have a dim sum blowout party.  See ya!

PORK BELLY BUN W/ PEANUT BUTTER AND CAPER

Yield: 17 buns

Ingredients

    BRAISED PORK BELLY:
  • 17.6 oz (500 grams) skin-on pork belly
  • 4~5 (40 grams) scallions, cut into short sections
  • 1 tbsp vegetable oil
  • 1 1/2 tbsp (20 grams) light brown sugar
  • 3 cloves garlic, minced
  • 1/4 cup (60 grams) shaoxing wine, or rice wine
  • 1/4 cup (60 grams) soy sauce
  • 2~3 bay leaves
  • 2 star anise
  • 1/8 tsp ground cinnamon
  • DOUGH:
  • 2 cups (250 grams) bread flour
  • 3 1/2 tbsp (50 grams) granulated sugar
  • 2 tsp (3 grams) instant dry yeast
  • 1/2 tsp salt
  • 2/3 cup (147 grams) water
  • FILLING:
  • 1/4 cup drained pickled capers
  • 2 tsp vegetable oil
  • 1/2 tsp granulated sugar
  • 1/2 tsp rice vinegar
  • smooth peanut butter

Instructions

  1. PREPARE PORK BELLY: Cut the pork belly into 1" (2.5 cm) dices, set aside. In an oven-proof pot, heat vegetable oil and cook the scallions until browned all over and shriveled, then remove with a slotted spoon and set aside. Add the diced pork belly and cook until the edges are slightly browned and some of the fat is being rendered out. Pour all the fat out of the pot, then add the light brown sugar. Continue to cook, stirring frequently, until the edges of the pork belly and the sugar are caramelized. Now add the scallions back in along with garlic. Cook for 1 min until fragrant, then add shaoxing wine, soy sauce, bay leaves, star anise and ground cinnamon. Bring to a simmer, put the lid on, then transfer into a 300 F/150 C oven. Give it a stir every 30 min, and cook for about 1:40 ~1:50 hour until it's melty tender (if it looks like there's no more liquid left at any point during cooking, just add a bit more shaoxing wine).
  2. Remove the bay leaves and star anise, and skim off most of the fat off of the surface. Then transfer into an air-tight container and chill until completely cold, at least 6 hours or overnight.
  3. PREPARE DOUGH: In a stand-mixer with dough-hook, combine bread flour, granulated sugar, instant dry yeast, salt and water. Knead on medium speed until incorporated, then turn to high speed and knead for 10 min until extremely smooth and elastic. The dough should pull away cleanly from the sides and bottom of the bowl during mixing, but should be soft and pliable. If it's sticking to the bowl during mixing, add more flour. If it feels stiff and dry, add a bit more water. Cover with plastic wrap and let rise in a warm place until fully doubled, about 2~4 hours depending.
  4. MAKE THE BUN: In a small skillet, combine drained capers, vegetable oil, sugar and rice vinegar. Cook on medium-high heat, stirring constantly, until the capers are slightly browned and shriveled. Set aside to cool completely.
  5. Transfer the dough to a lightly floured surface and fold it over itself a couple times, then divide into 17 equal portions. Tuck each portions under itself to shape into a tight ball, then let rest and relax for 10 min. Take a small saucer about 2 1/2" in diameter, then place 1 dough ball inside. Use your fingers to press and spread the dough outwards until it drapes over the edges with a dent in the middle (the edges should be slightly thinner than the center). Place 1 piece of braised pork belly in the middle, 6~7 fried capers, and a little less than 1/2 tsp of smooth peanut butter. Bring the sides of the dough together and pinch to close tightly. Repeat with the rest.
  6. You can freeze the buns now until hard, then keep in an air-tight bag until needed. If you're freezing them, take them out 6 hours before serving. Place each on a small piece of parchment paper, cover with plastic-wrap, and let thaw and proof until almost doubled (about 80%). If your place is warm and the buns are rising too fast, simply place them in the fridge to slow down. If you are not freezing the buns, it will only take about 1~2 hours for the to almost double.
  7. Place in the steamer and steam on high heat for 7~8 min.
http://cj8.98d.mwp.accessdomain.com/2017/02/28/dim-sum-month-pork-belly-bun-w-peanut-butter-and-caper/
Continue Reading

DIM SUM MONTH: Turnip cake fritters w/ prosciutto

DIM SUM MONTH CONTINUES…

WHAT:  A very logical and long-overdue twist on the classic and quintessential dim sum – turnip/radish cake, in bite-size fritter form.

WHY:  For far too long have we allowed ourselves to be complacent with “tradition”, in this particular case, boring and bland squares of steamed rice cakes barely containing any turnips that draw all of its flavors and appeals from the XO sauce that is piled on top.  I mean think about it.  Without the XO sauce, who the fuck is turnip cake?  Even the slight attraction from its crispy pan-fried edges is more often missing than not.  But turnip cake deserves more than XO sauce, if we just take a moment to let the star – turnips! – shine through.

HOW:  An almost 50:50 ratio of finely diced Chinese turnips (or called daikon in Japanese) to batter, yields a supple and succulent texture in these little babies, almost juicy if you will.  Yes, juicy, which is not a word you hear often when it comes to turnip cakes, but it should.  Each tiny dices of blanched turnips burst out in natural sweetness within every bite, in perfect juxtaposition to the stickier batter that holds them all together and the incredibly crispy jacket that it wears.  Yes, crispiness, which brings us to my next point.  For all sakes, I don’t understand the way this dish was traditionally done, which was steamed into a big rectangular block, cut into slices, then pan-fried for that half-assed, pathetic excuse of a “crust” that doesn’t exist.  All along, it should’ve been in fritter-form!  360 degrees of heat and awesomeness that transforms that batter into blistered and satisfying crunch.  With turnip cake this good, we don’t need other distractions but a subtle ribbon of prosciutto on top.

*Yellow mixing bowl from Dishes Only.

READ MORE

Continue Reading

DIM SUM MONTH: Creamy salmon & egg in rice wrapper rolls

DIM SUM MONTH CONTINUES…

WHAT:  Stuffed rice wrapper rolls they call “cheung fun“!

WHY:  These gorgeous and elegant beauties are often overlooked on the dim sum table because of their less flashy appearances, mellow flavor profiles, and batters with the wrong ratio that results in unfortunate, mushy-textured wrappers.  Well, that ain’t their fault, in fact, cheung-fun is the most versatile blank canvas waiting for someone who appreciates its possibilities.

HOW:  In restaurants, this dish is always made to order.  The rice batter is usually steamed with the filling on top then rolled into a log and served with sweet soy sauce.  This method has its virtues but also, many flaws.  It is convenient from a restaurant’s perspective, allowing them to serve the dish hot and speedy, but not necessarily so from a creative point of view.  Making the dish to order will be unrealistic to pull off for at-home dinner parties, and steaming the wrappers and the fillings simultaneously will greatly limits its possibilities.  So, we are going to prepare the rice wrappers beforehand, and assemble them with the filling at the last minute.  In my wildest dreams where money flows like abs in a Channing Tatum movie, I would make the filling with gently poached lobster meat and XL lumpy blue crabs tossed together with herby mayonnaise and a few popping jewels of ikura (Japanese cured salmon roes).  But I live in the real world.  As you can see that my XXL Magic Mike-version is reduced down to slow baked then torched salmon with cheap-but-not-sad 15-seconds magic scrambled eggs.  Still Magic, just less Mike.  Serve the dish on a hot plate and simmering sweet soy sauce to bring the warmth back.  Hey, still fucking sexy.

By the way, most of the recipes in DIM SUM MONTH is designed to be prepared ahead of time.  Make each items and store them in the freezer (well, not this particular recipe), and at the end of the month, we’re going to have a dim sum blowout party.  See ya!

CREAMY SALMON & EGG IN RICE WRAPPER ROLLS

Yield: Approx 8~10 rolls

For the RICE WRAPPER recipe, I strongly recommend measuring by weight (not volume).

Ingredients

    RICE WRAPPER/CHEUNG FUN:
  • 3/4 cup + 1 1/2 tbsp (100 grams) short grain rice flour
  • 1/4 cup (33 grams) potato starch
  • 1 cup + 2 tbsp (267 grams) water
  • FILLING: (see note)
  • 1 lb (500 grams) mid-cut salmon
  • 1 tbsp salt
  • 2 tbsp finely diced scallions
  • 1 tbsp plain mayonnaise
  • 1 portion 15-seconds magic scrambled eggs (3 eggs)
  • fresh cilantro leaves
  • SWEET SOY SAUCE:
  • 1/3 cup (94 grams) soy sauce
  • 2 tbsp + 2 tsp (31 grams) light brown sugar
  • 2 tbsp (30 grams) water

Instructions

  1. This instruction differs from how restaurants typically do it, which is to always steam the cheung-fun/rice wrapper and the fillings together simultaneously, right before serving. Here, I prepare the cheung-fun/rice wrapper separately and beforehand. It gives me more control to play with the fillings, and makes them easier to prepare for a party.
  2. PREPARE THE CHEUNG-FUN/RICE WRAPPER: Make the wrappers up to 4 hours before serving. Check out RICE RIBBON for more referrences. In a jar that's easy to pour, whisk together rice flour, potato starch and water.
  3. For steamer, you can use any large pot with a rack placed in the middle to hold the mold/pan. I used a 6" (15 cm) square cake-pan as my mold to make the rice wrapper because 1) It fits into my steamer/pot (see photo). 2) It's just the right size for one single roll. If you have a larger steamer that can allow a bigger pan that will cut down the number of time of steaming, you can do that as well.
  4. Fill the steamer/pot with enough water just below the steamer-rack, then bring to a boil over high heat. Brush the pan with a bit of canola oil and place it on top of the rack. Give the batter a little whisk (do this every time before you pour), then pour just enough batter to create a thin film on the bottom of the pan. ADJUST THE POT so that it's LEVELED, and that the batter is evenly thick on all sides. Close the lid and steam on high heat for 1 min. The wrapper is ready when you see large air bubbles when you remove the lid. Brush the top surface of the wrapper with a little canola oil, then tilt the pan over a piece of parchment paper so it faces downward, then scrape the wrapper off so it falls onto the parchment. Repeat until you've used up all the batters, and keep each wrappers sandwiched between parchments. Plastic-wrap the whole stack and set aside until needed.
  5. PREPARE FILLING: Two hours before serving. Preheat the oven on 155 F/70 C. Rub the 1 tbsp of salt all over the salmon and let sit for 20 min, after which, rinse and pat dry with a clean towel. Place on a piece of parchment paper and rub the salmon with a bit of olive oil, then wrap tightly with the parchment. Place in the middle baking-rack (NO BAKING SHEET) and bake for 1:20 hour. Crumble the salmon into large pieces, and if you have a blow-torch, torch the surfaces so they're a bit charred. Gently toss the salmon with scallions and mayo (do the same if you're using lobster or lumpy crab meats). Set aside. Make the magic scrambled eggs. Set aside.
  6. Lay one cheung-fun/rice wrapper with the oiled side down (that would be the top surface when it came out of the steamer, which is the pretty side). Scatter a few cilantro leaves across the middle, then a bit of salmon fillings and scrambled eggs. Gently roll it together, and repeat (only make as many as you're serving).
  7. Place the rolls on a hot plate (the dish should be warm when served). In a small pot, bring soy sauce, light brown sugar and water to a simmer until the sugar has melted, then spoon the sauce over the rice rolls. Serve immediately.

Notes

If your budget allows, you can switch to using lobster or large lumpy crab meats, or a combination of the two. I would gently poach the lobster, then cut the meat into small pieces. Toss the lobster meats together with lobster roes (or the "brain"), lumpy crab meats and the scallion mayo. If you have enough of this, you can even omit the scrambled eggs and go delux.

http://cj8.98d.mwp.accessdomain.com/2017/02/14/dim-sum-month-creamy-salmon-egg-in-rice-wrapper-rolls/
Continue Reading

DIM SUM MONTH: CHARSIU PULL-APART PINEAPPLE BUN

DIM SUM MONTH CONTINUES…

WHAT:  The new poster child of dim sum-scape in Hong Kong, the char siu pineapple buns, pull-apart style!

WHY:  Do you need to reason to eat a soft, squishy bun stuffed with sweet char siu pork and topped with crunchy “pineapple” crusts?  The entirety of happiness all in one bite, pillowy, crunchy, salty, sweet, gooey, porky and buttery?  Do ya?

HOW:  Burn all the other recipes that are dumbed down and one-dimensional.  Here’s a thorough recipe to show you how to make them like a pro, either with fresh pork shoulders (my preference), or with store-bought char siu pork.  But what really makes this recipe different is how the delicate balance of flavors are re-imagined.  Instead of the typical, cornstarch-thickened sauce that screams boring, we are going to re-create the stickiness by mixing in honey, ground dates and dried strawberries.  Not only do they provide a natural gooey-ness, they also bring a hidden fruity tone to the flavor-profile, making these sweet and salty buns unstoppably addictive.

By the way, most of the recipes in DIM SUM MONTH is designed to be prepared ahead of time.  Make each items and store them in the freezer, and at the end of the month, we’re going to have a dim sum blowout party.  See ya!

READ MORE

Continue Reading

DIM SUM MONTH: Crystal shrimp dumpling w/ shrimp oil mayo

EXACTLY WHAT DIM SUM IS SUPPOSED TO, BUT SOMEHOW FORGOTTEN TO BE,

LITERALLY, AS TO TOUCH HEART

Welcome to DIM SUM MONTH!

WHAT:  I’m dedicating this whole month to the delicate art that is dim sum.

WHY:  I’m slowly and painfully realizing how scarce a good, thoughtful and delicious dim sum can be.  Even in Hong Kong – the supposedly promised land of dim sum – I found my expectation being shattered with sloppy, tired, and borderline unethical display of dimness.  Frankly, I’m fed up.

HOW:  Just as unfamiliar as most of you are in terms of making dim sum, I’m going to show you that it is possible for us to create these little baskets of happiness at home.  We are going to take each conventional dim sum item, and mix them with a bit of thoughtfulness and fun.  Almost every items can be made ahead of time, and hopefully at the end of the month, we’ll be able to host our own dim sum party that is more awesome than most.

Let’s start with the classic of the classics – crystal shrimp dumplings.

We are going to correct all of its frequently ignored mistakes: soggy and texture-less wrappers, and frankly, boringness.  This recipe will yield a wrapper that is beautifully translucent, shiny, and just a bit bouncy to the bite, filled with a generous amount of whole tiger shrimps held together by fatty ground pork.  Last but not least, a small dollop of mayonnaise made with shrimp oil and thickened up with cashew butter, will knock this out of the park.

It is a single bite that embodies a carnival of senses: textures, flavors, esthetics and imaginations.  Which is exactly what dim sum is supposed to, but somehow forgotten to be, literally, as to touch heart.

READ MORE

Continue Reading

SUPPLE SLOW-COOKED SOY SAUCE CHICKEN RICE

soy-sauce-chicken12

Sometimes ideas arise upon the complete rejection of another.  This recipe is a perfect example of such.

The other day (I say “the other day” a lot, which really means “last year”), I was watching this video on YouTube, a michelin-starred chef explaining how to make his “perfect roast chicken”.  Curious, so I watched, as he demonstrated with a straight face on how he cooks his chicken slowly inside a low-temperature oven for 4 hours, then afterwards, finish browning the skin inside a skillet, and after which, injecting the chicken with melted butter.

I mean, is this guy serious?

I don’t even know where to begin.  First of all, the whole notion that one could crisp up a whole, uncut chicken inside a skillet is basically again the laws of physics.  The extremely curvy and maneuvering silhouette of a chicken is exactly the reason why people resort to a three-dimensional heat source to tackle it in the first place.  Steaks, flat.  Chickens, curvy.  Simple logic.  Is he Doctor Manhattan?  Did his pure geniuses allow him to leap into another dimension of space and time to warp his chicken to the skillet?  Of course not!  That patchy-browned chicken looked like it just suffered from a skin-graft.  But you know what, even if, just because I’m nice, even if one could disobey the laws of physics and pull this whole thing off, why would I spend 4 hours of slow-cooking in the pursuit of supple meats, just so I can over-cook it later while I roll it around a super hot skillet like a total moron?  “Not too long in the skillet.” he said.  Yeah, like you mean just long enough to color the outer patch of the thighs plus to realize that this is complete idiocy?  No injection of butter can help you, my friend.

Can you believe this guy….

But wait a second now…. there there there….

Even though his low-oven chicken method is, in my humble opinion, not the answer for crispy skin roast chickens, it would actually… work perfectly for something else.

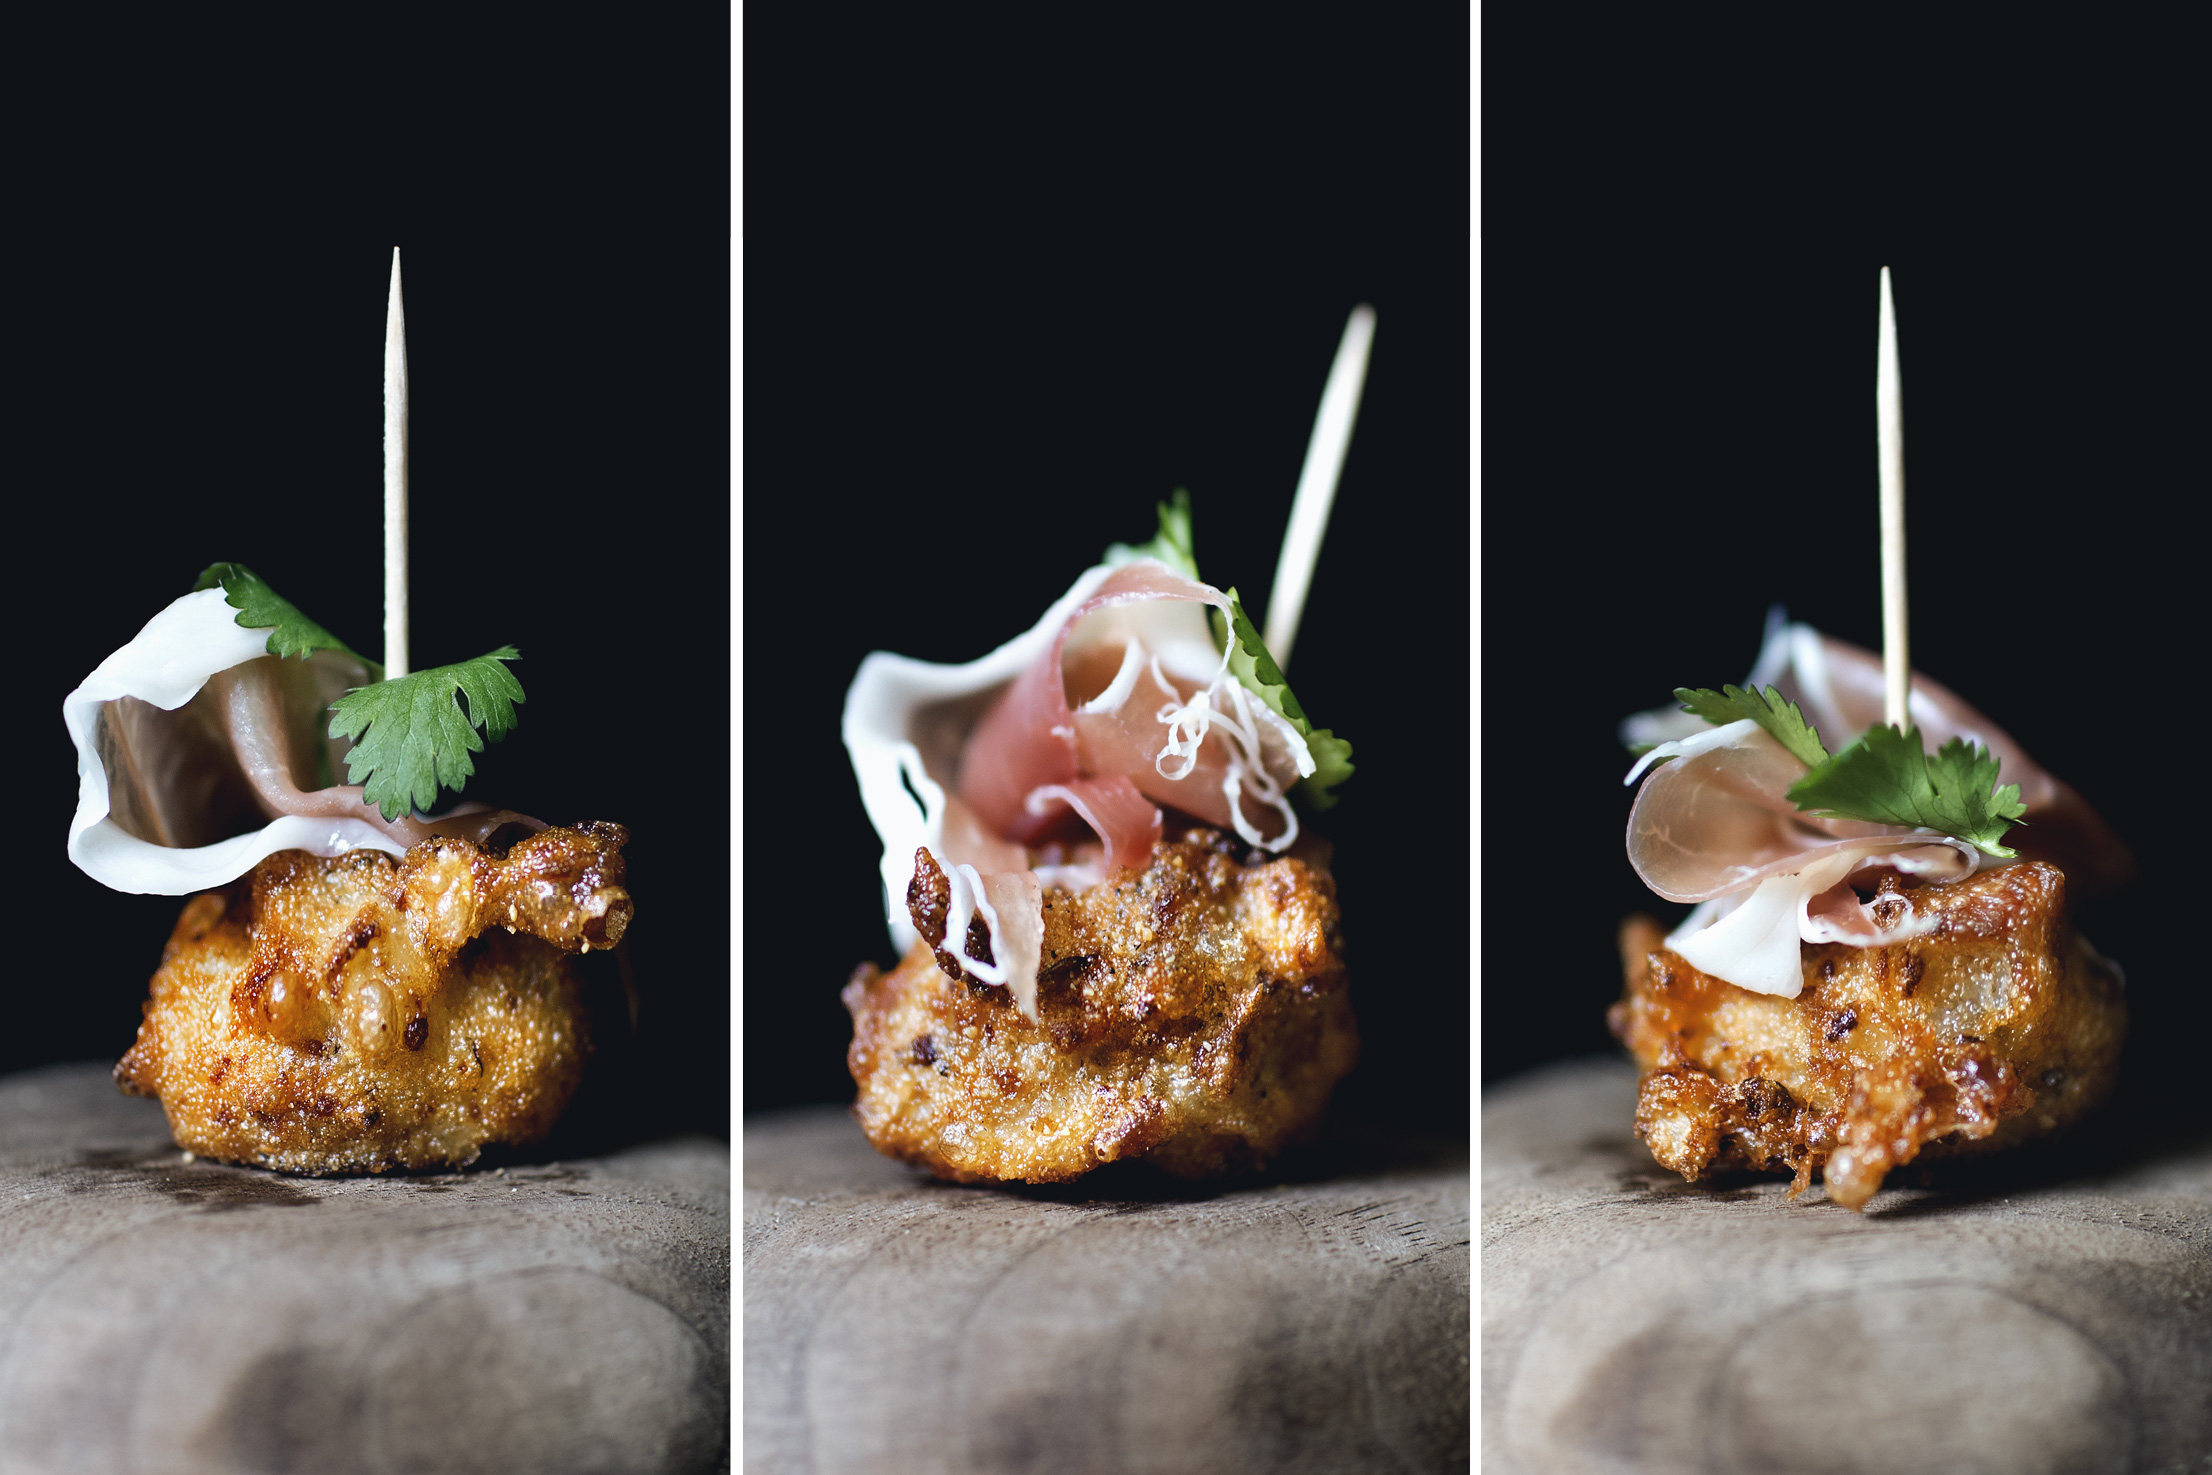
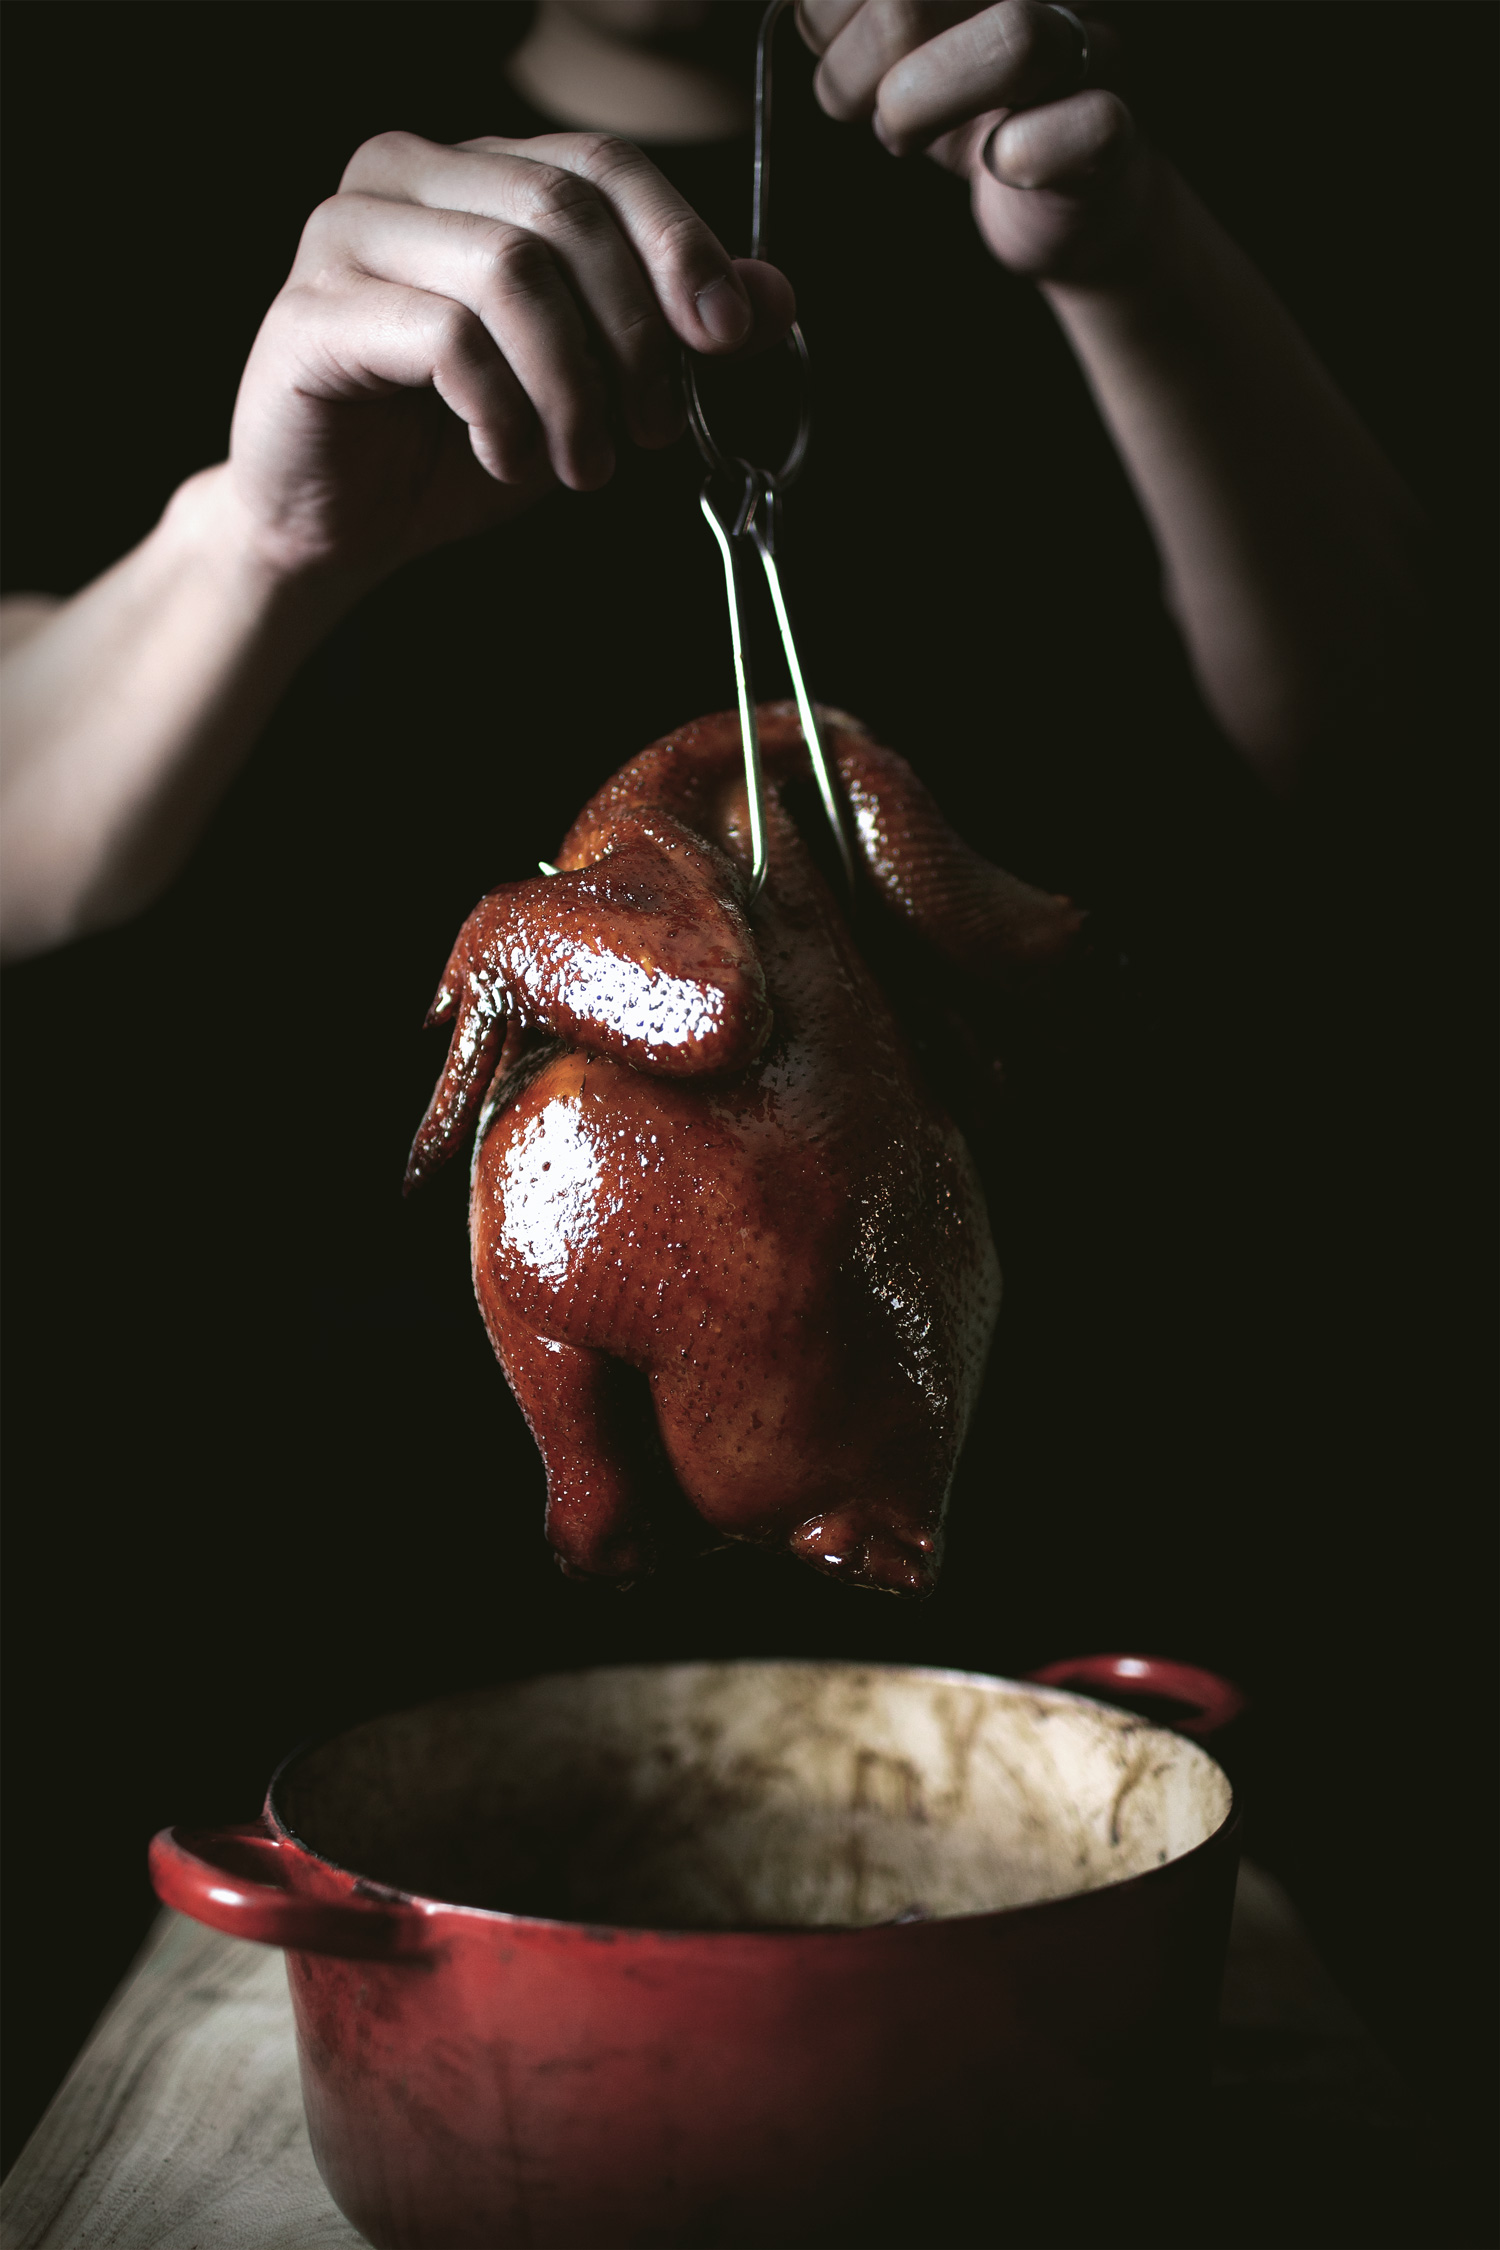
I don’t know if you know, but there is a whole other branch of philosophy on cooking chicken where crispy skins are actually not the holy grail.  Instead, it’s the extremely supple, juicy, and almost silky slick texture of the meat that reigns supreme.  And this dish called soy sauce chicken, seen hanging inside the steamy windows of Cantonese restaurants everywhere in the world, is where cooks put their relentless pursuit for such texture to the test.

Traditionally, the chickens are cooked inside a pot filled with a shallow, simmering layer of soy sauce-mixture, turning every so often until the skins take on a deep amber sheen and the meats are cooked to perfection, after which it’s hung to cool down to room temperature in order for the salty skins to tighten and become elastic, and the meats to become “jelled” almost.  Not that this traditional method doesn’t work, but it has its flaws.  First, again, uneven heat source, making it that much more difficult to cook the chicken evenly.  Second, the risk of burning, which requires the cook to stand-by and babysit the chick as it matures safely into perfection.

A low temperature oven, solves both.

The whole chicken encased in its own skin inside a low oven is almost functioning as a sous-vide operation, and on top of which, the coating of that deeply savory and aromatic soy sauce mixture never gets burnt, but instead, gets condensed and caramelized on every inch of the skin as the meats slowly and gently comes of age.  The result, on first trial, is perfectly, and I mean perfectly silky and luscious chicken meats that literally slips down my throat, wth firm and salivatingly salty skins that, in my mind, goes head to head with crispy.

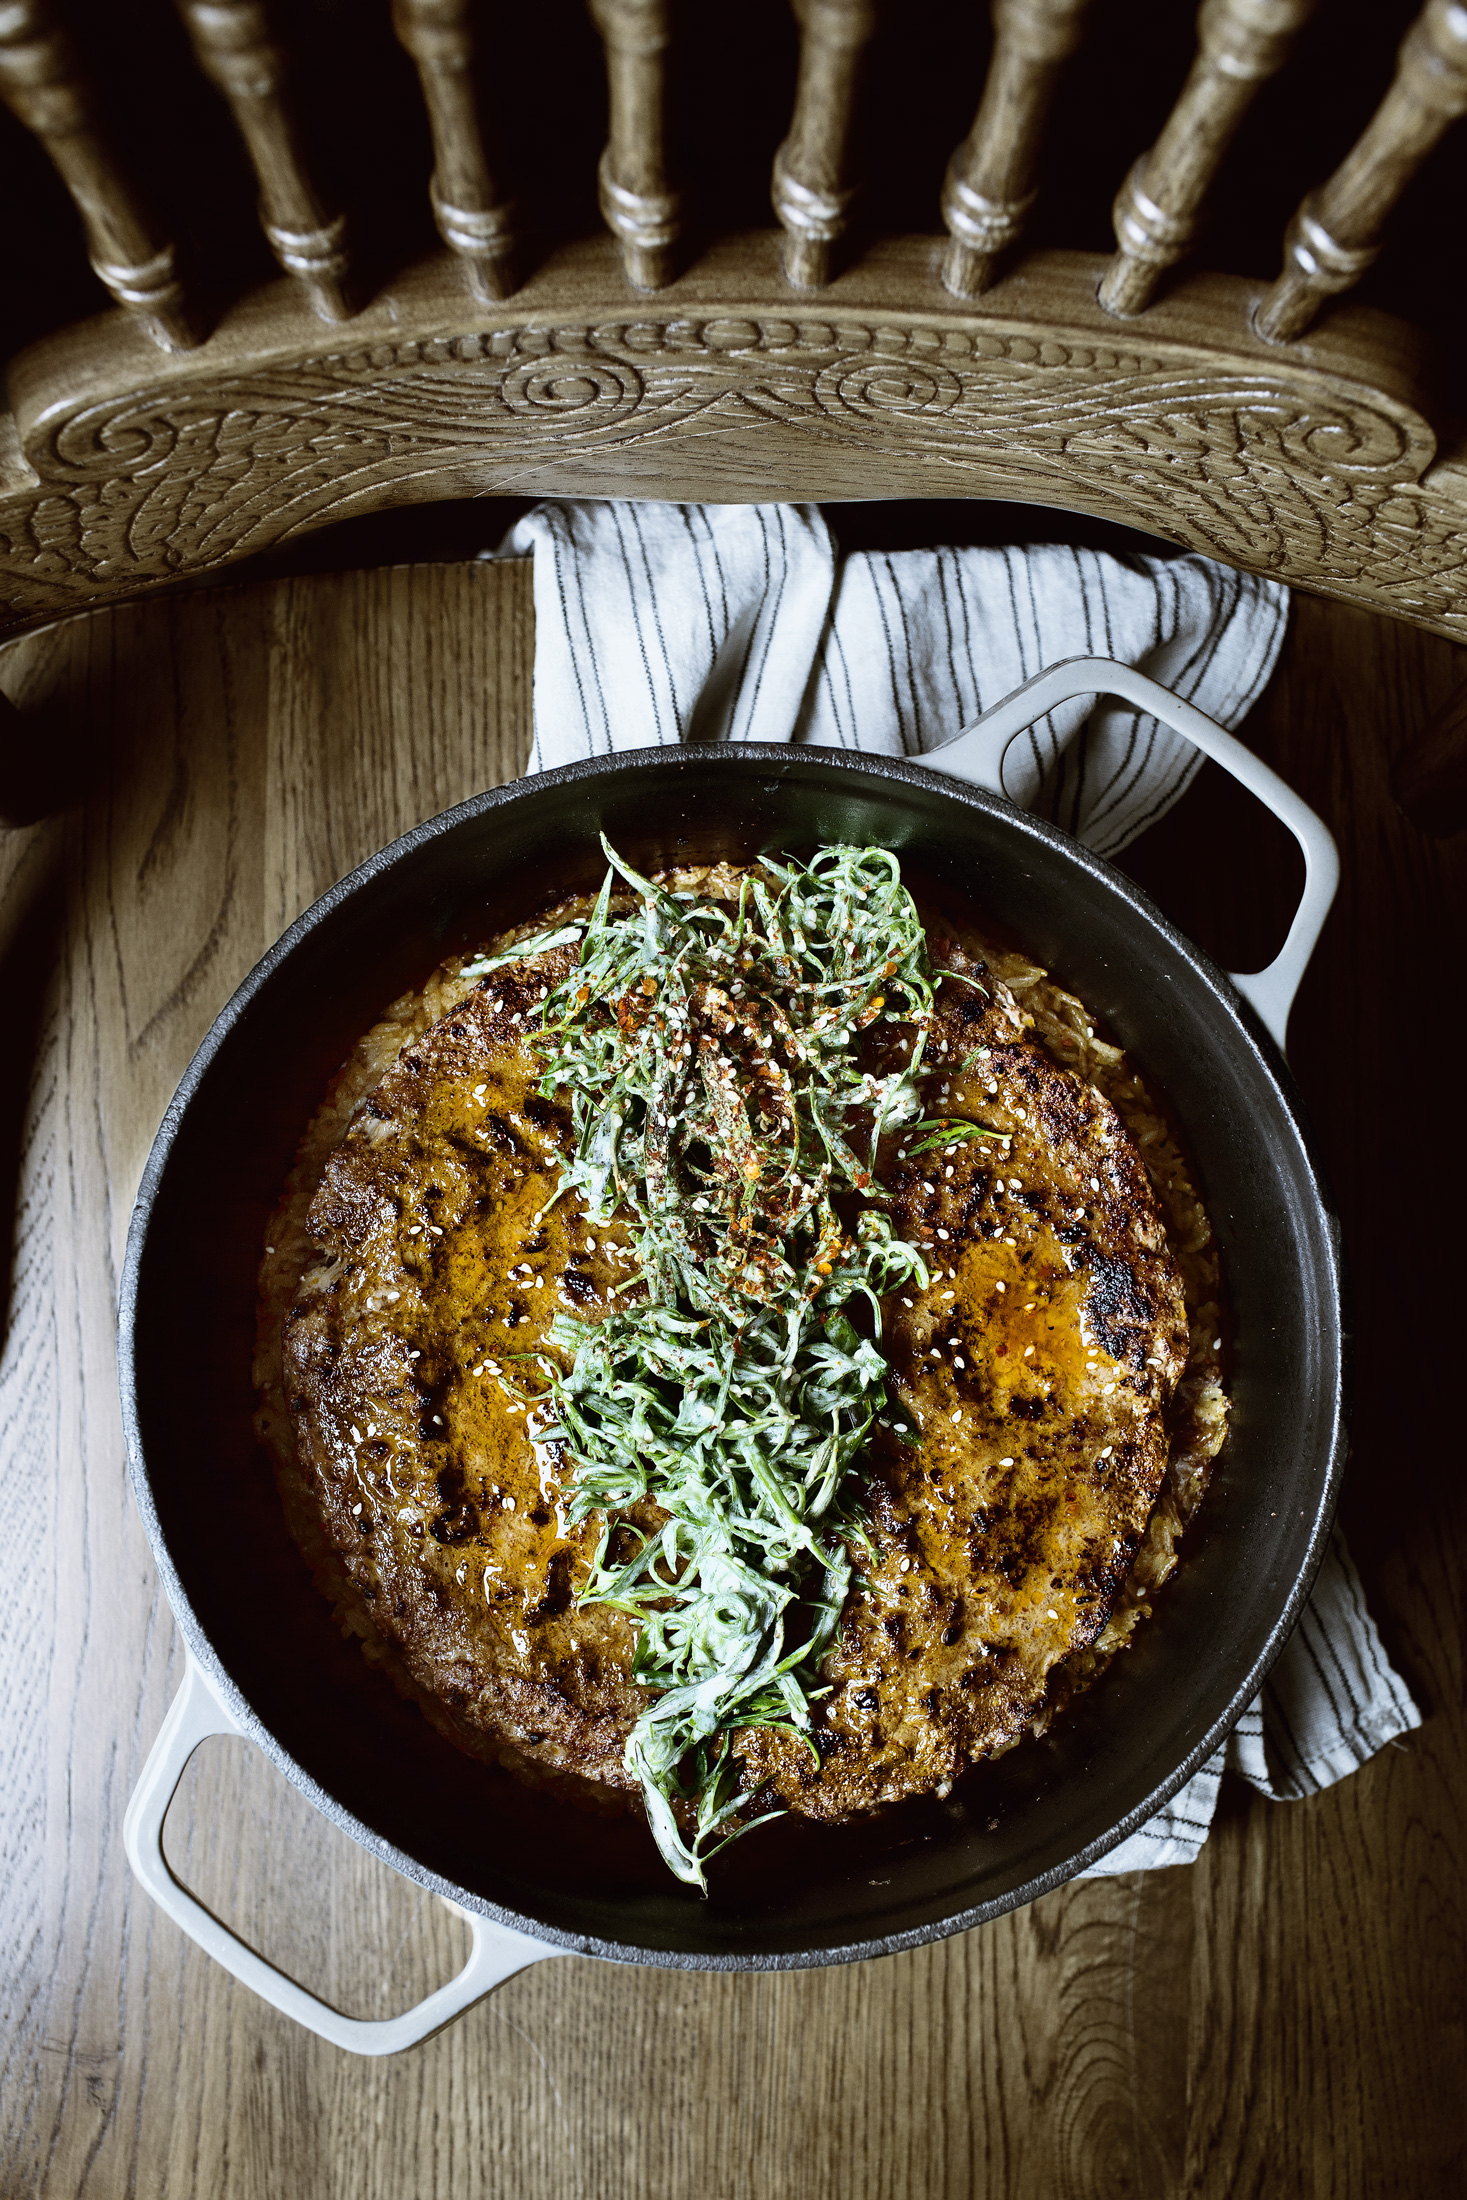
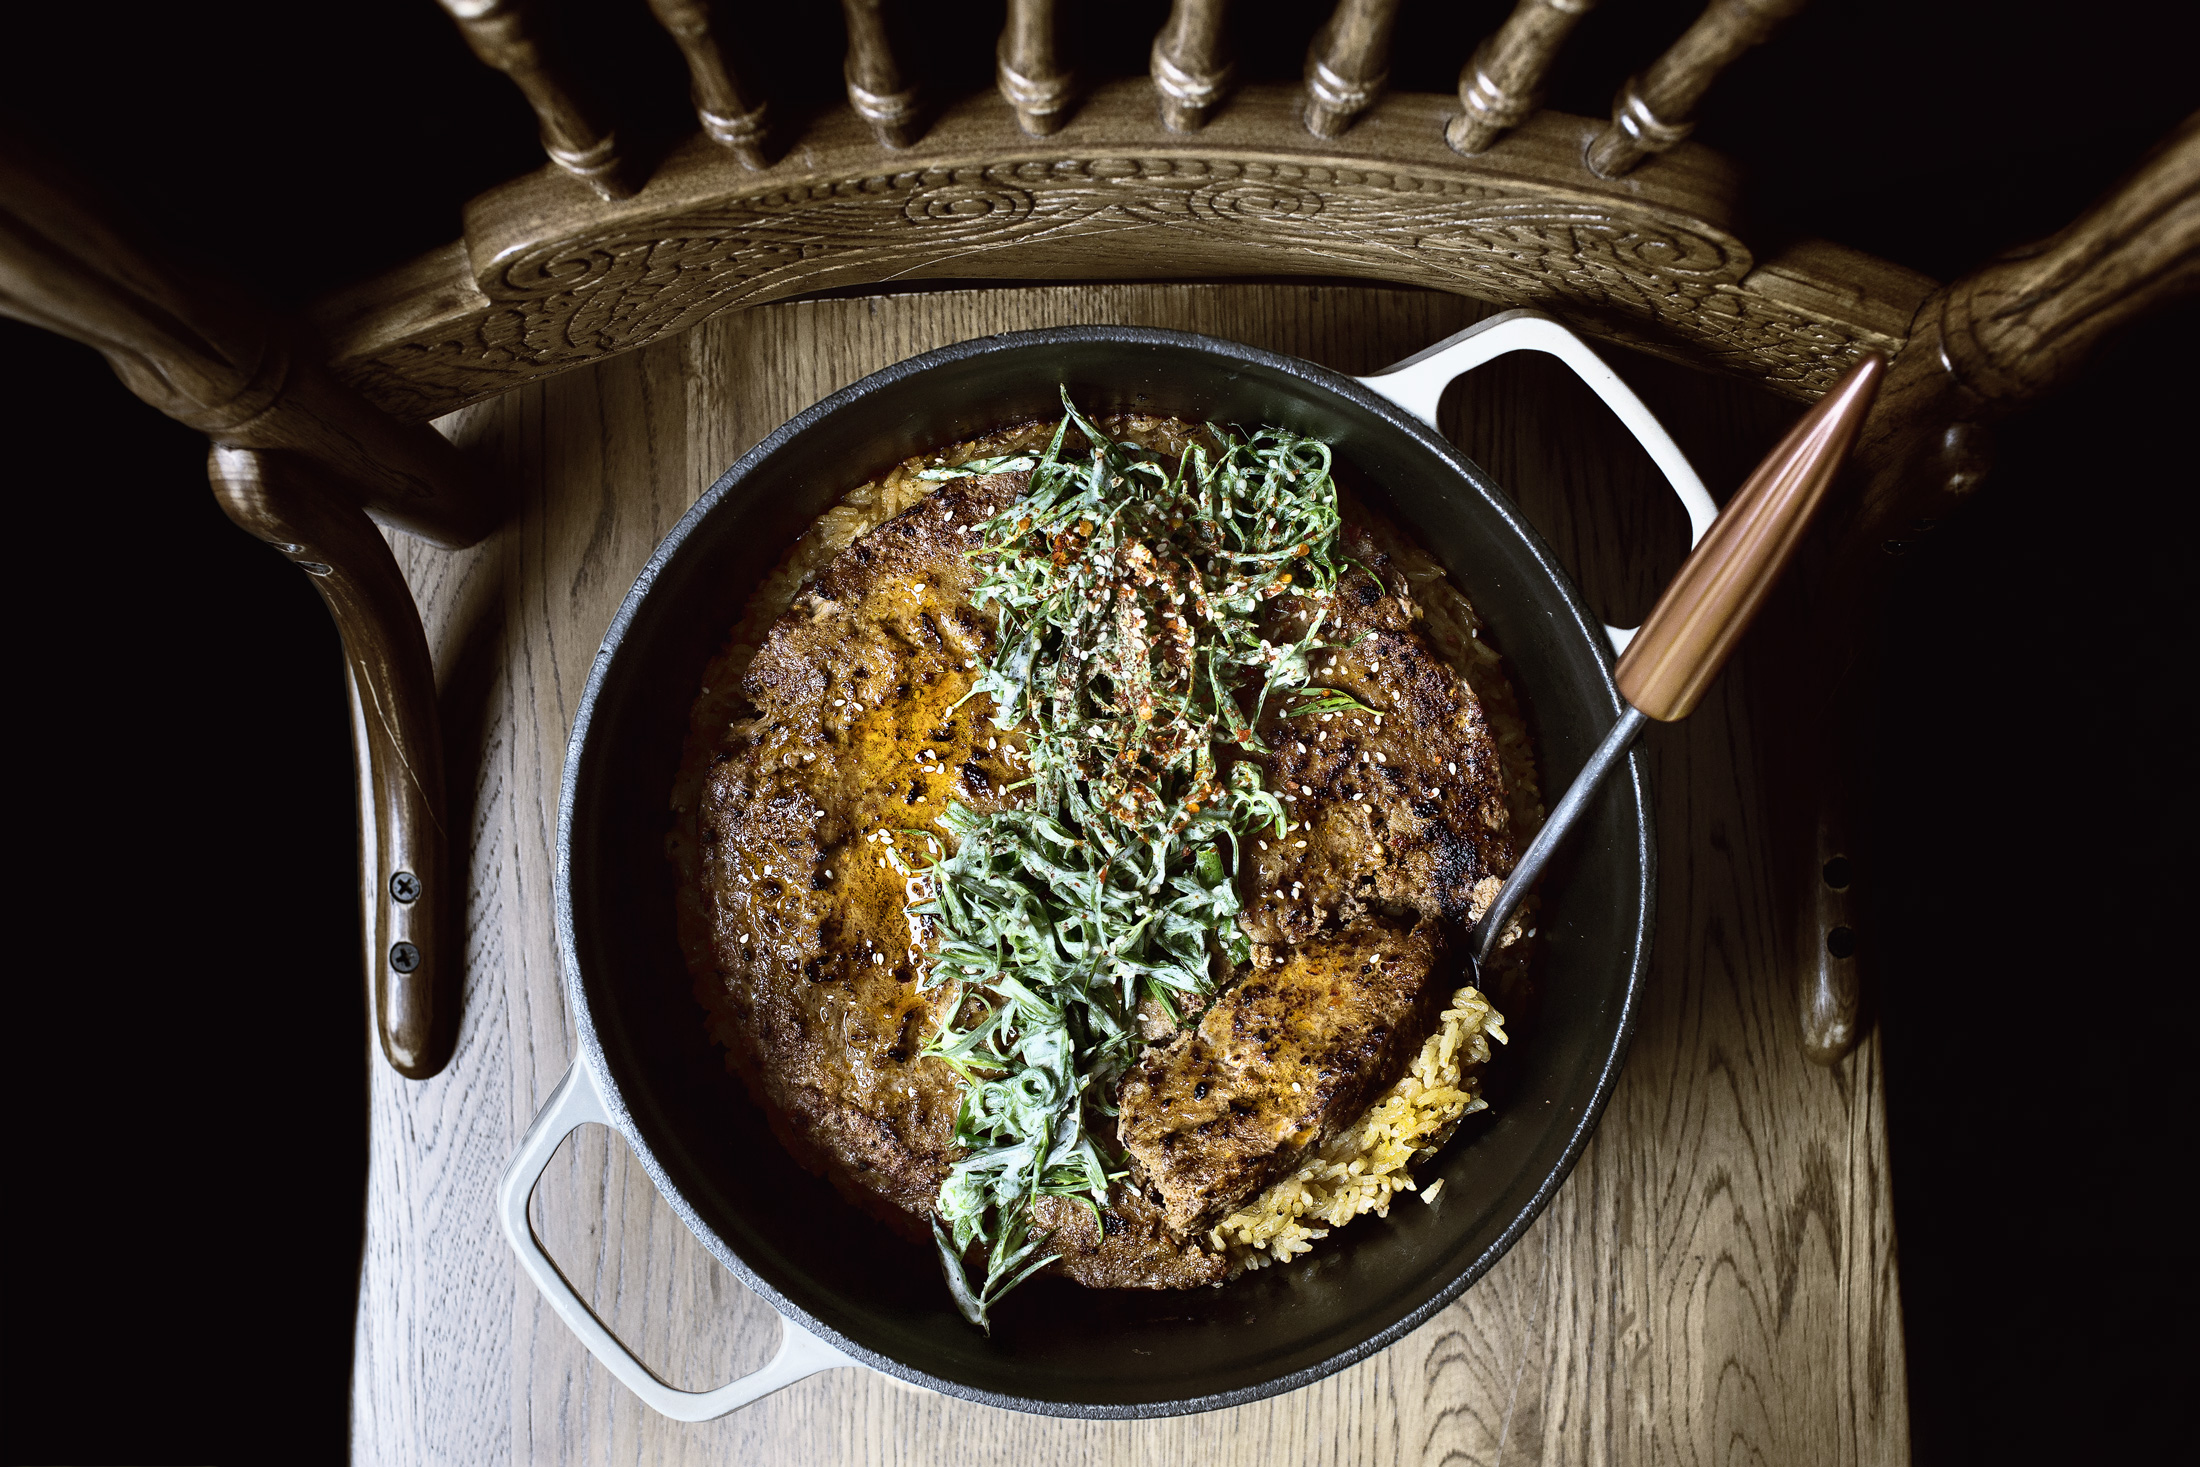
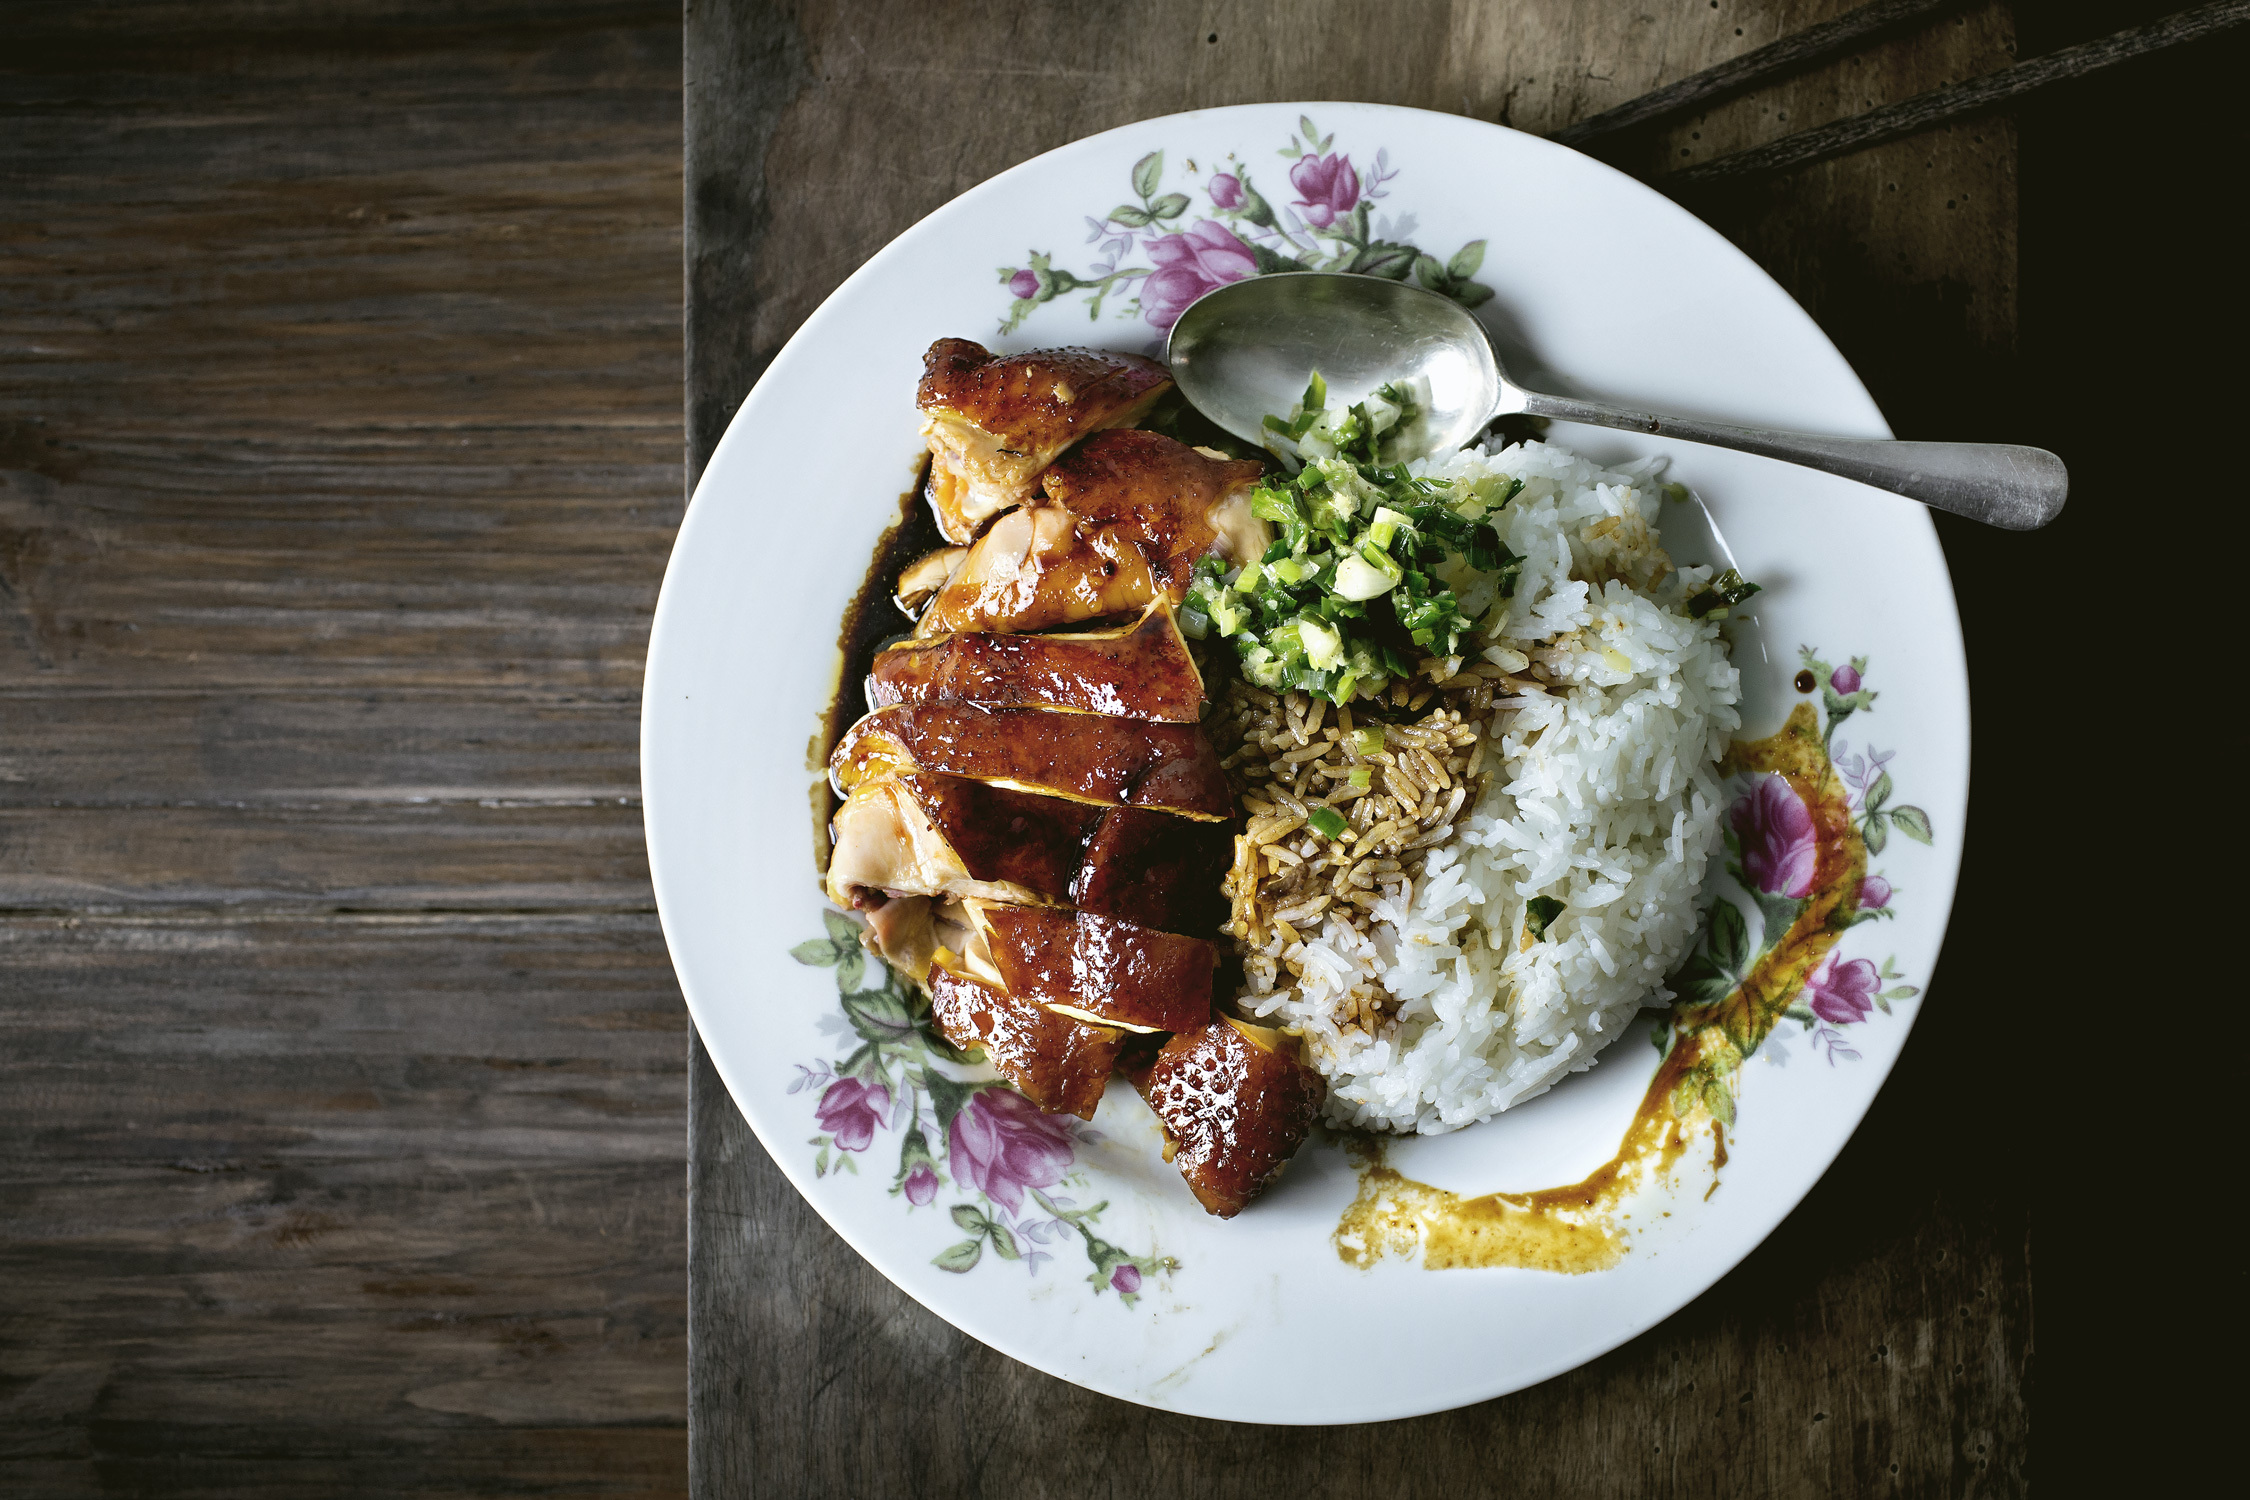
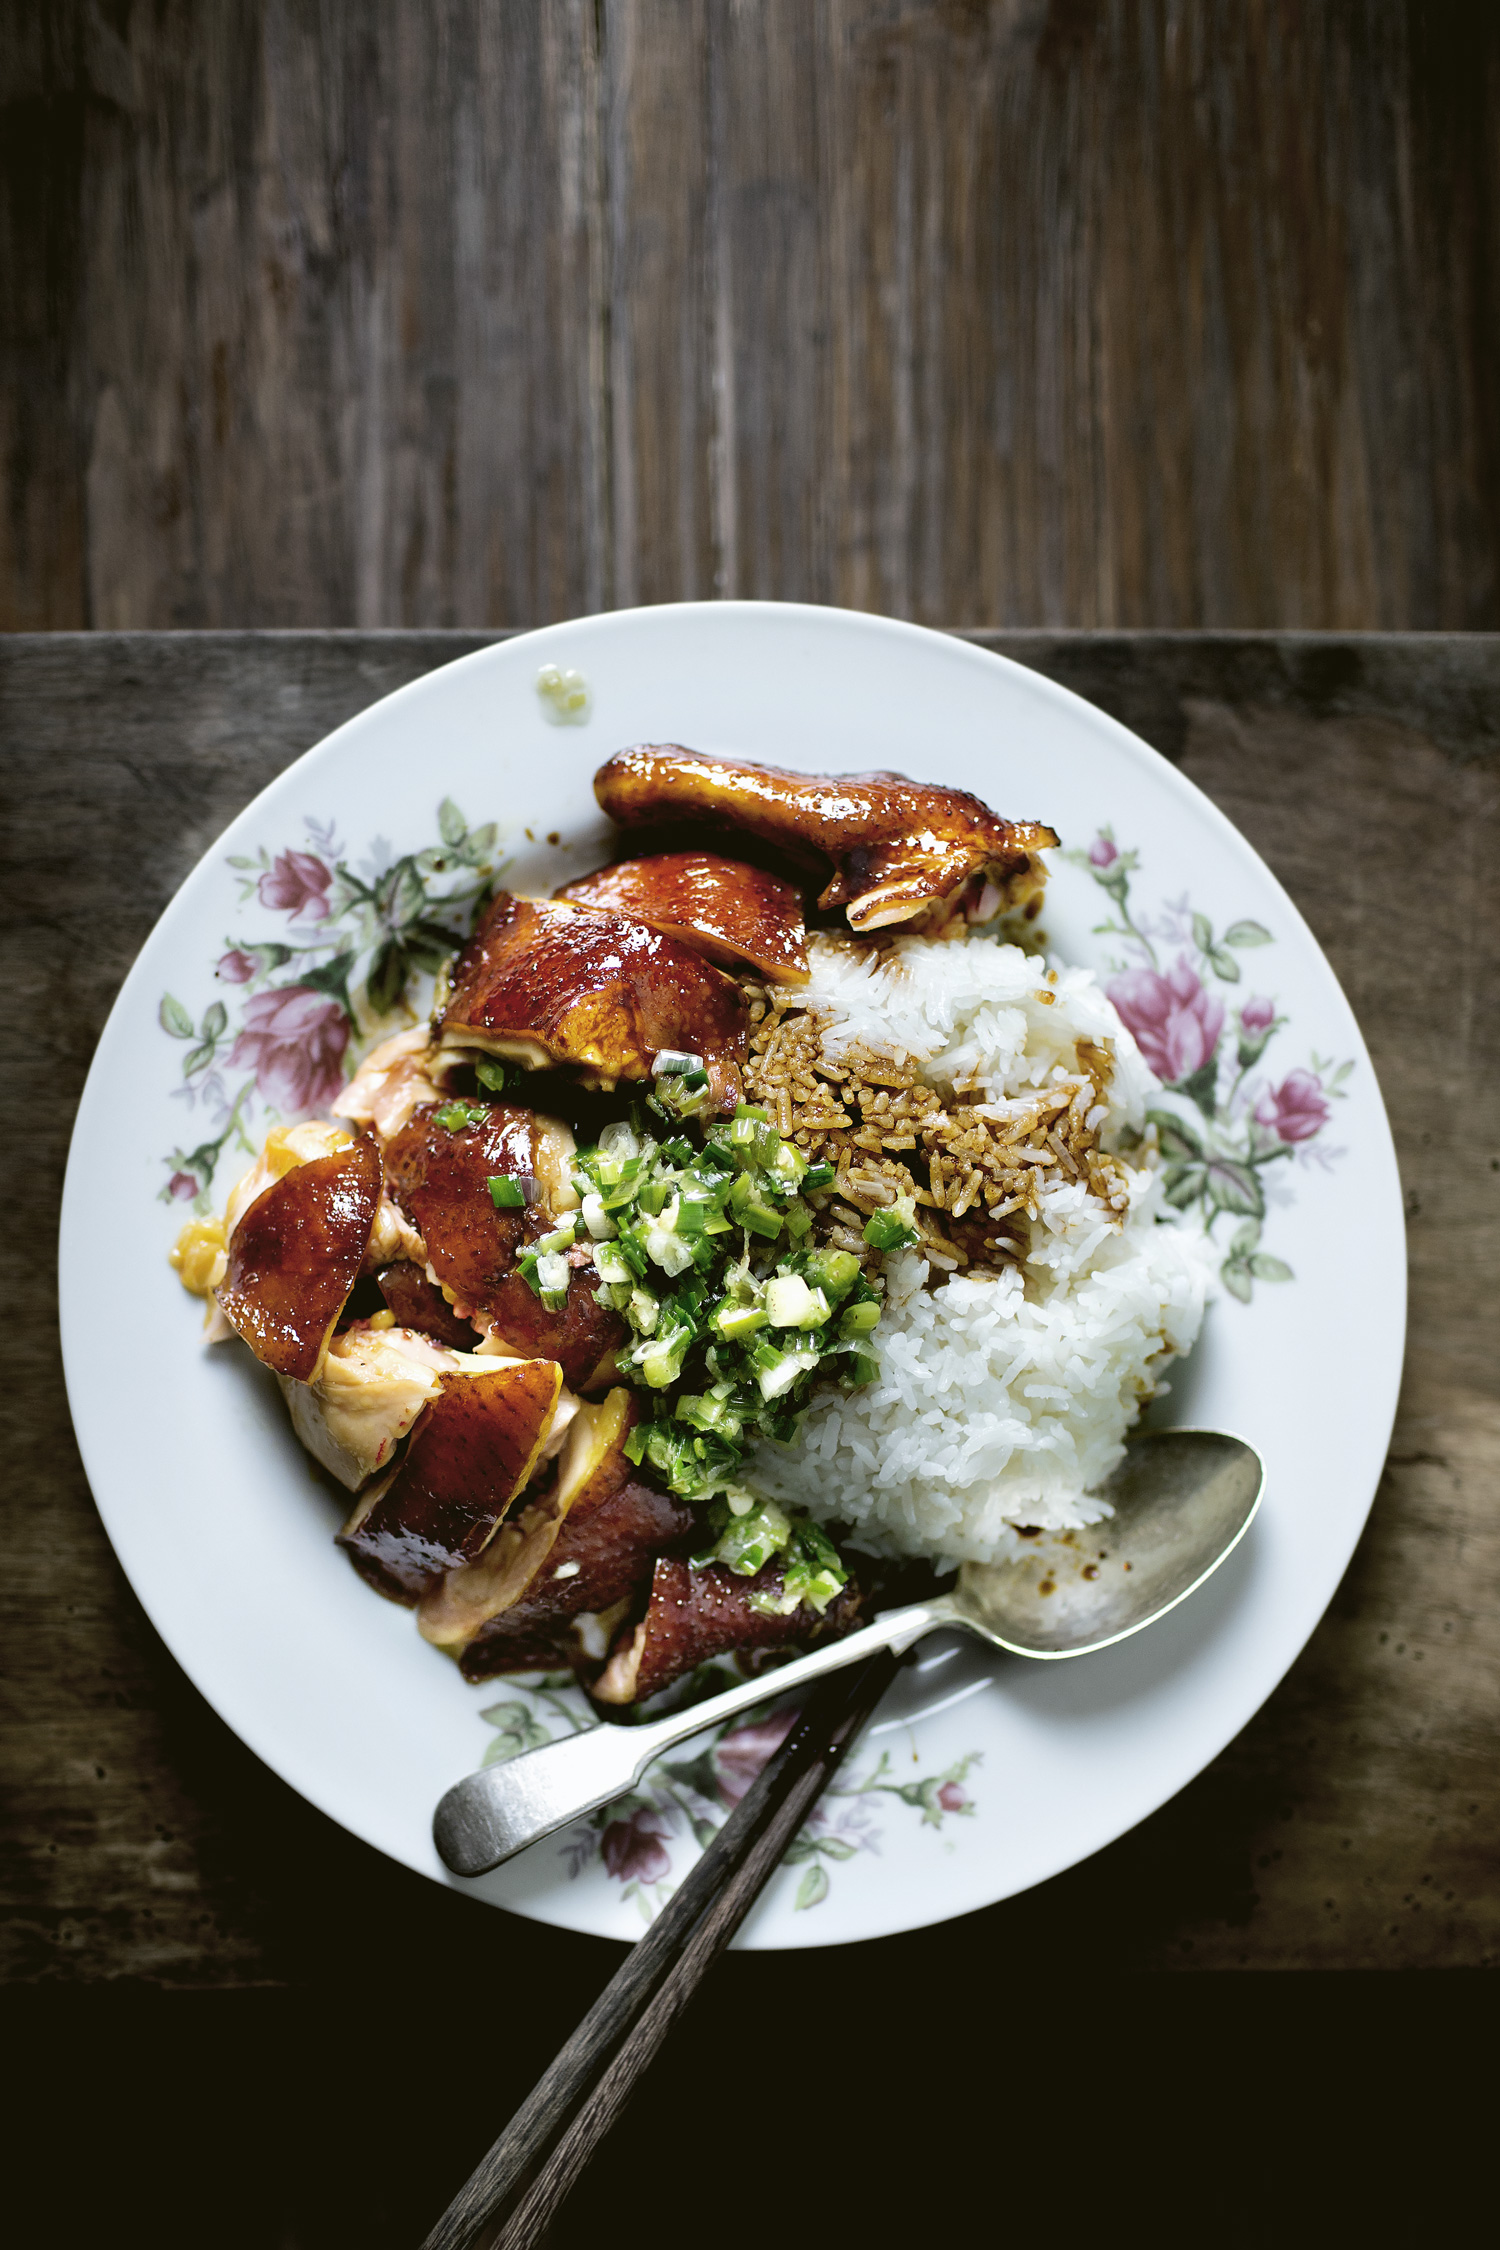
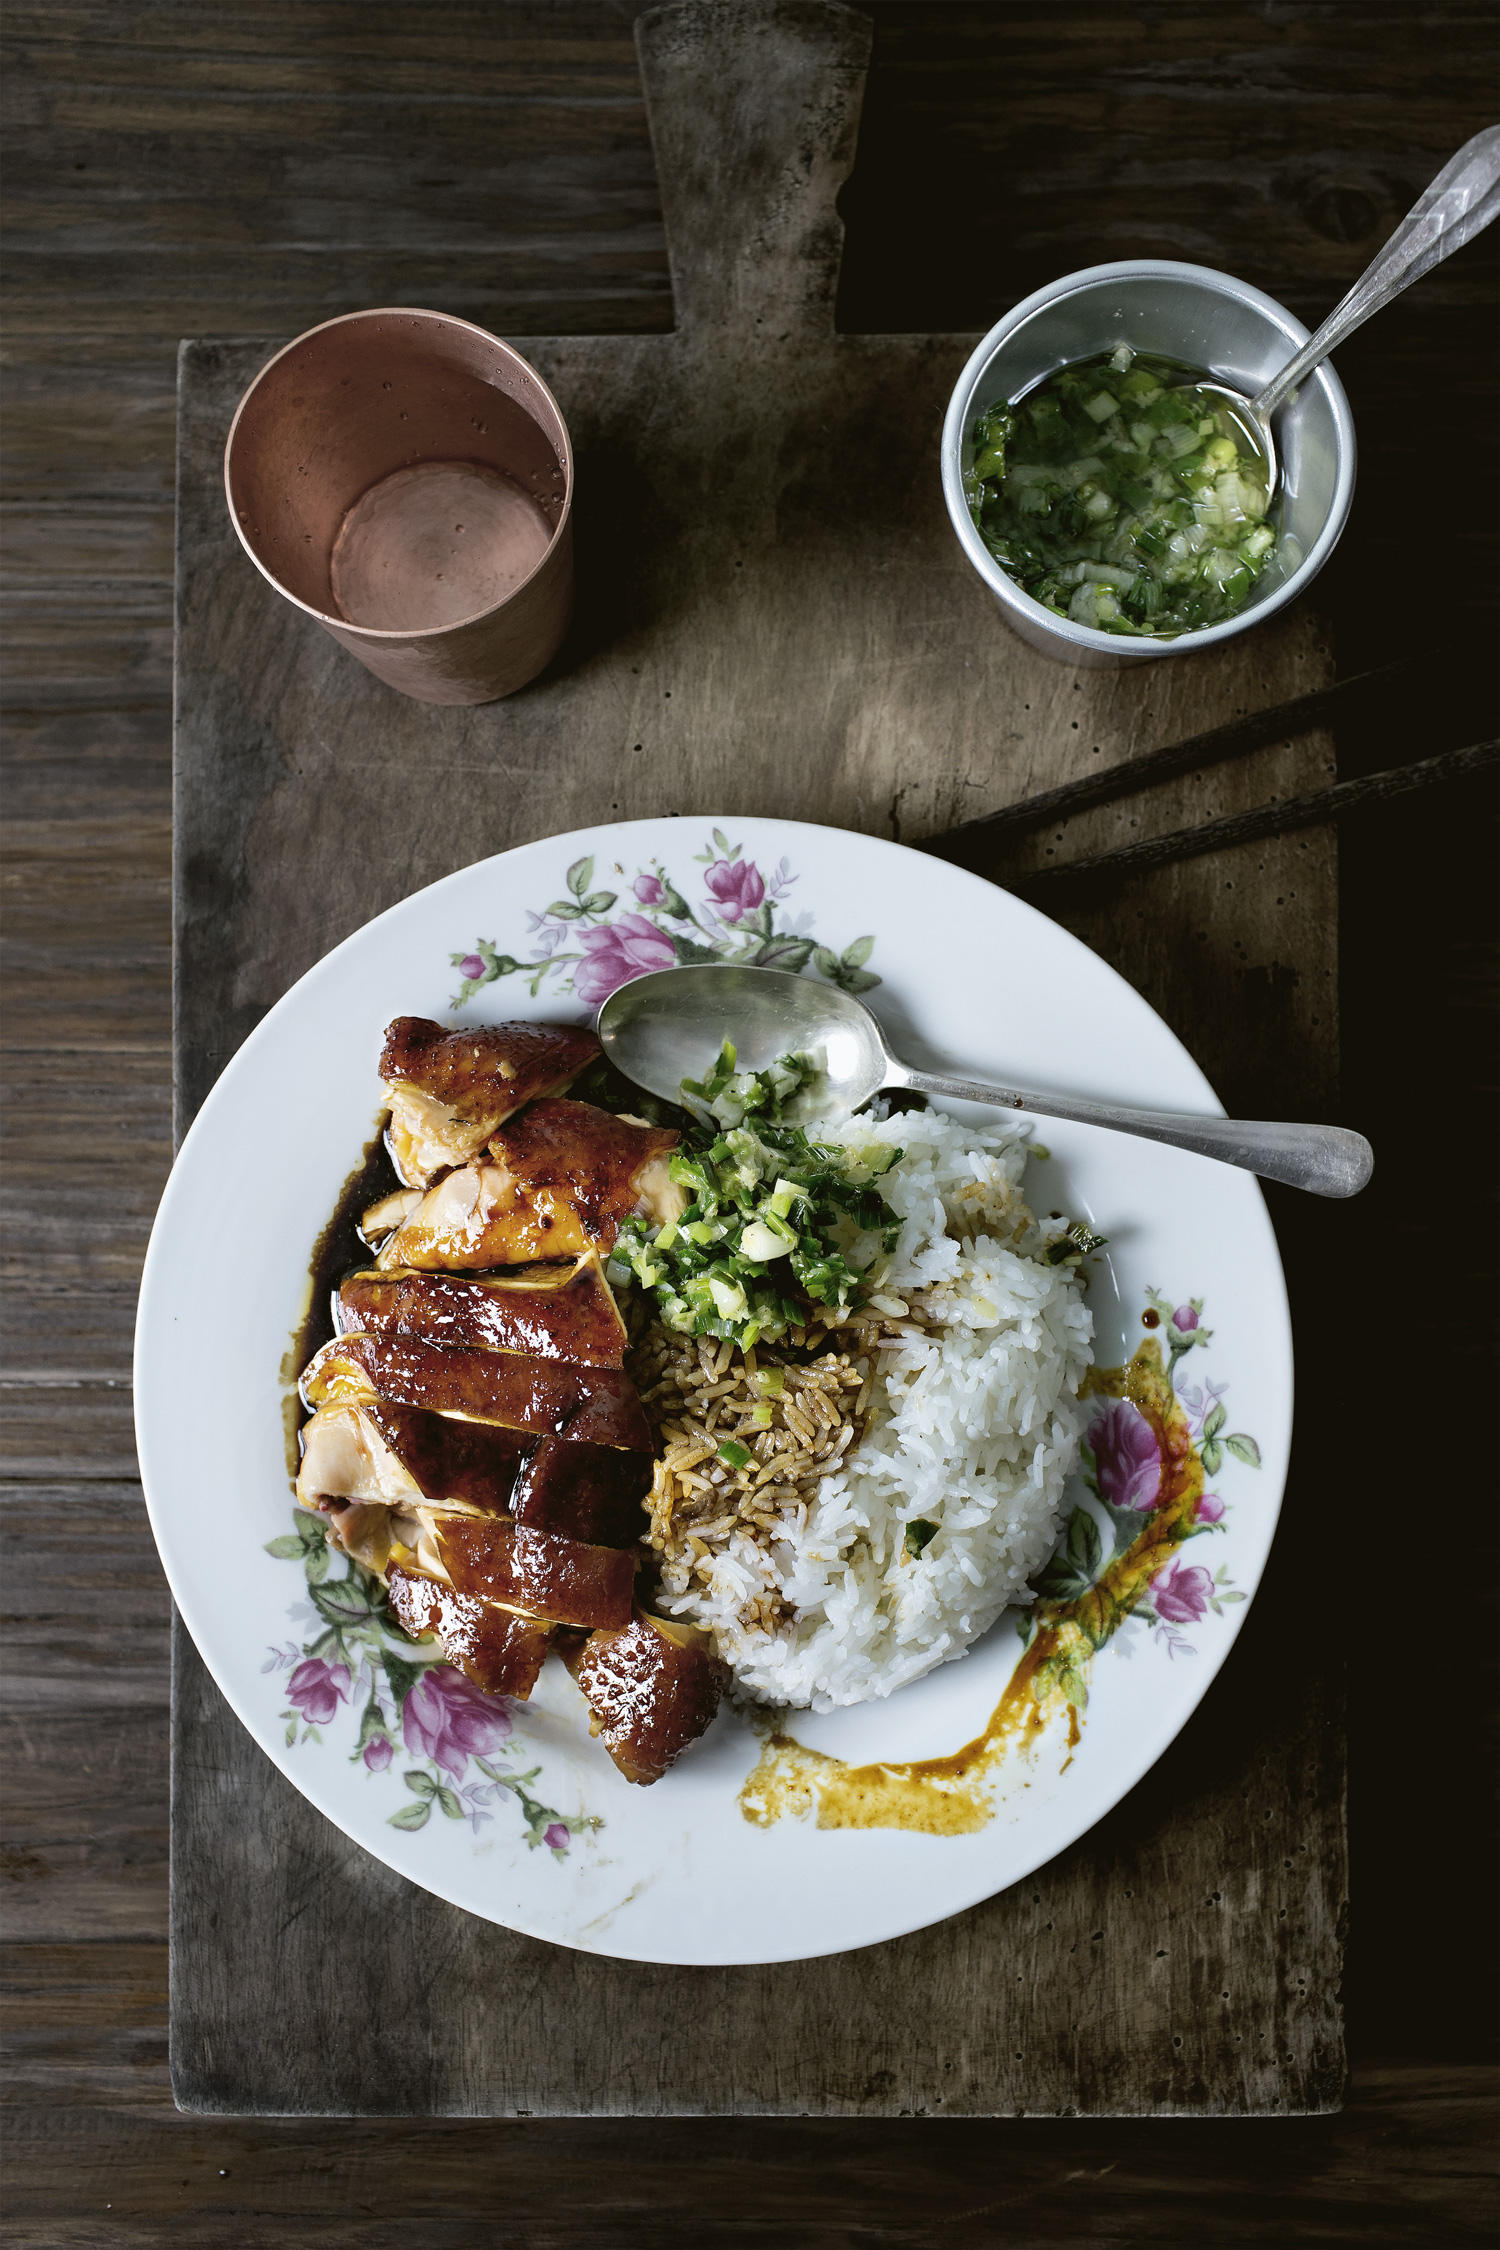
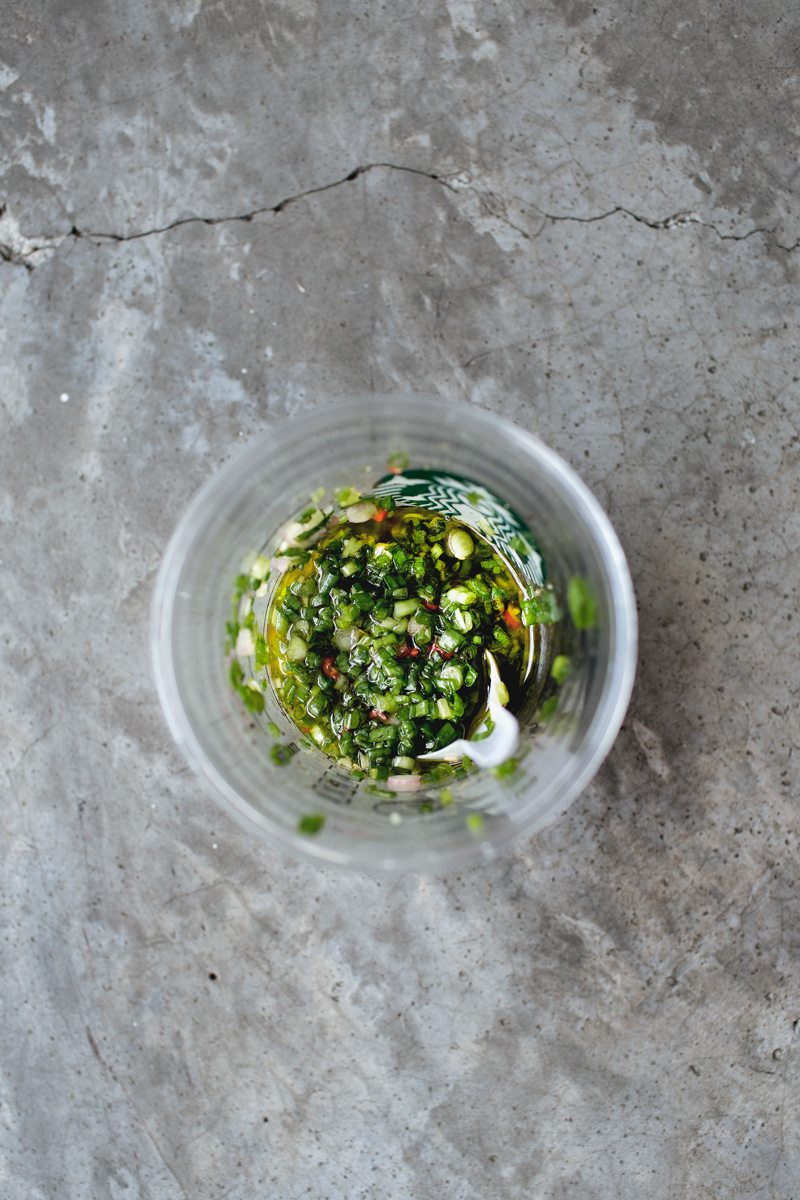
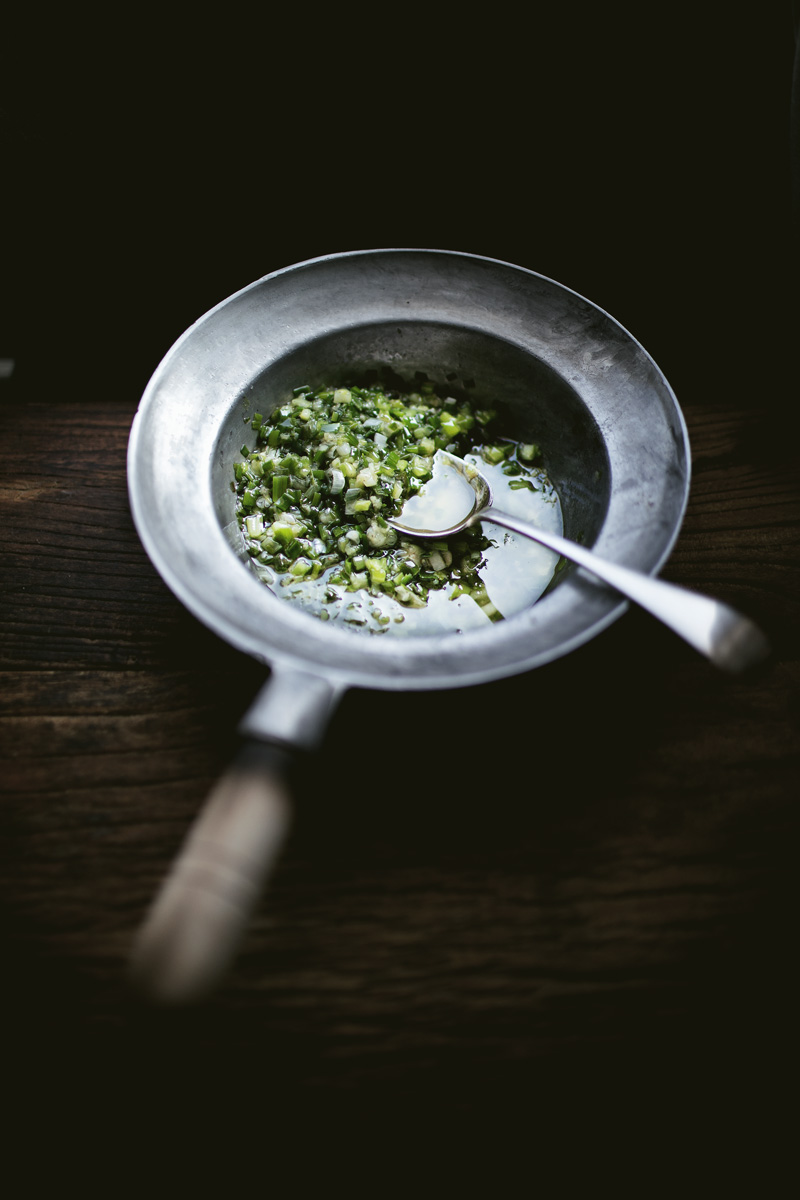
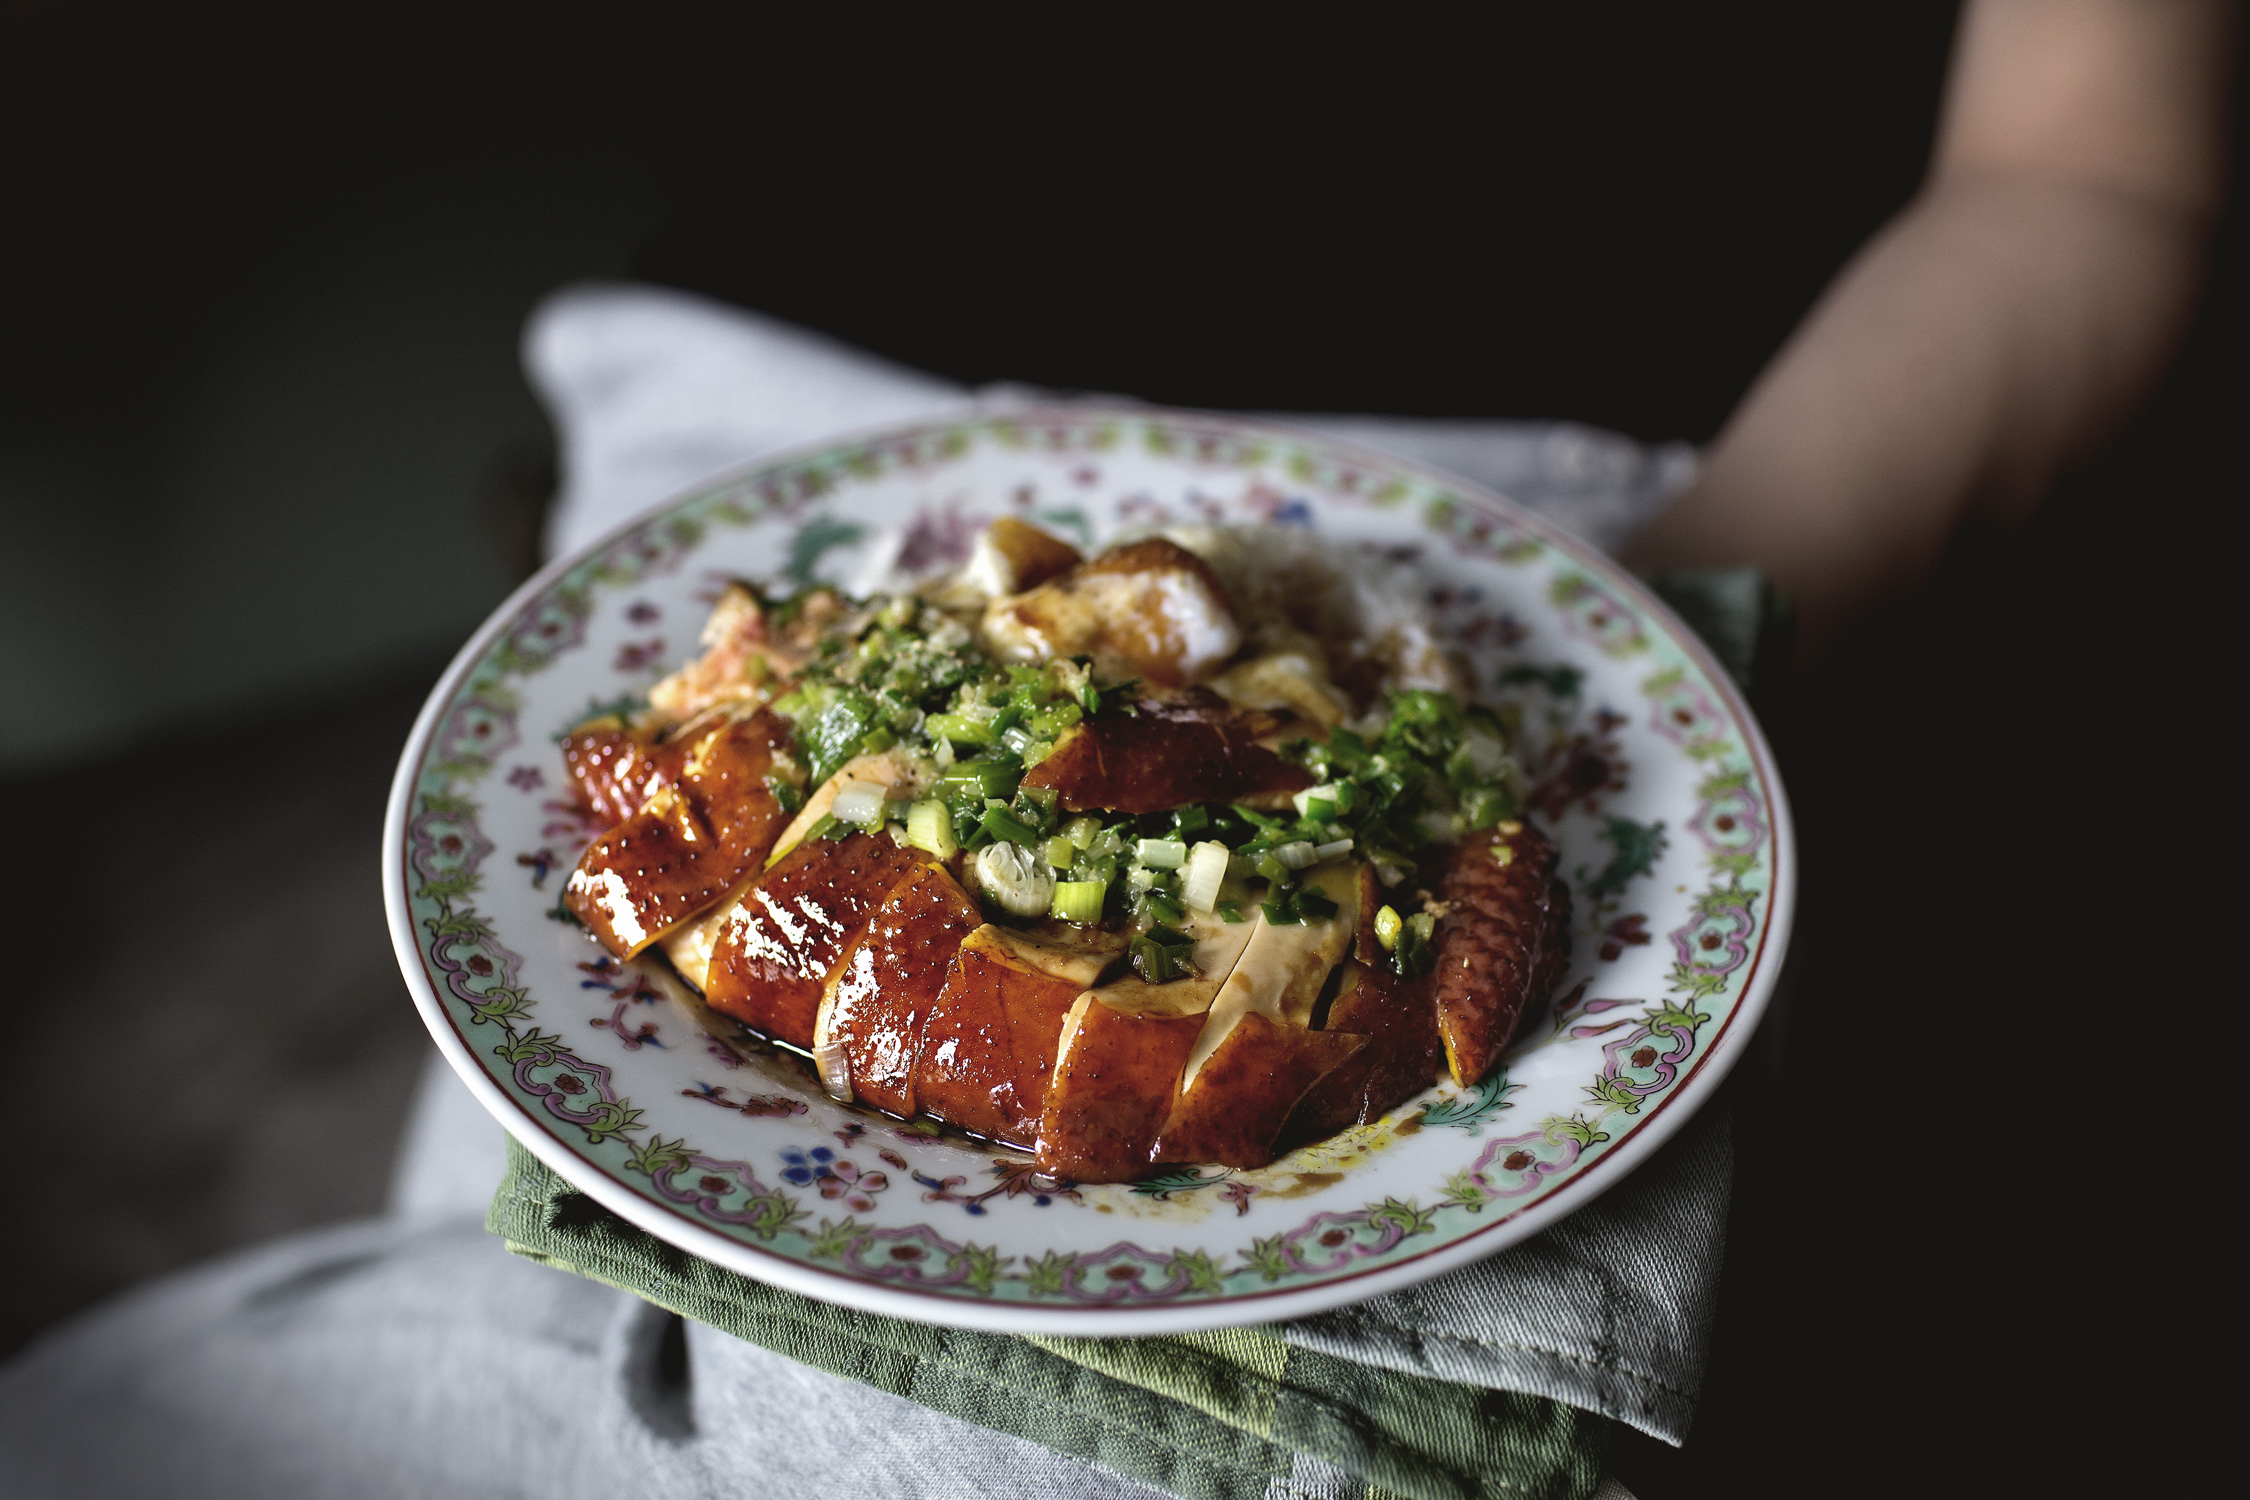
The dish is served with hot steamed rice, a good moistening from the strained sauce, and scallion oil, which is the part that will hear no objection from me.

soy-sauce-chicken01
soy-sauce-chicken02
soy-sauce-chicken03
soy-sauce-chicken04
soy-sauce-chicken05

CRISPY SKINS ARE NOT THE HOLY GRAIL.

BUT INSTEAD, IT’S THE EXTREMELY SUPPLE, JUICY, AND ALMOST SILKY SLICK TEXTURE OF THE MEATS THAT REIGN SUPREME

soy-sauce-chicken13
soy-sauce-chicken11
soy-sauce-chicken14

soy-sauce-chicken15

*UPDATED 2017/06/02: Added an internal temperature for the chicken for perfect doneness.

SLOW-COOKED SOY SAUCE CHICKEN RICE

Ingredients

    SOY SAUCE CHICKEN:
  • 1 small-size (1.2 to 1.4 kg/2.5 to 3 lbs) free-range chicken (weight includes the head)
  • 2 (45 grams) scallions, cut into chunks
  • 1" (20 grams) ginger, sliced
  • 2 star anise
  • 1/2 cup (118 grams) soy sauce
  • 1/4 cup (60 grams) unsalted chicken stock
  • 2 tbsp (30 grams) dark soy sauce
  • 2 tbsp (30 grams) shaoxing wine
  • 2 tbsp (30 grams) rock sugar, or light brown sugar
  • 1 tbsp oyster sauce
  • 2 tsp ground mushroom powder (see note)
  • 1 tsp smoked paprika
  • 1/8 tsp ground black pepper
  • SCALLION OIL:
  • 2 cups (120 grams) finely diced scallions
  • 2 tsp grated ginger
  • 1 tsp salt
  • 1/4 tsp ground white pepper
  • 1/2 cup (105 grams) canola oil
  • STEAMED JASMINE RICE TO SERVE

Instructions

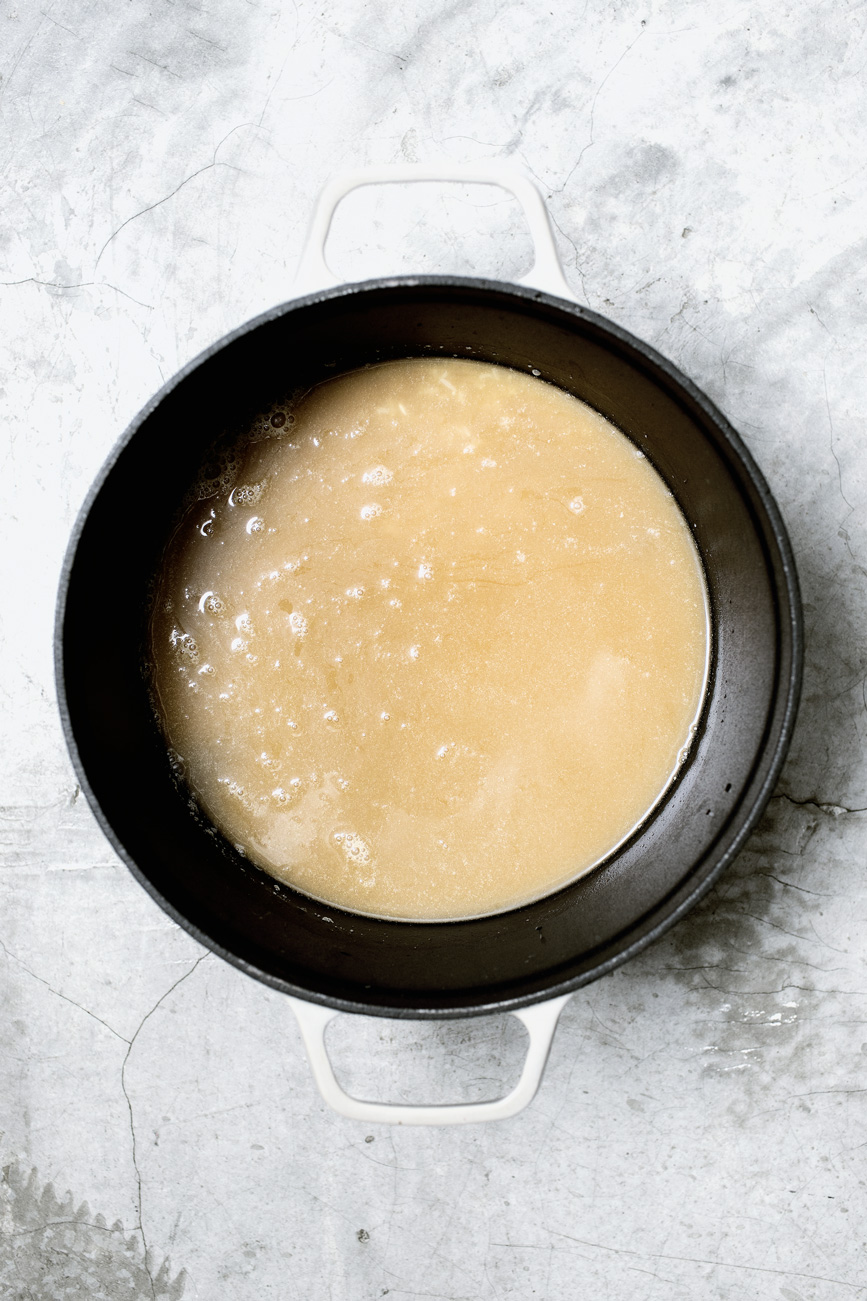
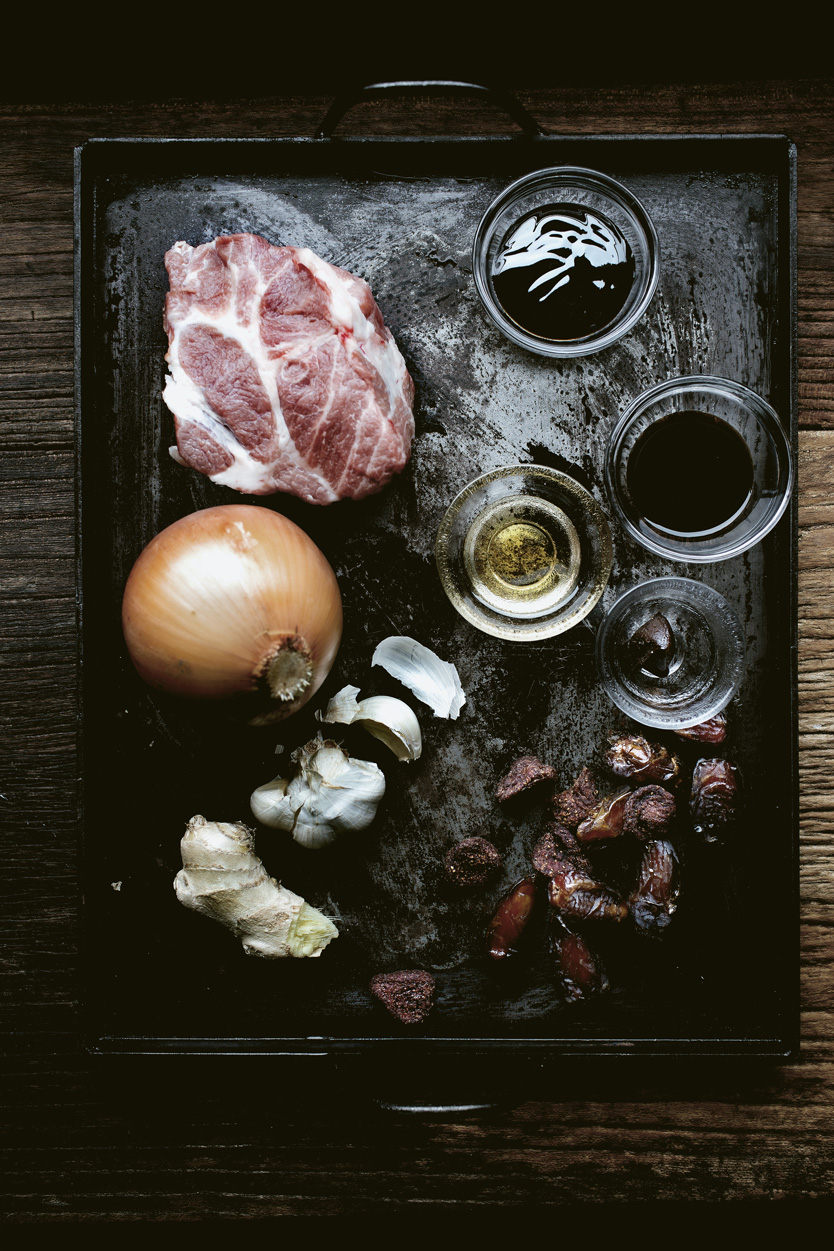
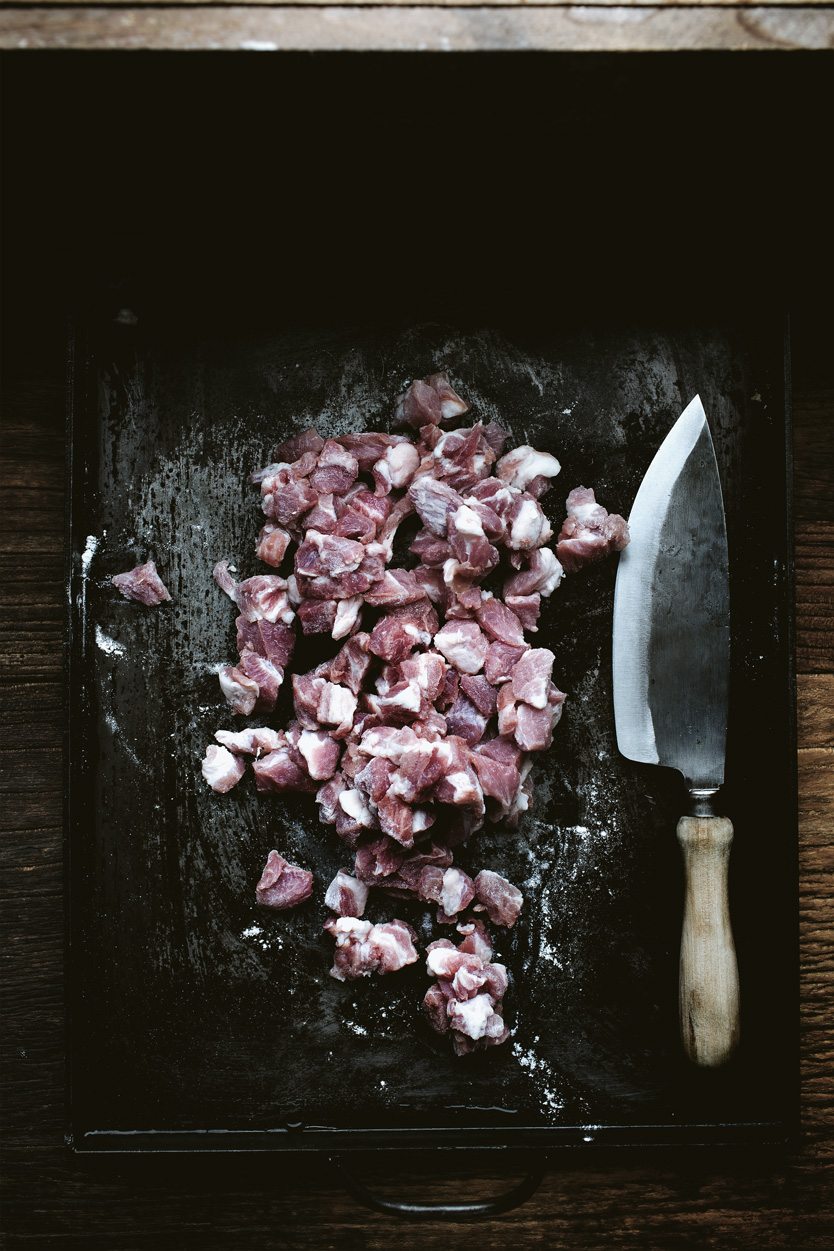
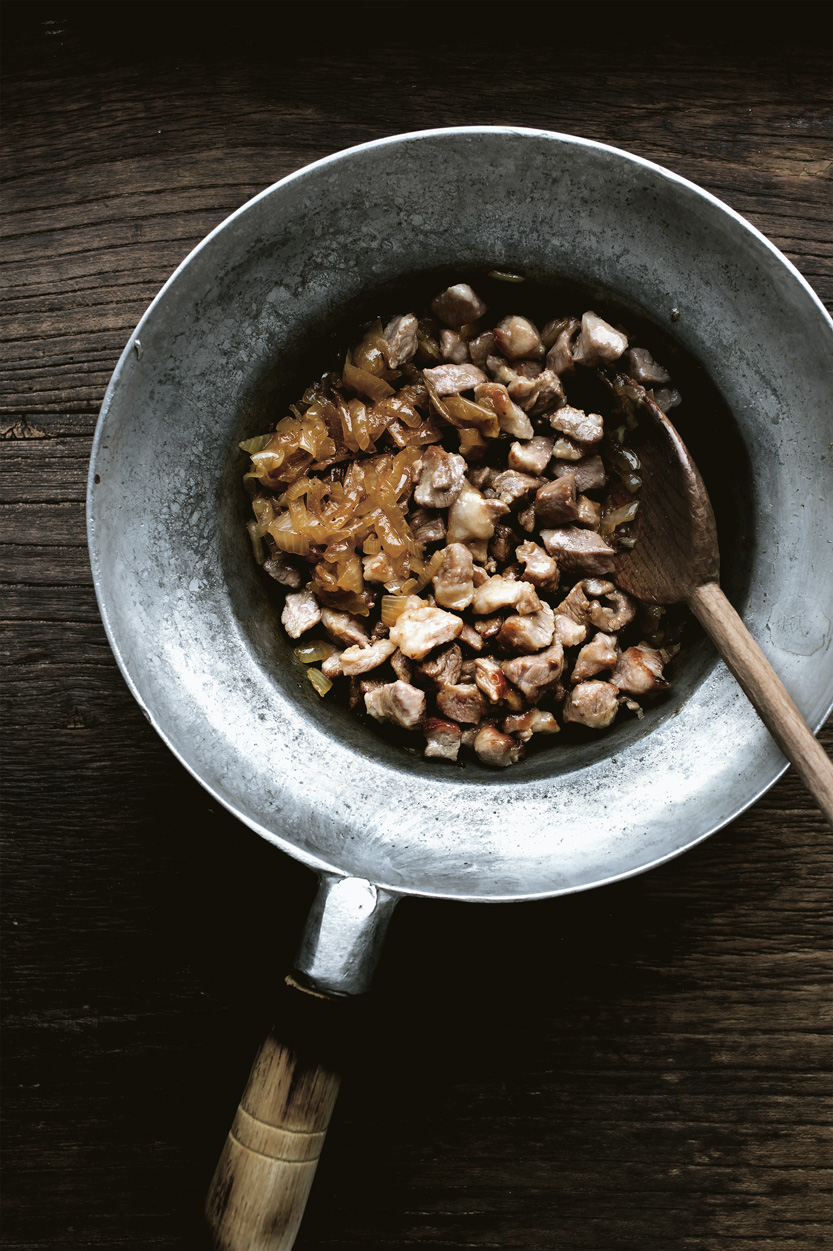
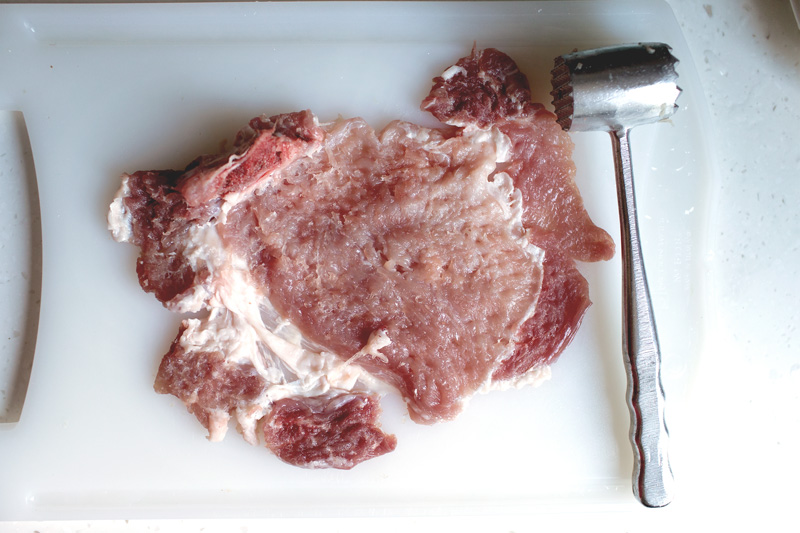
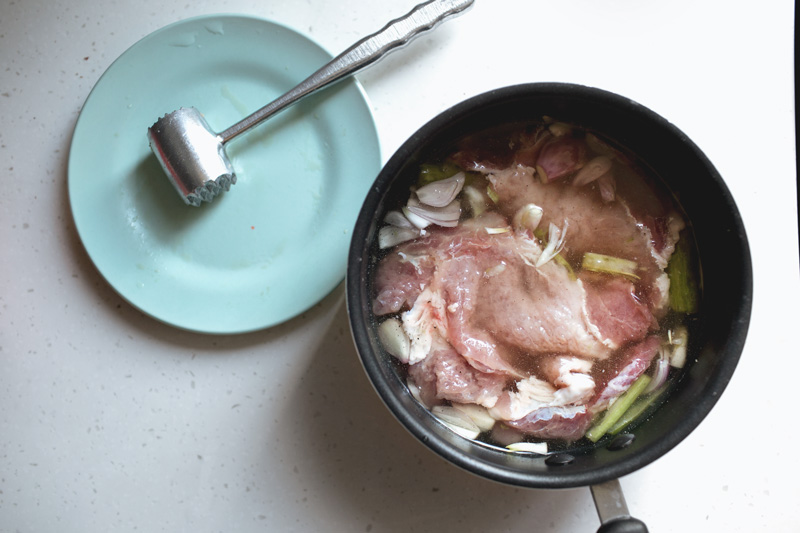
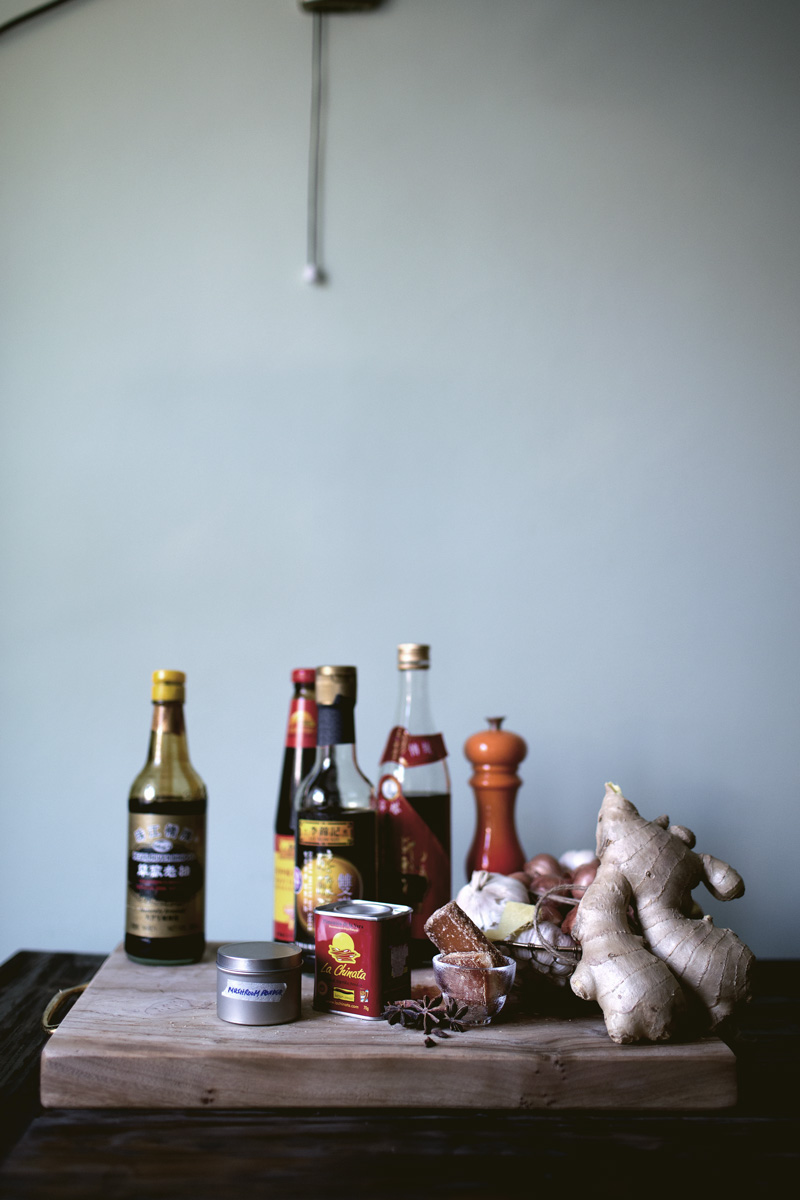
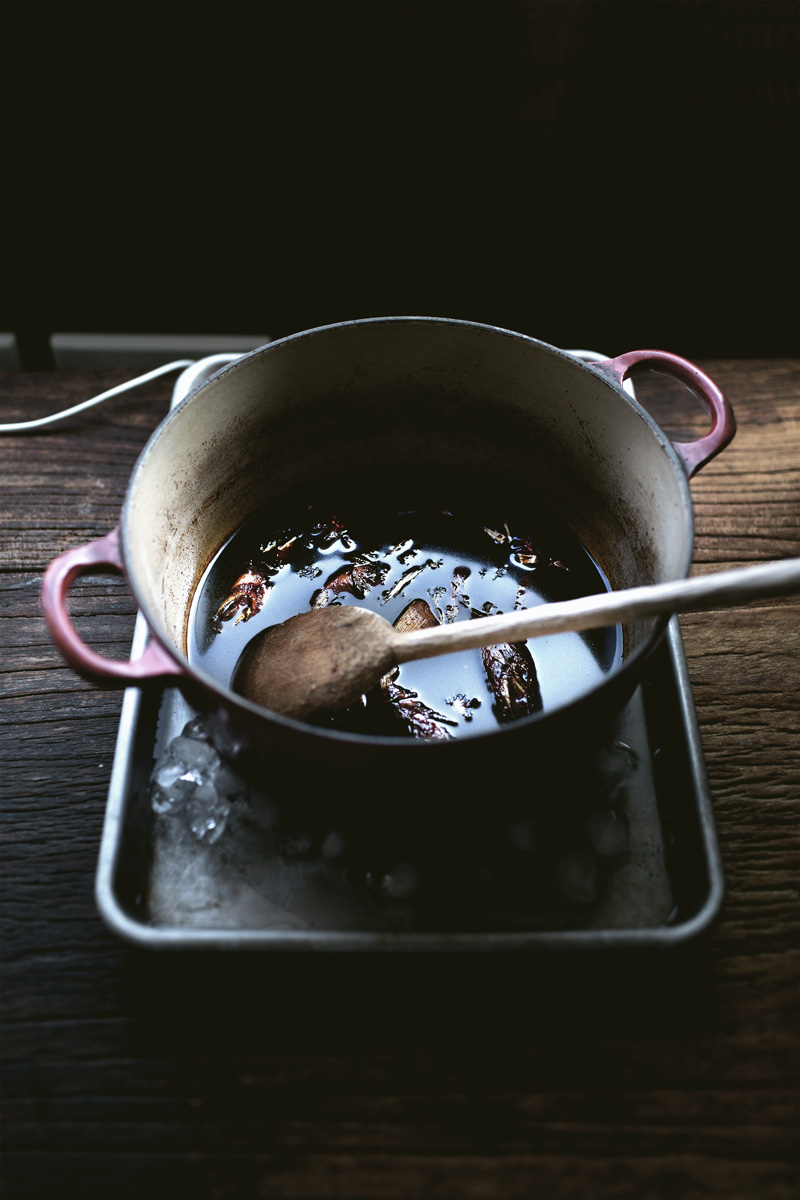
  1. TO PREPARE THE CHICKEN: This dish should be done with small-size chickens. Asian chickens tend to come with the neck and head attached. If yours doesn't, then it should weight even less (around 1 kg/2 lbs). In a pot, combine scallion, ginger, star anise, soy sauce, chicken stock, dark soy sauce, shaoxing wine, rock sugar, oyster sauce, mushroom powder, smoked paprika and black pepper. Bring to a simmer to cook for 5 min, then place the pot over ice to cool down to room-temperature.
  2. I marinated the chicken directly inside the pot, but I would recommend doing it in a large zip-lock bag, because it allows more surface area to be submerged in the marinate. So, place the chicken and the soy sauce-mixture inside a large zip-lock bag, and rub until coated evenly. Transfer to the fridge to marinate overnight (recommended), or at least 4 hours. Either way, turn the chicken once in a while, and remove from the fridge 2 hours before cooking.
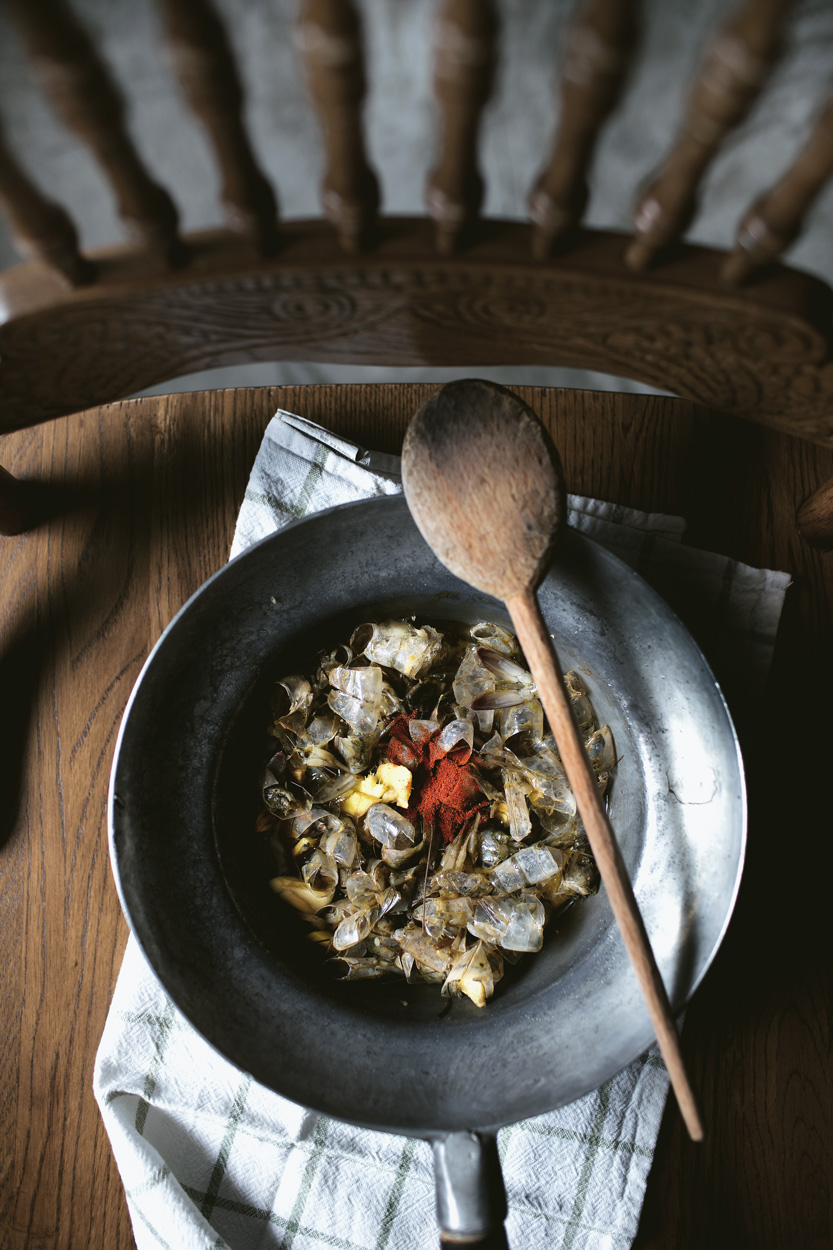
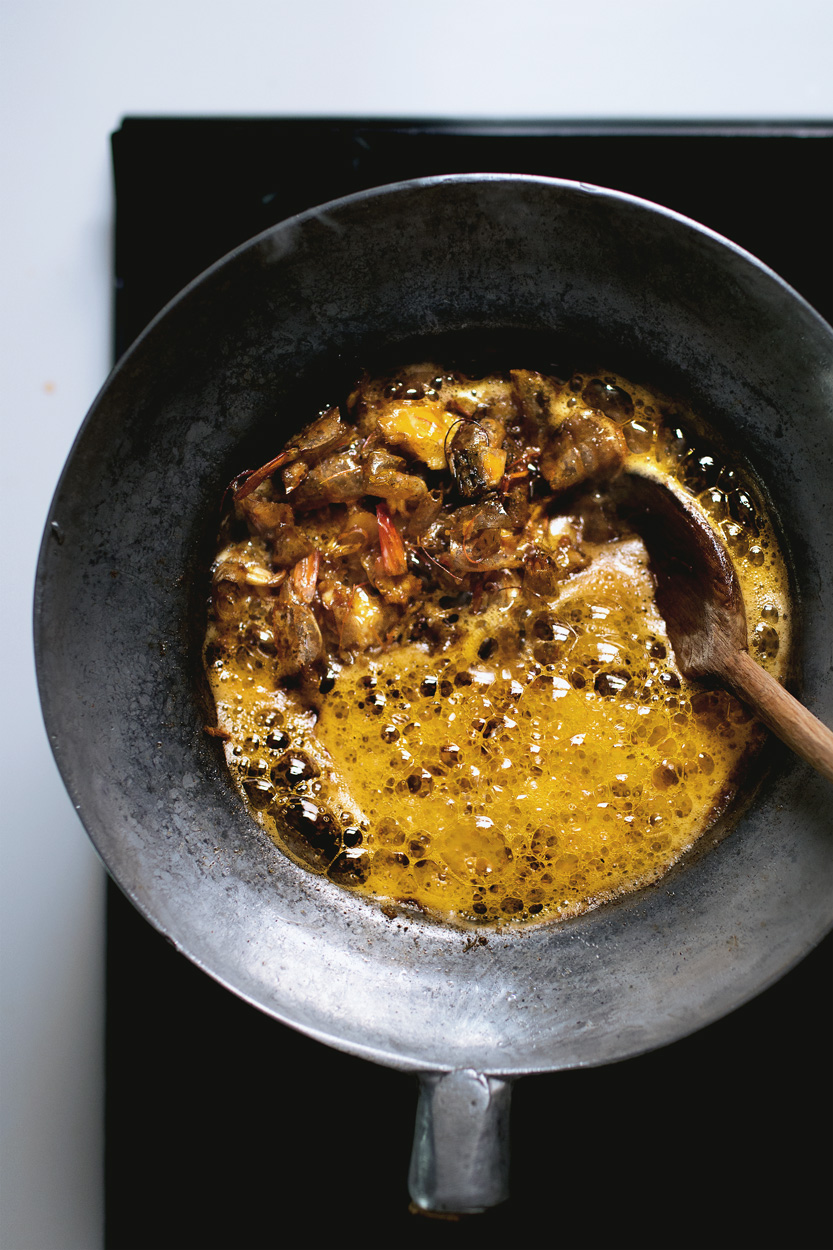
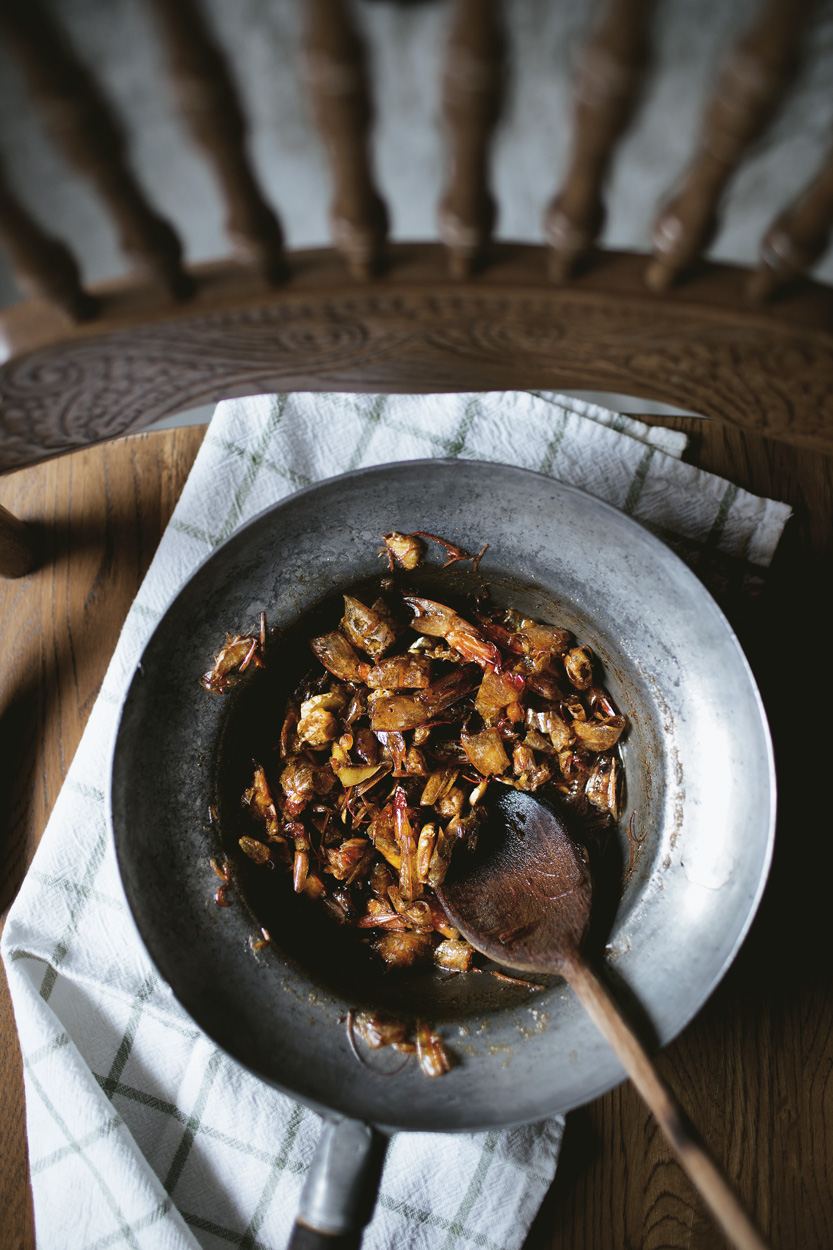
  3. PREPARE SCALLION OIL: Place diced scallion, grated ginger, salt and ground white pepper in a large bowl. Heat canola oil in a pot over high heat until it just starts to smoke a little, then pour it evenly over the scallion-mixture. It will sizzle enthusiastically. Stir the mixture evenly with a spoon while hot, then let rest for at least 2 hours before using.
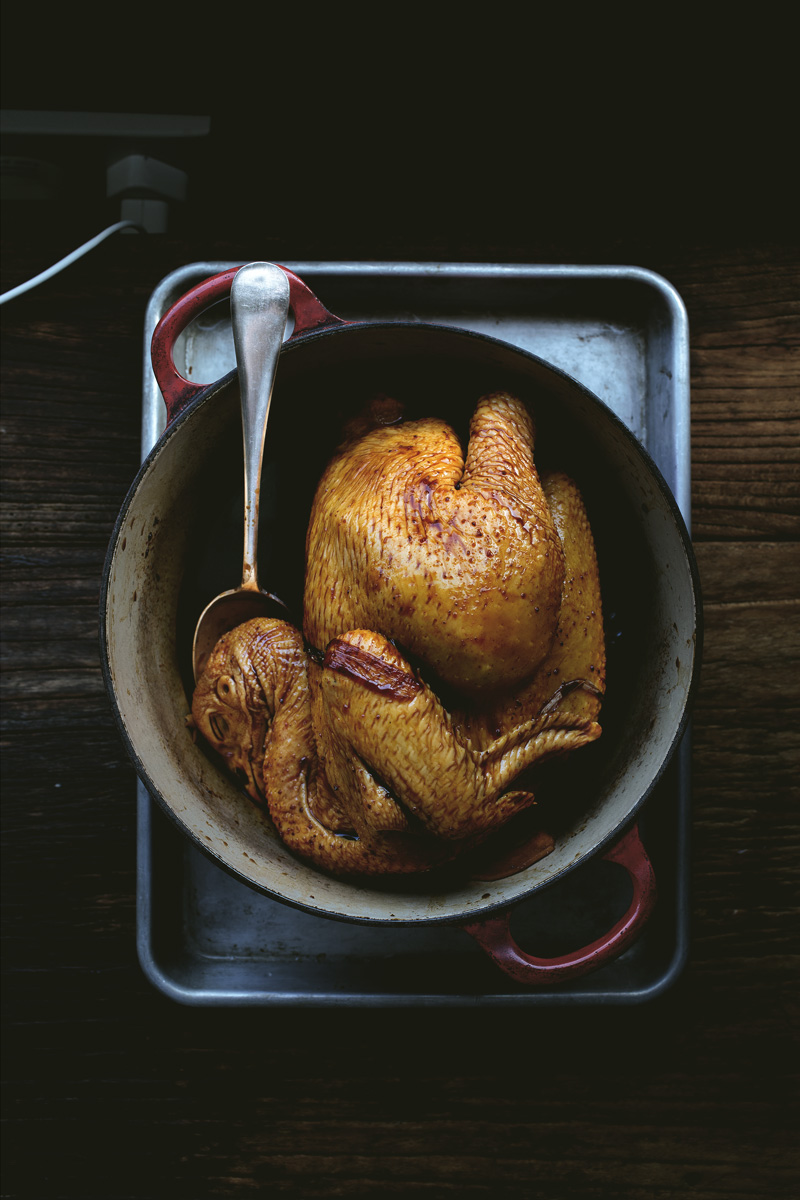
  4. TO COOK THE CHICKEN: Preheat the oven on 300 F/150 C. Choose a pot that will fit the chicken neatly without too much empty space. Remove the chicken from the zip-lock bag, then transfer the marinate into the pot. Bring it to a simmer over medium heat, then add the chicken inside. After turning it once or twice to be coated, transfer the pot inside the oven, UNCOVERED. Every 15 min, come back to it and turn the chicken, basting/brushing the sauce evenly over every surface, then return the pot back in the oven. The chicken will be perfectly done with a beautiful sheen after about 55 to 60 min, until the internal temperature around inner thighs reaches 172 F/ 77 C.
  5. KEEP IN MIND that this timing is for a small chicken about 2-plus lbs. I haven't done it with large chickens (and wouldn't want to), but just purely guessing, I would add 20 more minutes to every 1 extra lb, but go by the internal temperature just to be safe. ALSO, when I say "perfectly done", I mean it as really supple meats with a bit of pink inside the bones.
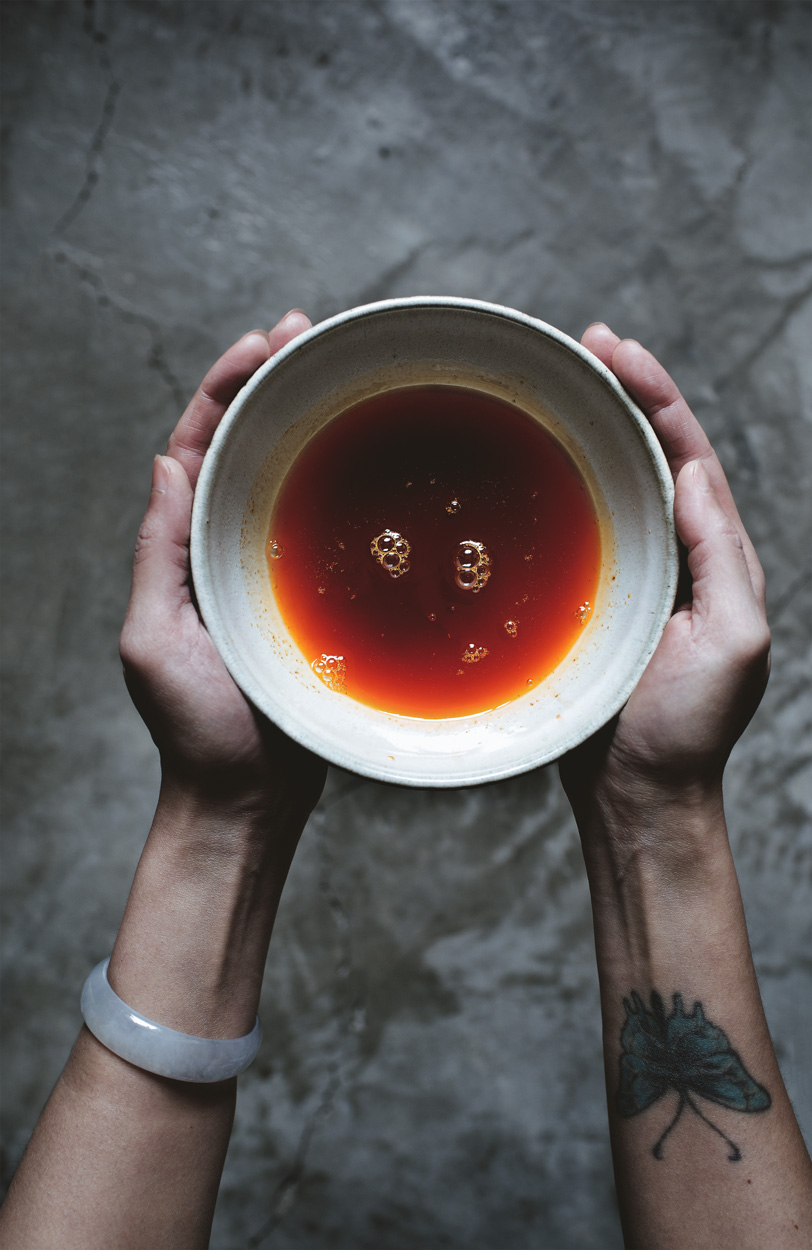
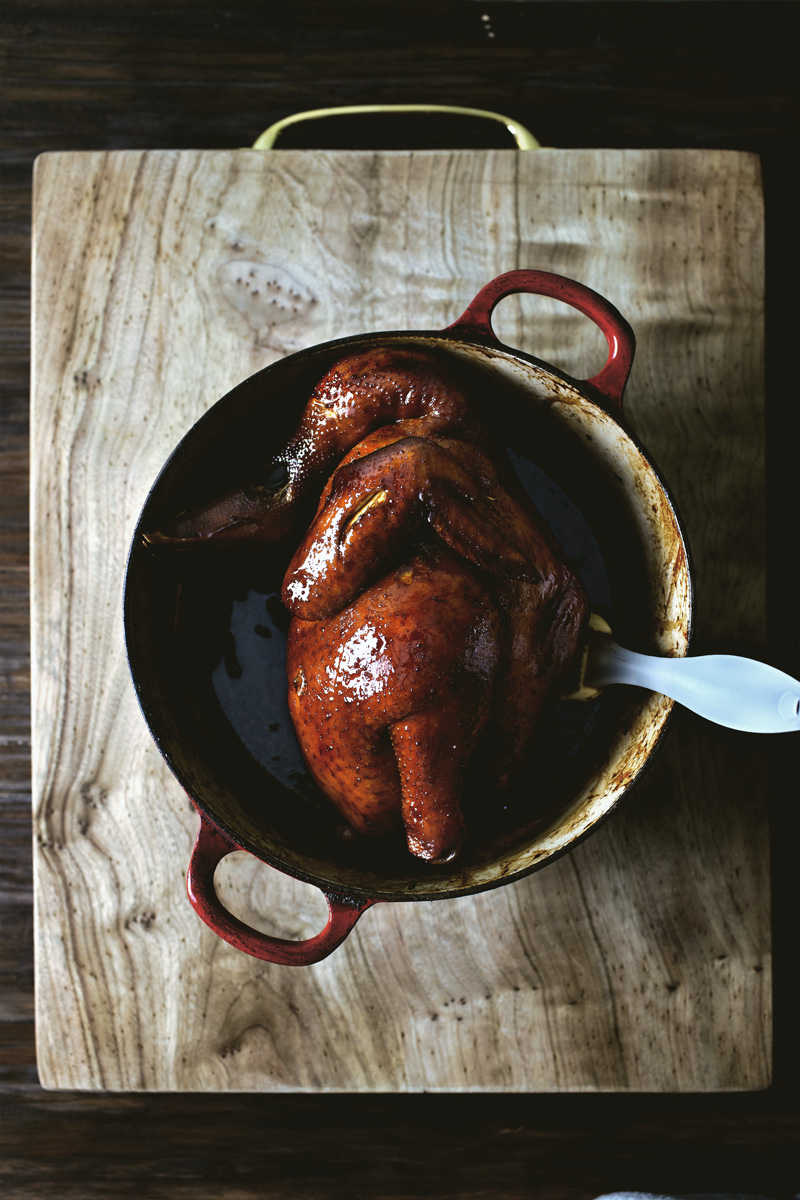
  6. After the chicken's cooked, hang it either by kitchen-twines around its wings or with meat-hooks, then brush the skin thinly with vegetable oil (keeps it shiny and prevents drying). Let it cool down to room-temperature. Strain the sauce, pressing on the solids to extract as much liquid as you can, then discard the solids. Add 2~3 tbsp of chicken stock to the sauce to thin out the saltiness, set aside.
  7. To serve, cut the chicken in small pieces and place over steamed jasmine rice. Ladle everything with the sauce and a good dollop of scallion oil. Sprinkle with ground white pepper.

Notes

The chicken is served at room-temperature over hot rice.

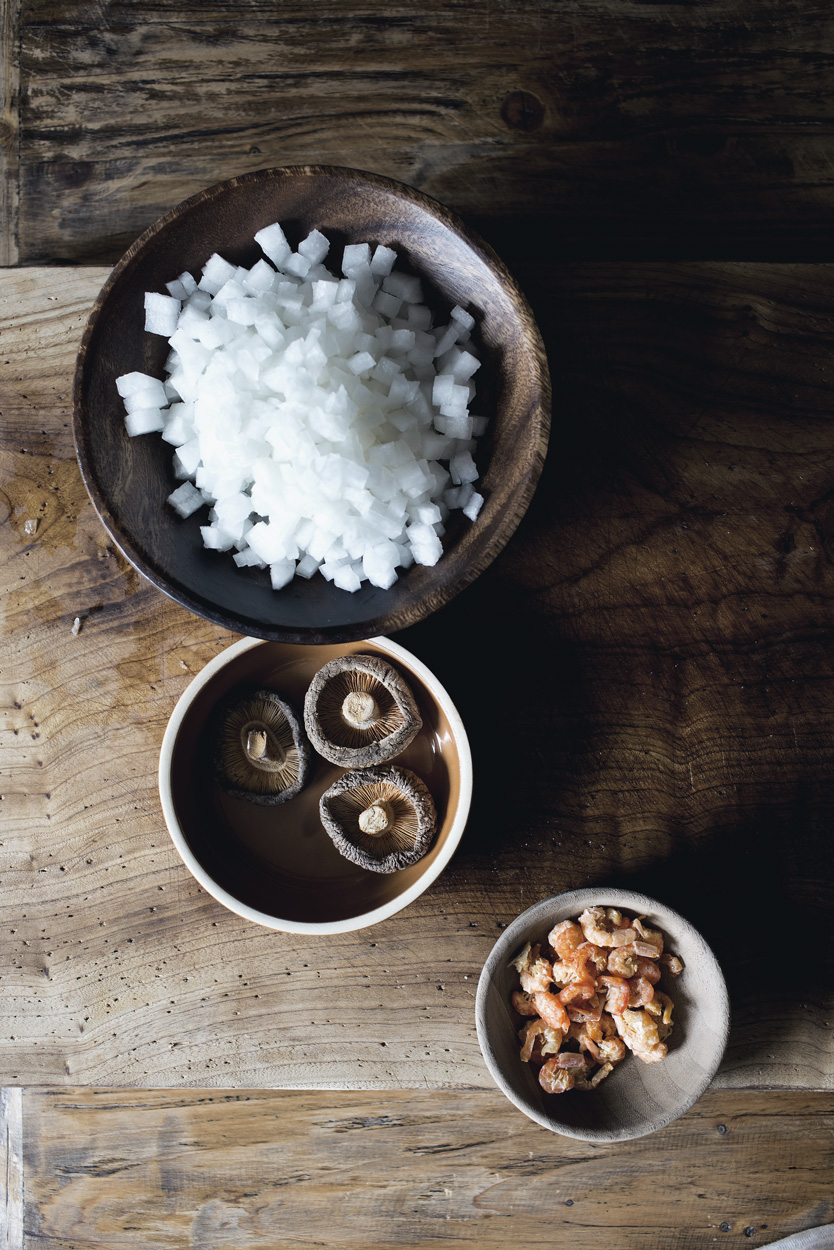
To make mushroom powder, simply grind dried shitake mushrooms in spice-grinder until finely ground.

http://cj8.98d.mwp.accessdomain.com/2016/09/20/supple-slow-cooked-soy-sauce-chicken-rice/
Continue Reading

HONG KONG’S CURRY FISH BALLS OVER RAMEN

Drifting over moving chaos, under the clouds of settling dusts, weeks… have passed.  It’s been almost a month since my last post, the longest it has ever been.

This posting gap was considerable in blogging years, unplanned nor welcomed, and in many ways in fact, nerve-wrecking.  But I wanted to do the first “official” post properly, to wait, to get all the shit that needs to be done in our apartment, one that we renovated ourselves 6 years ago before moving to Beijing, so I could include a proper introduction of our new life to your all in this post.  Kind of…  Friends, apartment.  Apartment, friends.  Now help yourself at the buffet.

But turned out, as it seems, that there is more work involved behind those House And Garden variety of apartment showoffs that I used to take completely granted for.  After 4 weeks of grinding constructions, big and small, to touch up those little imperfections that, really, bothered nobody but myself… the apartment, is still not there yet.  So I decided not to wait any longer.  This post may not include apartment therapy – maybe in another week – but worry not, it’s still got food.

Now, for the first “official” post marking a new beginning in Hong Kong, I thought it was only fitting that we start with something iconic to this city.

Every city needs a hero.  Best yet, an nourishing one, dependable, non-judgmental, and accessible to all under its shelter, big or small, rich or poor.  One that doesn’t care if you were hustling sober through the high traffics or stumbling drunk on the stone-cold pavement, always and forever, as the city promises, the rescue that is steaming just around the corner.  Dirty water hot dog in New York, jian-bing in Beijing.  Here, this thing called curry fish balls is the food-hero that bonds between Hong Kong’s identity and its people who hold it dearly.

The fish balls, pre-fried, are boiled in a large tank of neon-yellow water which gets replenished as more fish balls are removed from the water, and served with a spoonful of curry sauce and hot sauce to standing customers huddling around the booth.  This boil-and-sauce technique, I suspect, is catering more to a streamlined service with higher turn-overs than say, optimising flavours.  The fish balls, without actually being cooked in the curry, are slightly bland and therefore have to draw all their flavours from the topical sauces instead of being a single, together, perfect entity.  This makes sense for street vendors, of course, especially in this relentlessly expensive city where any means necessary to speed up services are justifiably, if not rudely, executed.  But if we were to recreate this dish at home – and I would argue that it’s in the best interest to honor its complexity – we shall do things a little differently.

curry-fish-balls-ramen01
curry-fish-balls-ramen02
curry-fish-balls-ramen03
READ MORE

Continue Reading

Your Next Perfect Porchetta Sandwich is from Chinatown

I guess I am currently in the middle of what one would call, a blogger limbo.

We have “officially” moved out of Beijing, so to speak.  But in the next 3 weeks when our apartment is under renovation, we are going to be staying in a hotel where the closest thing to a cooking vessel is the bathroom sink with hot tap water (hotel sous vide?).  How do I create something delicious when the mere act of making fruit smoothies posts challenges?  Then I realised, the answer lies just around every corner in this city.

Cantonese-style roast pork.  Something as abundant in Hong Kong as Starbucks are in New York.  This awesome thing, is everywhere.  Even if you didn’t live here, chances are you’ve seen it in your nearest Chinatown, a staple in Cantonese cuisines.

Typically served with rice, which I’ve always had my doubt on.  I mean, it is a great piece of roast pork, with salty yet juicy flesh and gloriously blistered skins.  But on its own, and paired with yellow mustard, in my opinion, it just isn’t the most flattering companion for steamed rice.   It is however, the most perfect yet most under-utilized sandwich candidate, practically an half-way porchetta sandwich.

Here’s what you do.  You chop up a whole box of these porky awesomeness, then you make a “dressing” out of minced scallions, ginger and red chilis, with pungent savouriness from fish sauce and a tang that cuts through the grease from red wine vinegar.  You let this “dressing” seep through the nooks and crannies of an unapologetic pile of the chopped roast pork, into the thirsty holes of a toasted crusty roll that catches it all.  Then you cap everything up with a few slices of provolone cheese, and you draw your finishing touch with a smear of yellow mustard.

Porky, crispy, drippy and zero-cooking involved.  What can I say?  Hotel meal.

YOU LET IT SEEP THROUGH THE NOOKS OF AN UNAPOLOGETIC PILE OF CHOPPED ROAST PORK, INTO THE THIRSTY HOLES OF A TOASTED CRUSTY ROLL.

cantonese-porchetta-sandwich01
cantonese-porchetta-sandwich02
READ MORE

Continue Reading

MACAO’S PORK CHOP PINEAPPLE BUN


IT CAN’T BE RIGHT.  IT SHOUDN’T BE RIGHT.

BUT IT MIRACULOUSLY IS.

History had it, that whenever two polar opposite cultures are smashed together, often under reluctant or even violent circumstances, despite hardships and losses, something mutated but beautiful eventually comes out at the other end.  That something, is usually food.

No doubt that America has its unspeakable history from the time of slavery, but what was left from its ugliness, was the unapologetic creole and cajun.  Taiwan’s predominantly Fujian and kejia culture (derived from China’s southern coast) adjusted to 50 years of Japanese rule by nurturing an uniquely categorized cuisine all of its own, which, some say, may be the last-standing pride of this politically fading island.  So on… what unfortunate events gave us the Vietnamese coffee, and so forth… what conflict left us the baba-nyonya?  Food, among sadness and realities, always knows how to find its own humble delights.  Food, is always optimistic.

And right now, standing in Hong Kong where such experiences were no stranger, I’m holding in my hand, a  glorious testament of such history.  A legacy from Portuguese’s colonial time in Macao, the pork chop pineapple bun.

Macao’s pork chop bun compared to Portuguese’s bifana, obviously, is another life.  It uses bone-in pork chops instead of cutlets, reflecting Asian’s general preference for flavour over convenience.  On top of which, it deploys soy sauce as part of the seasonings, and baking soda, a typical and effecient meat-tenderizing agent in Cantonese cooking.  But perhaps the most controversial act of it all is that, in one version, it stuffs the shallow-fried pork chop, without a blinking of an eye, in between an iconic pastry of this particular region.  The pineapple buns.

It can’t be right.  It shouldn’t be right.  But in between the crispy and salty edges of a well-seasoned and juicy bone-in pork chop, and the sweet and crumbly crust of a buttery pineapple bun, it miraculously is.  To be honest, I don’t even know why I doubted it in the first place.  Salty and sweet.  A proven equation that works.  Really, give it a chance.  No matter how unseemly and conflicting the idea may sound, like the clashing of the cultures that nurtured it, pork chop pineapple bun is a tasty mutation that made the best of it all.

And don’t forget to serve it with Hong Kong-style English milk tea.

  
pork-chop-pineapple-bun01
pork-chop-pineapple-bun02
pork-chop-pineapple-bun03
READ MORE

Continue Reading