HOW TO ACTUALLY COOK PERFECT RICE WITHOUT A RICE-COOKER
LET’S SET THE RECORD STRAIGHT, ONCE AND FOR ALL… DON’T YOU EVER, EVER, AND I MEAN NEVER EVER, BOIL YOUR SUSHI RICE
There are a lot of rumours out there about cooking rice without a rice-cooker. And when I say “rice” in this particular case, I’m specifically referring to the Asian short-grain white rice, or mostly known as, the Japanese sushi rice (but not exclusively for making sushi). Whether or not you grew up cooking/eating this type of rice, that for every different reasons, the idea of cooking it on the stove can be a very confusing matter. Because if you did, like every other sensible Asians out there, you’ve been deferring this task to a trusty rice-cooker and the idea of doing it without one, for as long as you’ve been eating rice, has never even occur to you as a potential reality. But if you didn’t, like every other typical non-Asians out there without a rice-cooker, the assortment of instructions for cooking this type of rice on the stove with bare flames and pots, is a maze laid out with conflicting informations, false promises, and more often than not, guaranteed failures.
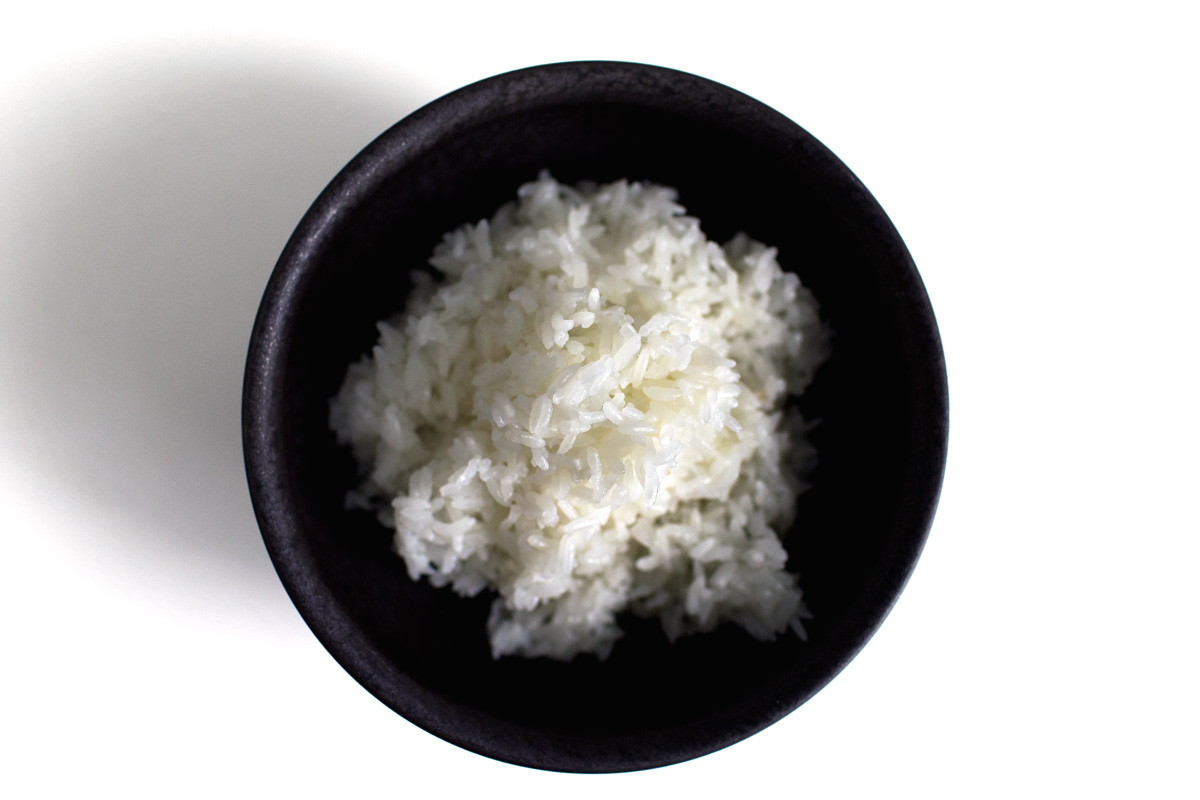
And when I say “failure” in this particular case, I’m specifically referring to anything but the state of its optimal textures. Look, it’s fairly easy to cook rice, or anything for that matter, until it’s no longer raw and passably edible, but it’s something else entirely to do it properly. Asian short-grain rice/sushi rice, when cooked properly, should glisten with a gentle shimmer on the surface, where every grains are consistent with a soft but bouncy mouthfeel, moistly sticky but ease gracefully into individual selves when being chewed. Now this, this is not something easily obtainable, not even for some less competent rice-cookers out there, let alone if you did it on the stove following many of the wrong directions online, which is to say, almost all of them.
So today, let’s set the record straight, once and for all. Here’s how to actually cook sushi rice on the stove.
THE CORRECT RATIO AND TOOLS
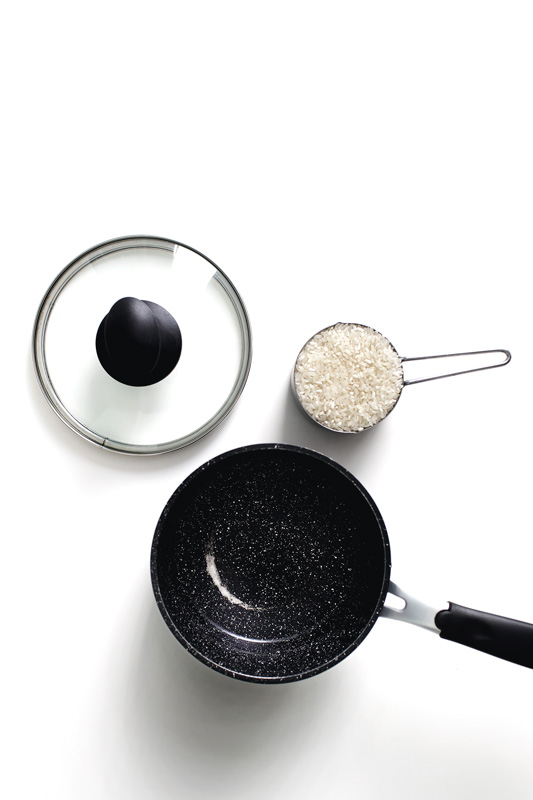
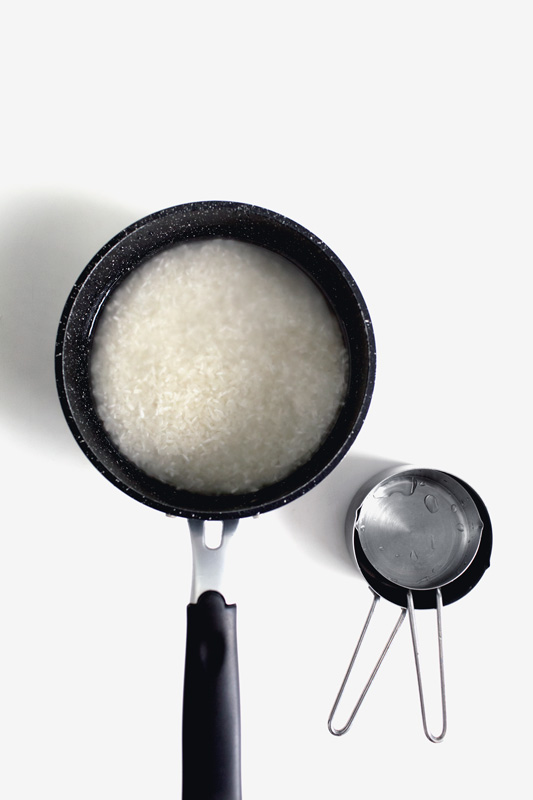
The ratio between rice : water is perhaps the single, most confusing information on cooking sushi rice. Most recipes out there ranges from 1 : 1.1 (too much water) to 1 : 1.5 (waaaaay too much water!). But the correct ratio should always, and I mean always, be 1 part rice : 1 part water BY VOLUME. Always! It doesn’t matter if you are cooking rice for sushi, or just for plain eating. Always. And when it comes to the right pot, I would highly suggest using a small, heavy-bottomed non-stick pot with clear glass lid. There is a reason why all rice-cookers uses a non-stick inner-bowl, because when rice sticks (and it will stick), it breaks. Broken rice = bad rice. Then, instead of flying blind, the clear glass lid allows you to get a good idea of what’s going on inside. Also, we don’t want a steam-hole for the lid, so if yours comes with one, simply block it with a damp paper-towel. So:
Makes about 4 cups cooked rice:
- 2 cups (400 grams) Asian short-grain white rice, or Japanese sushi rice
- 2 cups (429 grams) water
UPDATE 2015/08/04: You may be able to tell that the type of rice used in this particular example, was a typical Asian short-grain rice, which took 15 min in STEP 2. But if you were using an even stubbier short-grain variety, specifically for making sushi, with a wider and rounder body, then please increase the duration of STEP 2 to 20 min.
* The instruction is for 2 cups of rice only. Anything more or less by 1/2 cup will require adjustments on the cooking time.
UPDATE 2015/12/1: Months after I tested this recipe on the gas-stove, I finally had a chance to test it on induction stove, and the heat-setting turned out to be a bit different. It seems that induction stove requires a slightly higher setting to reach the description of each steps. In STEP 2, instead of 1~2 for heat-setting (on a scale of 10), induction stove needs around 3~4. Then for STEP 3, instead of 2~3, induction stove needs around 5~6. So whatever stove you’re using, adjust the heat-setting to get you to the description for each steps, instead of relying on absolute heat-settings.
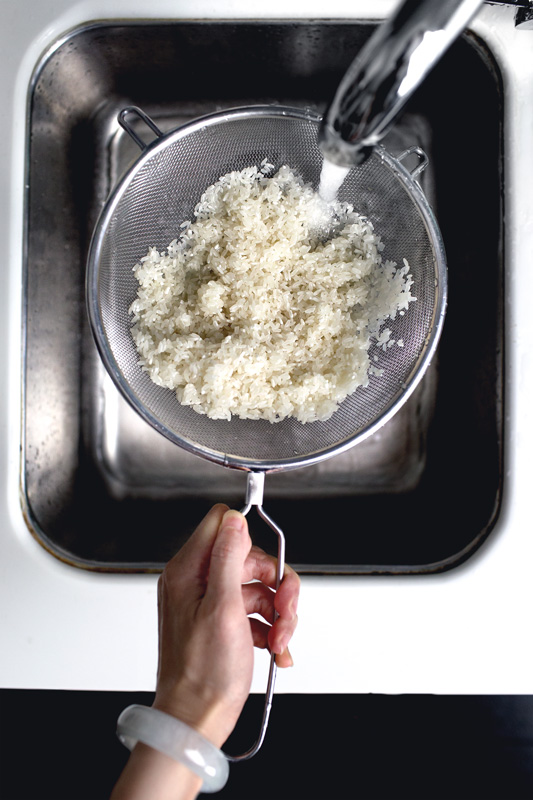
STEP 1: Put the rice in a large sieve, then rinse under running cold water. Gently rub the rice between your fingers, removing the excess starch, until the water runs clear. Drain very very well, until the last drop of water seem to have been shaken off, then transfer the rice to heavy-bottomed non-stick pot. Add the water and give it a stir, then put on the lid (if there’s a steam-hole, block it with a small piece of damp paper-towel.