The Dreamiest of Dreamy Milk Toast
OH boy, do I have a sob story for this one. Well, not of me growing up with Hokkaido milk toast of course (If you love bread but don’t know what it is, I feel truly sorry. It’s the dreamiest loaf of toast you could dream up.). Those were only fond memories, VERY fond memories like – me standing in the bakery, staring and chuckling like an idiot at the milk toasts on the racks why because they were also smiling back at me, and couldn’t stop myself from poking them with my fingers – kind of memories. The sobbing part is how I got to successfully making them in my kitchen, which was a road paved with disappointments, heartbreaks and betrayals (supposedly-trusted recipes out there…how could you?). Let me just start by saying that on Sep 19th at 10:45 pm, a loaf of bread died of a gruesome death on my kitchen counter. And at 4:30 am the next day, another one followed.
This is how I killed them and atoned for it.
I don’t know what had gotten into me that day but it was surely cursed. The initial idea that stuck didn’t start out as an intent to make milk toast but just a loaf of white bread with peanut butter and jelly swirls inside. I know… what an unnecessary and retarded idea. Don’t rub it in. Since I woke up exceptionally early that day at 12 pm, I took a sweet ass whole-3-hours to assess the possibility of me actually going out my front door to get the ingredients I need. If it sounded any better, during which I also gossiped with my mom on the phone for 2 hours and watched a bit of Barefoot Contessa, so it wasn’t a total waste of time. So at 3 pm sharp after some motivational speech I made to myself, I finally gathered enough momentum to peel myself off the couch and make a run for it.
Then I came home rewarded with a raging headache.
To explain the headache I have say a) Because we don’t own a car. We bike. b) Again because 80% of the biking experience in Beijing ends in oxygen deprivation in the brain. Why? Well there’s the air pollution that I can always count on (How good the air is on any given day depends on how well I can see the mountains on the west horizon and let me just say that in the first 2 months I lived here, I didn’t even know the mountain existed…), and the black-smoke-squirting-squid buses that somehow always coincidentally situates around me. Then let’s not leave out those fellow bikers who enjoy leisurely sipping on cigarettes on their scooters, and always think they should contribute to my misery, too. All in all sends a powerful signal to my brain to suspend my already-pathetic lung functions, and ignore the stress calls made from my earnest, pedal-stepping feet and raging, exercise-deprived heart. So I hope that sufficiently explains the headache that lead to another 3 hours haze to regather my will to actually make the bread.
Then I successfully pulled myself together to start at 7 pm.
I measured. I kneaded. I proofed, rolled then proofed again and I baked. The first loaf came out of the oven at 11:45 pm sharp, then like a stomped pudding, catastrophically collapsed in the middle into two miserable mess (insert a little gasp here) before I even had a chance to take a first breather. It sent me into an out-of-body experience where I floated to the ceiling and stared at myself staring at the corpse of the bread that stared back. All three of us engaged in a post-traumatic silence. What the HELL happened? I went back to the recipe and realized that I had miscalculated the wet ingredient (by way too much) while trying to half the recipe. I blame the headache. So what’s a responsible blogger had to do at this point at 12:00 am? Get my ass back in there and do over. I righted my wrongs in the recipe and patiently waited another 4 hours for my final, well-deserved triumph to come gloriously out of the oven. It didn’t. If the first loaf was a stomped pudding, the second one came out like a skull-breaking brick. I could murder someone with this loaf. Now what’s a responsi… oh who am I kidding…
At 4:30 am, I went to bed with tail between my legs.
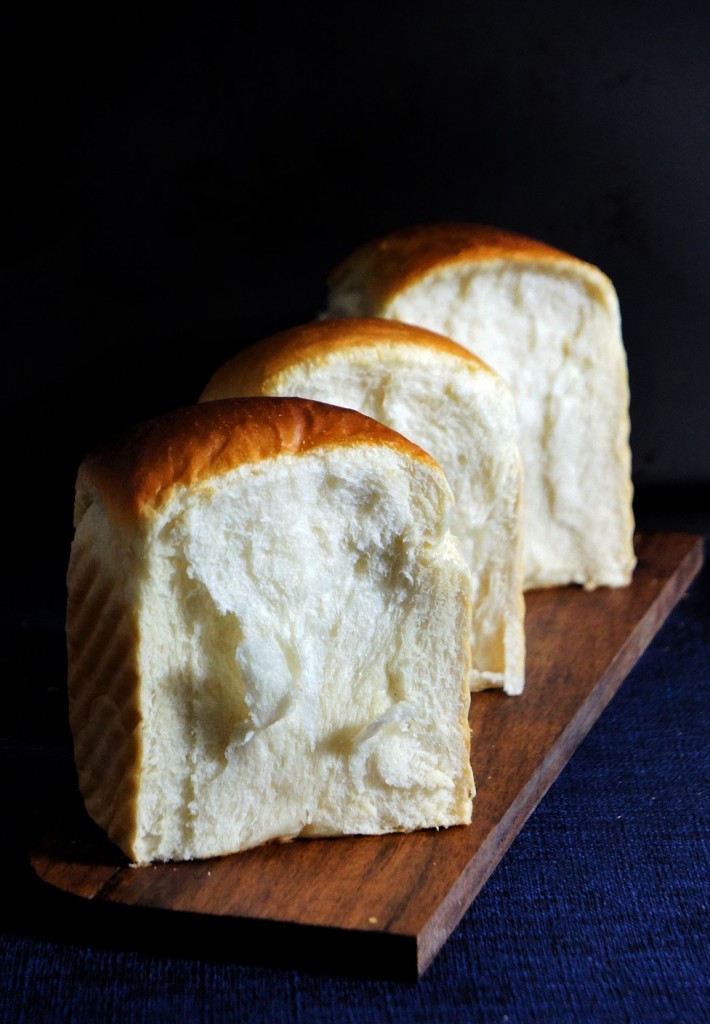
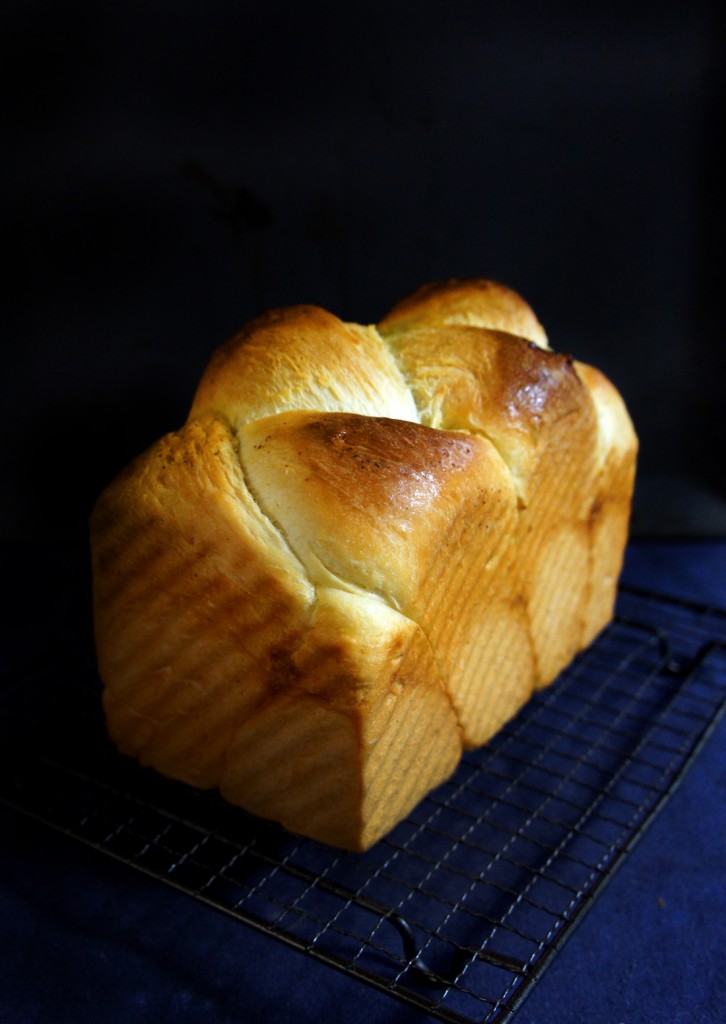
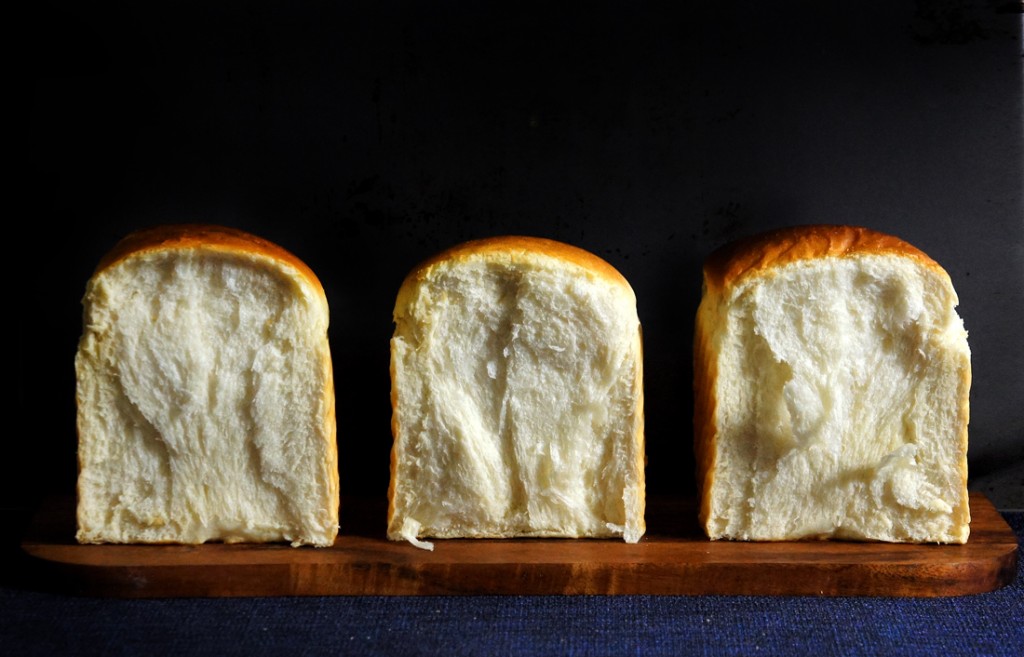
I woke up the next day feeling like a piece of stale bread dropped in dirty water. Totally worthless in the soggiest way. I realized I had to scrap the devil-pb+j-loaf idea (partially because I used up all the pb+j) and go back to the thinking tank. Let’s focus on how to make the perfect loaf of white bread first. And what’s more perfect in the realm of white toast than a loaf of Hokkaido milk toast? If you’ve never had it, you can’t imagine how crazy good a loaf of white bread can be. But if you have ever stepped into a Japanese bakery and landed your hands on their white toast, and were astonished at how much more moist, stringy, tender, creamy and chewy it is than your regular dry and boring white toast, then agonized over how you could produce the same at home? This is your answer. After combining several different recipes online, the third loaf came out of my oven two days later with songbirds and halos circling around it. It was so good I couldn’t believe I did it and had to make three more loafs in the following days just to reconfirm that it was real. Guys, seriously. You’ll want to dig a hole inside and sleep in it. It is so good.
Servings: 2 loafs
* You can half this recipe and make just 1 loaf instead. But I have to tell you that, considering the work involved, it makes much more sense to make 2 portions and freeze 1 portion of the dough in the freezer for next time.
** The dough takes two stages of proofing. The first stage is recommended to be done in the fridge overnight for a better texture and moisture content in the final product.
*** The original recipe calls for milk powder which I suspect no baby-less grownups would have it in their pantry. So to makeup for the “milky-ness”, I replaced the sugar in the first proofing ingredients with condensed milk.
**** The recipe is in metric system. I try to convert some for you but I would strongly recommend measuring it in grams instead.
Ingredients: ****
- First Proofing:
- 600 g of bread flour (at least 12~14% protein) updates on 2012/10/15: the bread flour from Hong Kong flour mills would yield the best result
- 42 g of egg white (approx 4 1/2 tbsp)
- 7 g of dry yeast (approx 1 1/8 tsp)
- 168 g of heavy cream (approx 3/4 cup)
- 190 g of whole milk (approx 3/4 cup)
- 12 g of unsalted butter, room temperature
- 18 g of sugar (approx 4 tsp), or 2 tbsp of sweeten condensed milk ***
- Second Proofing:
- 7.2 g of salt (approx 1 tsp)
- 5 g of dry yeast (approx 1 tsp)
- 90 g of sugar (approx 7 tbsp)
- 50 g of egg white (approx 5 tbsp)
- 36 g milk powder (I didn’t add this)
- 12 g of butter, room temperature
- To finish:
- 40 g of browned butter
- sea salt
- egg wash
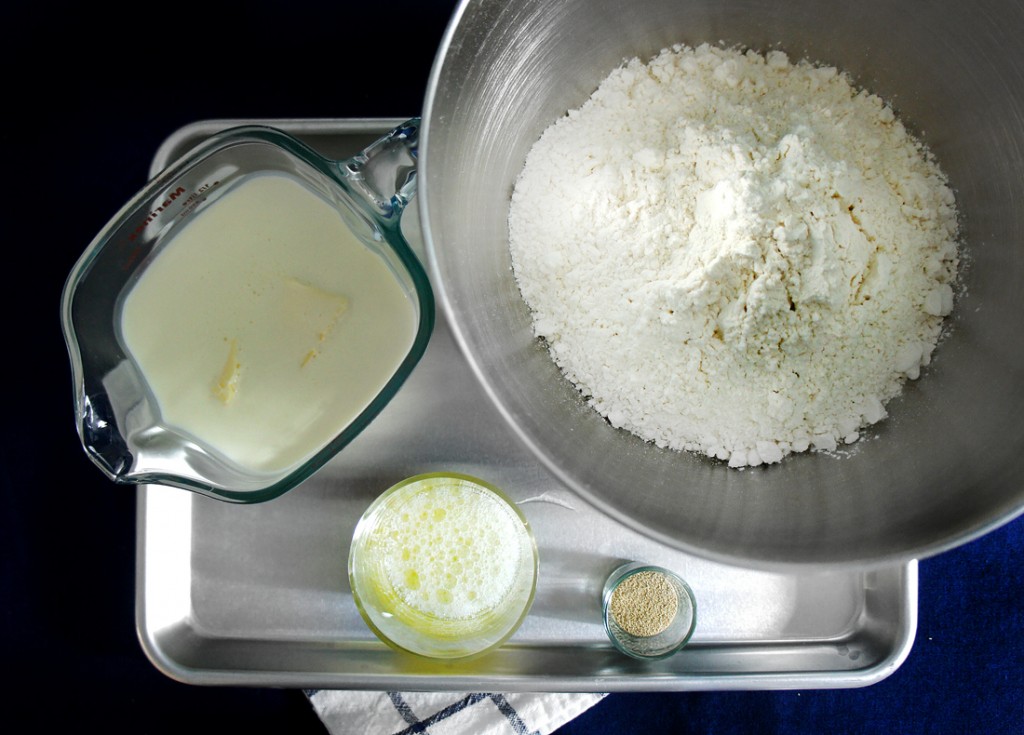
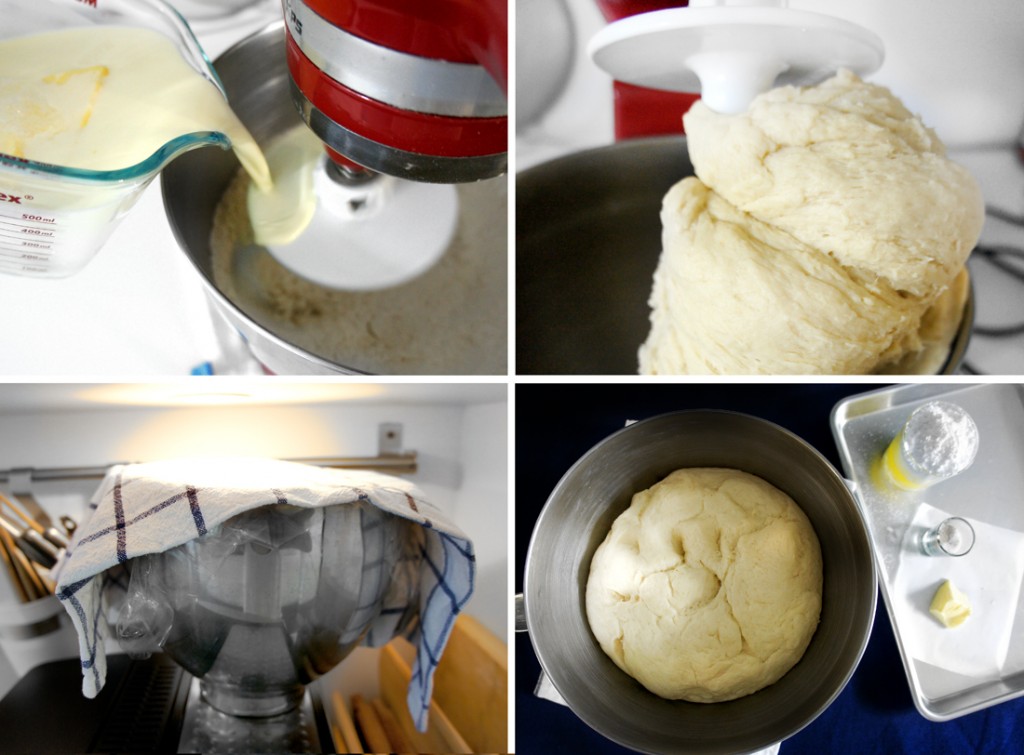
Combine heavy cream, whole milk, butter and sugar in a bowl and warm it in the microwave to 110ºF. In a stand mixer with a dough hook attachment, combine bread flour, dry yeast, egg white and the warm milk mixture, then knead until smooth on medium speed. You could either now proof the dough in the fridge for 18 to 24 hours, or under room temperature for 1 to 2 hours until doubled. I placed my dough over the warm espresso machine to proof and it took approximately 2 hours for the dough to double.
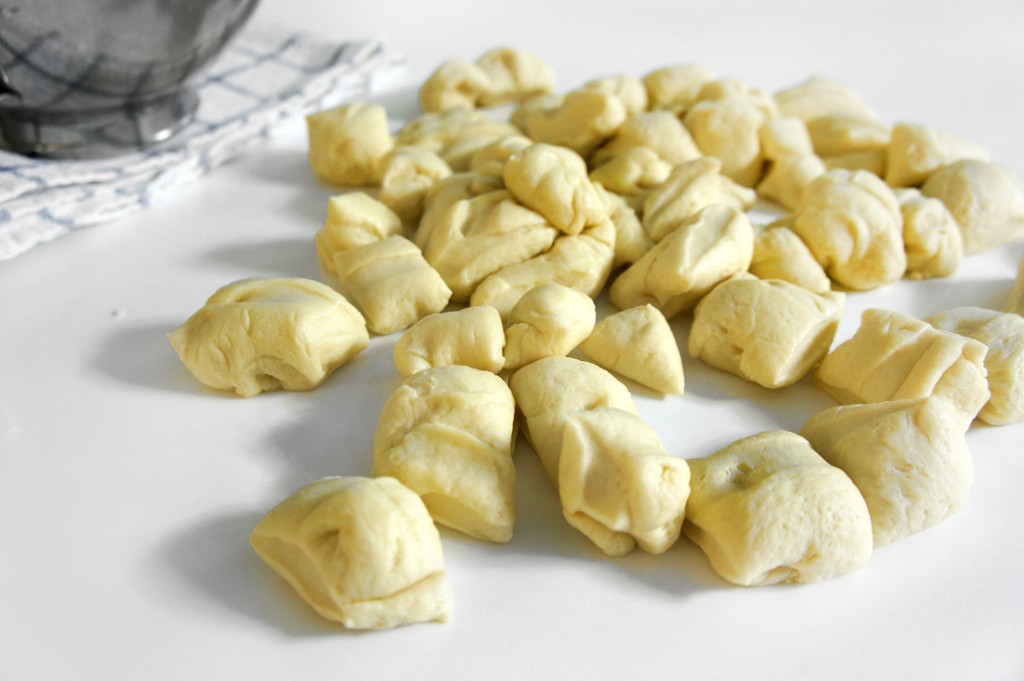
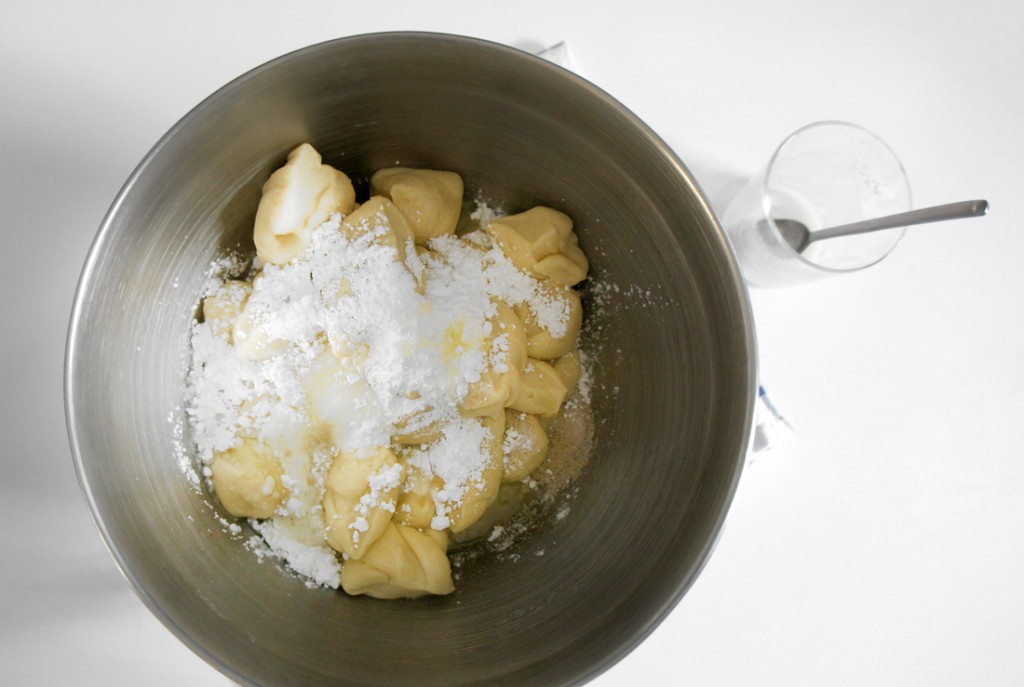
Once the dough has doubled (or kept in the fridge overnight), take it out of the bowl and punch out the air. Cut the dough into small “bite-size” pieces and return it to the stand mixer with a dough hook. Add the salt, dry yeast, sugar and egg white (save the butter for later) and turn the mixer on medium. Work the dough until it is smooth and elastic (approx 5 min), then add the room temperature butter. Keep the mixer on medium and work the dough for another 3 min. The dough shouldn’t be sticking to the side of the bowl too much. If it does, add another couple tbsp of flour. Then turn the mixer on medium high and work the dough for another 6 to 10 min. The dough should pull away from the mixing bowl and making “slapping sounds” against the bowl.
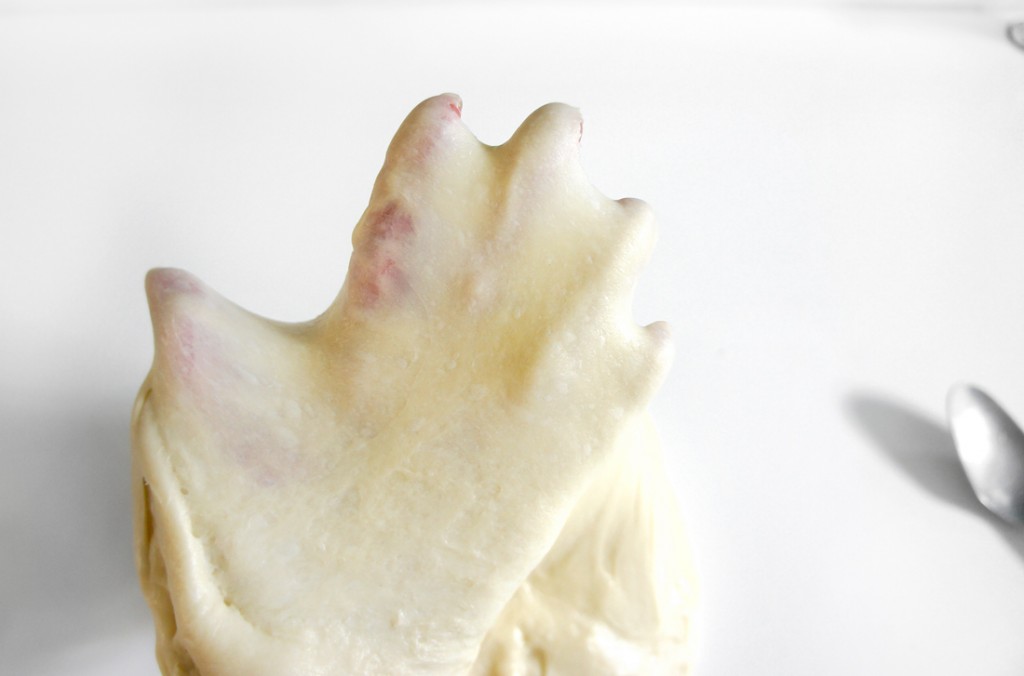
When you are done, the dough should be in a state where it isn’t too sticky, but just moist and developed enough gluten that you could slowly stretch it into a thin, translucent film without breaking (see the pictures above). Divide the dough into 2 equal portions and let it rest for 15 min if it was proofed under room temperature, OR 30 min if it was kept in the fridge overnight. During this time prepare the browned butter. Melt the butter in a small sauce pot over medium heat. It will start to foam, then turn brown and smell nutty. Turn off the heat and set it aside.
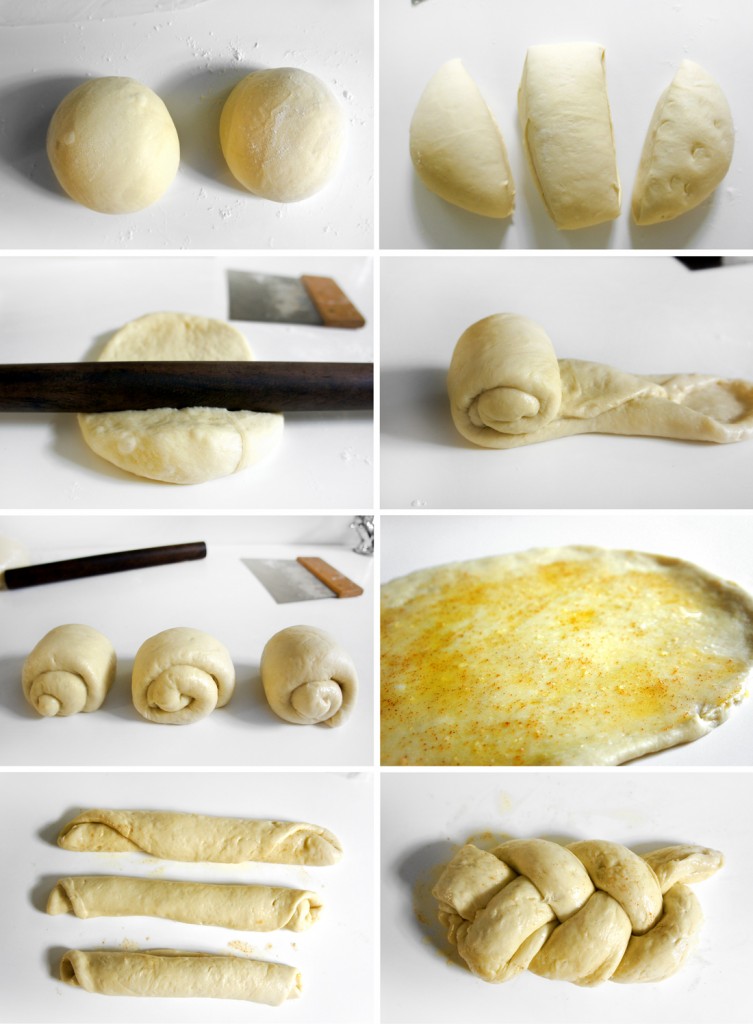
Once the dough is rested, take 1 portion of the dough (keep the 2nd portion covered in plastic wrap) and divide it into 3 equal parts. Roll each part into an oval shape, then fold the sides toward the center (like folding a letter) and roll it out again into a long rectangle, then curl it up like a snail. Repeat the same step with the 2nd portion and let the dough pieces rest for another 15 min (you should now have 6 pieces of dough, 3 pieces for each portion).
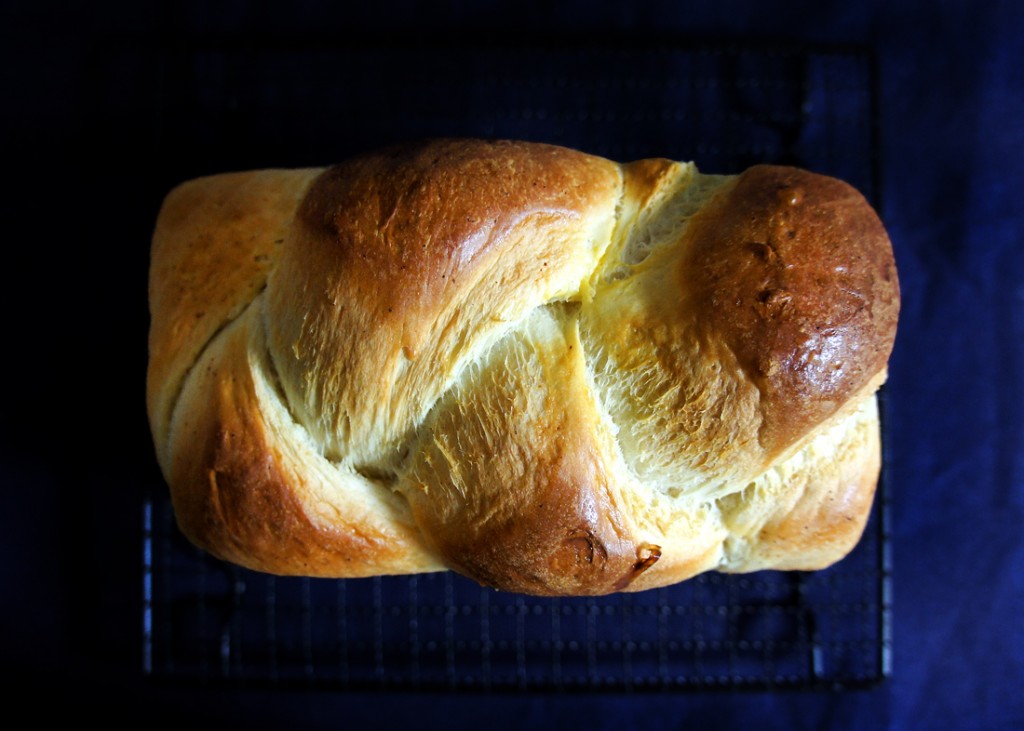
I formed the 2 loafs into 2 different shapes, 1 that’s braided and 1 that’s not. To make the braided shape, roll 1 piece of dough out into a oval shape again. Brush the top of the dough with the browned butter and sprinkle with some sea salt, then roll it into a long log. Repeat the same step with the other 2 pieces, which will give you 3 long logs. Braid the 3 long dough like braiding a ponytail, and set it inside a loaf pan. OR for a traditional loaf, after brushing the dough with browned butter and sea salt, you could fold it again and curl it up like a snail, and set it side by side in a loaf pan.
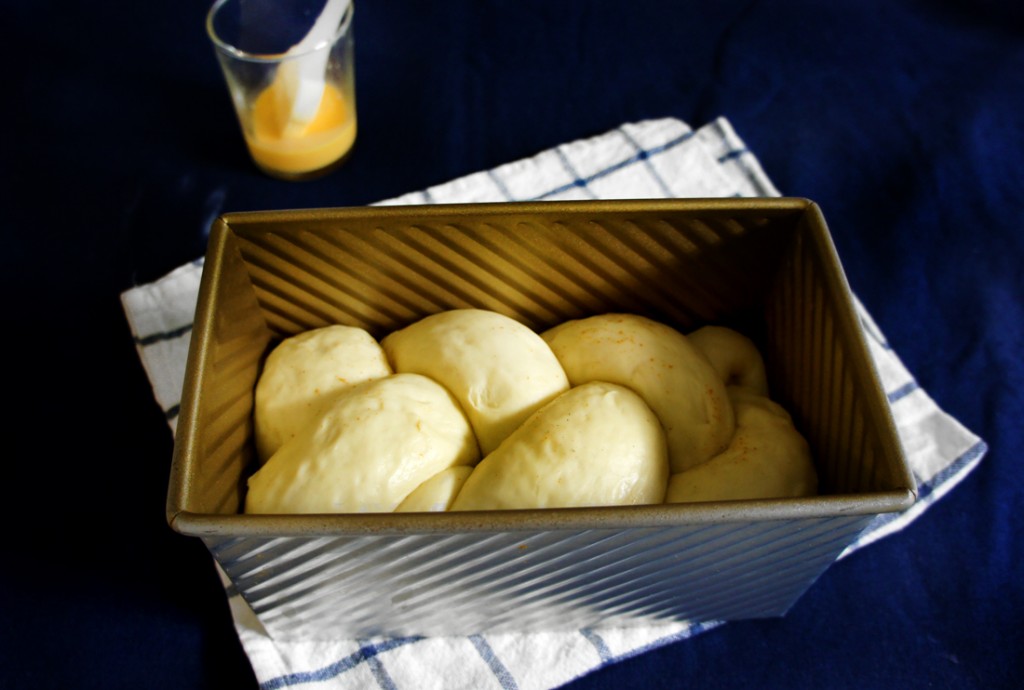
At this point, I put the un-braided loaf into the freezer and kept the braided loaf under room temperature to proof. To bake the frozen loaf, take it out of the freezer and set it inside a loaf pan in a warm spot. Let it completely defrost and proof until it has expanded to 80% full. This will take several hours.
Preheat the oven on 360ºF/180ºC. Let the dough proof to 80% full (not doubled which will be 100%). This took another 1:30 hour in my kitchen. Brush the dough with egg wash and cover the loaf pan with aluminum foil. Bake in the oven for 20 min, then uncover the foil and let it bake for another 20 min until golden brown on the top. The loaf should expand significantly in the baking process.
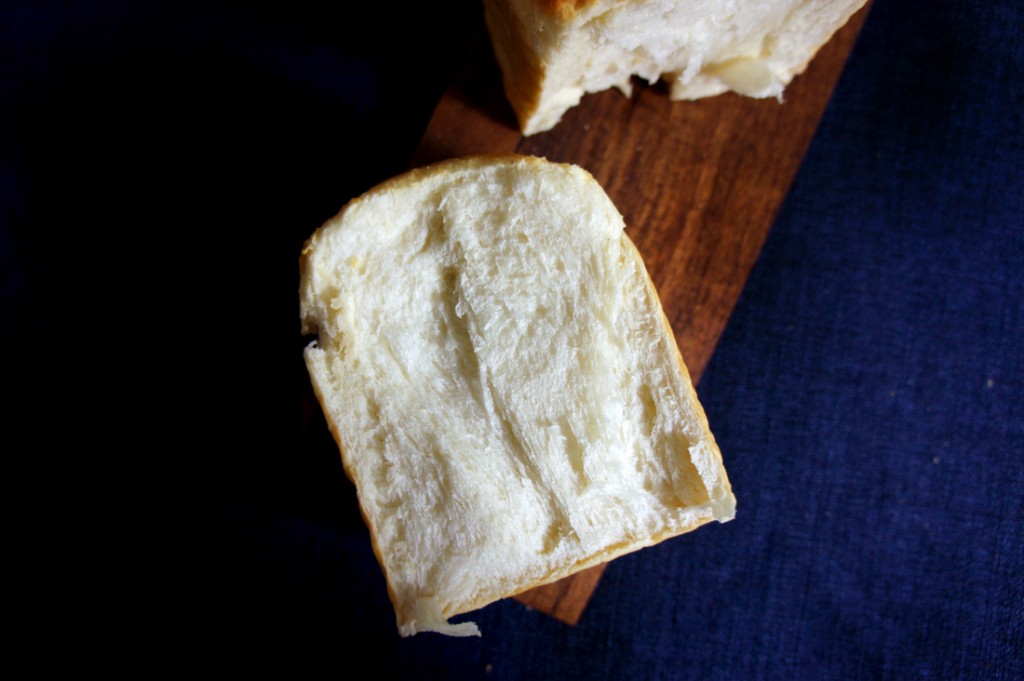
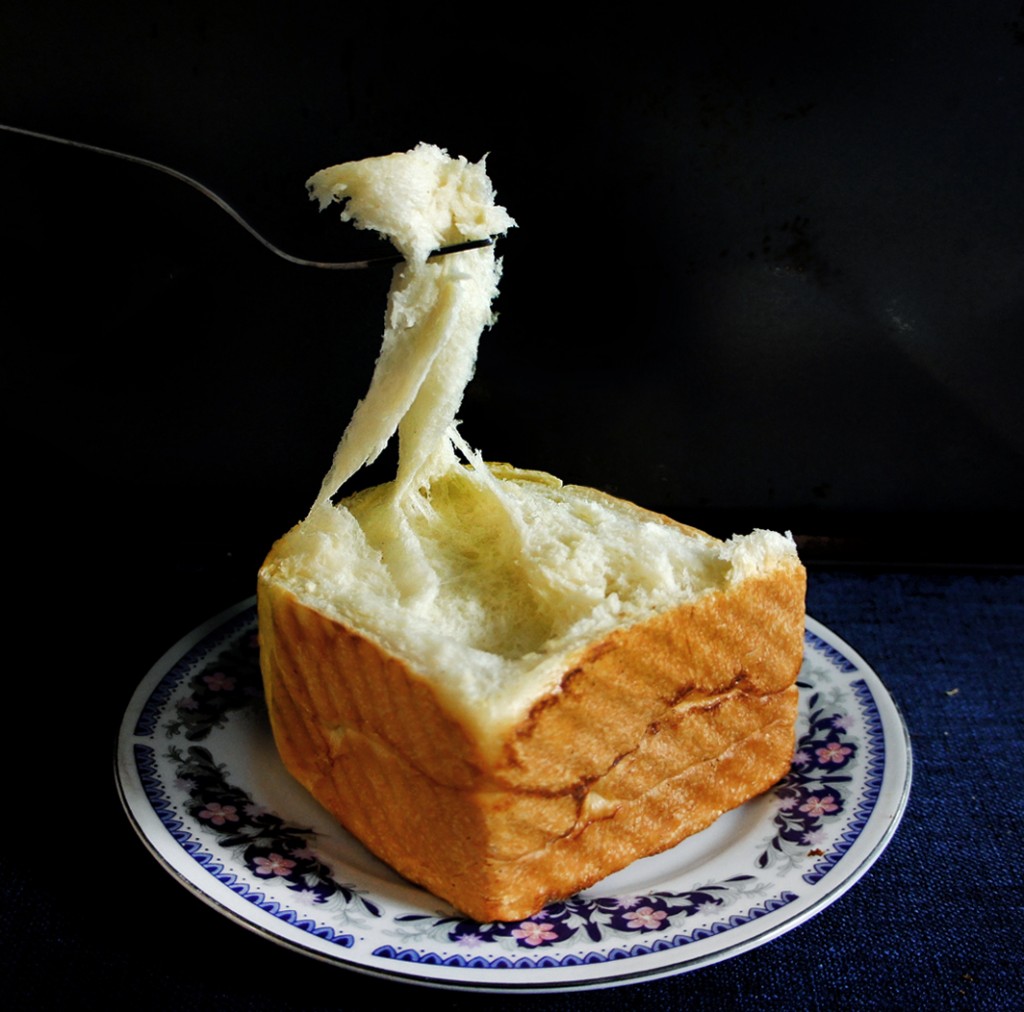
You could take the loaf out of the pan and let it cool on a rack for 20 min. I personally think it’s a crime not to eat it while it still retains its warmth from the oven. You wouldn’t believe the stringy and chewy texture of this milk toast. It doesn’t need any jam or butter. It’s good enough to be a snacking bread on its own.


Lokness @ The Missing Lokness
10.05.2012at6:02 AMOh soft and fluffy bread! I am making this for sure! I just got a kitchenaid mixer, and I am looking for a good bread recipe! This just looks perfect! I am very excited! Let’s hope everything will come out ok. Thanks for sharing!
Laurie
10.05.2012at7:01 AMOh my! This is a gorgeous bread. The crumb on the loaves looks so soft and light!
I am SO American and am a bit lame when it comes to metrics.. but this loaf is so worth getting a converter chart out.
Loved your tale.. and the idea of a P&J swirled loaf.. sounds awesome and if you ever do have success with it, I’ll be happy to hear!
STEPHEN ROBINSON
09.24.2018at6:03 AMNo need of conversion chart. Just get a cheap $12 scale from ikea or somewhere and it’s easy peasy
Mandy L.
10.05.2012at1:53 PMLokness and Laurie, Thanks for commenting. It really is a super yummy bread. please let me know how it turns out if you guys ever tried making, OK?
Lokness @ The Missing Lokness
10.12.2012at11:52 AMI made it tonight. It was my first ever homemade bread. It was a bit dense and it didn’t rise as high as yours, but it was still soft. Do you think it is because I didn’t let it proof long enough? I let it sit at room temp for 1 1/2 hour. I still have another loaf in the freezer. I am hoping it will come out better the second round. :)
Mandy L.
10.12.2012at3:32 PMThere’s a few reasons that are possible. It could be that your home may be a bit cold, which would take much longer for the dough to rise. I placed my dough above a warmed-up espresso machine (I would assume the temperature to be around 28 to 30 degrees) and it still took 1 1/2 ~ 2 hours for the first proofing (to double), another 1 ~ 1 1/2 hour for the second proofing (to rise to 80% full). OR. It could be that the yeast you used have lost its potency. The ratio of yeast used in this recipe is relatively lower, so it would need longer time to proof and a potent active dry yeast. When you are ready to bake the one in the freezer, make sure you let it thaw COMPLETELY in a warm spot (would take several hours), and let it rise to 80% full before baking. I hope the second one turns out better.
It also took me a couple of tries to get this right but this bread is definitely worth it!
Lokness @ The Missing Lokness
10.14.2012at6:46 AMGot it. 失敗乃成功之母! I will let it proof longer next time. Thanks for the tips :)
hexanes
06.27.2013at11:24 AMI usually proof my breads in the oven with the light on. Might still be a bit cooler that on top of the espresso machine but I’m used to it and it gives consistent results even if the rooom temperature varies.
carey
10.06.2012at12:37 AMWow, this bread looks amazing. And you are hilarious! “Totally worthless in the soggiest way” killed me. (:
Mandy L.
10.06.2012at1:33 AMCarey, haaaa you should tell my husband who thinks my jokes are generally lame.
Marta @ What should I eat for breakfast today
10.06.2012at3:00 AMYour post is so funny! And this bread looks simply amazing. I love to bake breads, I hope mine will look similar.
Nathalie
10.11.2012at5:49 AMSincèrement, un des meilleur pain blanc que j’ai mangé!!! Long à faire mais ça en vaut la peine, il sera sur mon blog dès demain, Merci beaucoup!!!!
Mandy L.
10.11.2012at3:35 PMNathalie, thank you!!
Jessie
10.12.2012at5:48 AMthis looks incredible
Jordyn @ Butter Than Toast
10.22.2012at6:27 AMThis looks amazing!! I walk through the bakeries here in Okinawa and wonder how they make those beautiful, soft and delicious breads. I cannot wait to try this and learn another Japanese recipe! Thanks for posting this!
fanny
11.25.2012at9:54 AM麻煩請教一下配方里用的是active dry yeast還是instant dry yeast?我用的是active dry yeast,沒有用溫水溶直接和干料一起攪拌的,第一次攪拌好還看得見yeast的顆粒。另外我用普通的loaf盤烤,360F烤40分鐘,外殼很硬很焦。是否要降低溫度。最后請問攪拌時用中速和高速是指kitchenaid的mixer哪幾個檔,4檔和8檔嗎?
Mandy L.
11.25.2012at1:56 PMHi Fanny, 我用的是 instant dry yeast 牌子叫 “安琪”. 你的情況聼起來像是麵糰沒有發成功。將牛奶加熱至 110 (但不能過熱)很重要。尤其是冬天。如果麵糰太冷或太干。yeast 溶解不了就發不了。如果想再試一次,會建議先讓 yeast 在溫牛奶内溶解冒泡后,再和麵糰攪拌一起。發的時候記得將碗用保鮮膜蓋住,保持水氣。每個烤箱溫度有些不同。如果太焦了,可以試試看前半個鐘頭將烤槃用鋁箔紙蓋起來。最後10分鐘打開。中高速是 5~6 檔之間。 再試試看吧。我也試了一兩次。
Laetitia
01.07.2013at3:37 AMYumm..Looks delicious!
Two questions for you:
1. Where did you buy your loaf pan from?
2. What is the purpose of splitting the ingredients between the two proofs?
Mandy L.
01.07.2013at3:52 AMLaetitia, 1. I bought the loaf pan online in Beijing on taobao.com. 2. To be honest I have no idea why but I just followed the instruction given. Please let me know if you have any clue!
Jena
03.08.2013at2:03 PMThe two step process is generally called the “sponge” method and I believe it is also related to the “levain” method by which you get stuff like sourdough. It gives yeast a chance to work longer and more slowly (which is why you refrigerate overnight so that yeast doesn’t go all crazy and double, triple, quadruple your dough). The slow fermentation gives a different sort of texture and a deeper flavor that a lot of straight dough method (twice rise, single proof method) gives you. You can easily make any of your regular sandwich straight dough method breads by this method (check out Alton Brown’s episode on yeast – he has a basic bread that does this). Try it, you’ll see the flavor difference. Both dough methods are tasty; just different.
Mandy L.
03.08.2013at3:28 PMJena, thanks so much! That’s very informative! I tried both proofing in the refrigerator AND in room temperature for the first stage. The dough in the fridge only rised 50% overnight, but doubled rapidly (within 1 hour) on the second proofing stage. Where as the dough in room temperature doubled in the first proofing, but took a long time (2 hours) in the second proofing. Next time I will try the straight dough method and see where it takes me. Thanks again!
CBGCP
06.23.2013at5:58 PMHey, did you use the famed- Tangzhong method in this recipe? It seems all of the real, and authentic milk loafs use that.
Just curious, as I like your recipe the best, and it sounds quite good.
Mandy L.
06.23.2013at8:53 PMYes I have heard about that method but never tried it yet. Supposedly it helps the bread retain moisture better. This is sort of a more simple technique (even though already quite time consuming). Maybe someday ill give tangzhong a try.
Fiona
07.26.2018at4:22 AMI adapted this to tangzhong method and it turned out brilliantly! I was rushed for time so didn’t split into two steps. I used 50g flour for tangzhong and 250g milk. As a result of higher liquid content, I used only one egg instead of two. The rest of the ingredients were the same except I may have been generous with the butter! Will definitely be using this recipe again. Thank you for posting!
Kimberley
11.21.2013at12:55 PMI just made this tonight (started last night) and the bread is wonderful. I love the consistency of it. I made the version with milk powder. Next time I’m going to half the sugar in the 2nd proofing though to bring it down from almost being a sweet bread. Also, the bread was very moist at the end of mixing during the 2nd stage. I had to add about 4 tbsps of flour. And even then it seemed quite sticky but I didn’t want to ruin it so just went for it instead. Turns out that was a good choice. And knowing after 24hrs of working on it that there’s now a second loaf in the freezer makes it even so much better! Thanks for putting this recipe out there.
Averie @ Averie Cooks
02.04.2014at7:36 AMThis is straight up HEAVEN in the shape of a loaf. WOW! Truly, the dreamiest!
Lisa I.
02.10.2014at6:18 AMMade this today.
A. MAZ. ING.
Someone needs to take this away from me before I eat both loaves in one fell swoop.
Thank you for a fantastic recipe and a beautiful blog.
Viola C
03.02.2014at5:48 PMThanks so much for the detailed recipe!
I had a question: do you knead the dough to the “windowpane” consistency before the first proofing?
Cheers
mandy@ladyandpups.com
03.02.2014at6:24 PMVIOLA: No, the heavy kneading comes at the second proofing. For the first proofing, you just need to knead it until it’s smooth and elastic.
Alexandra
06.21.2014at12:12 AMI dont have a way to mea. things in grams. I Googled a conversion for flour, and I am getting all sorts of different answers. About how many cups is the flour you used? Im in the middle of making this based on what I think it is, and im feeling a little iffy about it turning out right lol
Ling
06.26.2014at6:25 AMI finally mustered up the courage to take on this recipe and o…m…g… THANK YOU!!!!! It is AMAZING!!! I accidentally let it rise too much in the last step and the top stuck to the foil and I ended up ripping off the top layer but despite it’s looks, it still tastes amazing. The dough was so nice to work with too! Other recipes I’ve tried that didn’t use egg or butter were very stiff to work with. Not sure those are the only reasons why yours came out softer and more elastic, but they are the most notable differences to me. Seriously amazing stuff here =D
In case any other readers at high elevation are wondering, I made this at 5000′ elevation and followed the recipe exactly proofing all at room temp. You’ll want to keep an eye on it while it does its last proof as it might rise faster than you expect & watch it in the last 20 minutes of baking. For me at 15 minutes, the crust was already well-browned & the inside was super soft & fluffy. Next time I might even cut it down to 12 minutes as the crust is a bit thick for my tastes.
Mel
08.23.2014at4:40 PMHi, there isn’t any bread flour where I come from, but there are bread mixes and normal flour. Is it possible to use plain flour for this recipe instead of bread flour?
Pingback:sea salt buttercream on a chocolate cupcake | Lady and Pups – an angry food blog
09.04.2014at5:38 PMmaripaz
10.23.2014at6:59 AMHoly smokes, this loaf is AMAZING!!!!! I didn’t quite get the stringiness that I see from the pictures, but I may have underbaked mine. It was starting to get really brown though so I just took it out with a few minutes left to go.
I also don’t know if I let it proof too long the final time, but I would recommend oiling the aluminum foil and giving it some slack. My bread stuck to the foil even though I left room for it to grow. While that doesn’t affect the taste, I wanted to give one loaf away, and the top just doesn’t look so nice…
Thanks so much for the recipe!!!! : )
Sharmaine
11.30.2014at11:38 AMHi Mandy!!
I totally understand that feeling when your bread fails after waiting for it for hours :(
That happened to me too and once or twice when I was proofing my bread for the 2nd rise, my oven somehow had set itself to heat at 180 deg c instead of 30 deg c and ruined the batch haha *cries*
Just wondering if this recipe should be fine to work with by hand?
I’ve read somewhere before that working by hand you have to add 15% more liquid?
Sorry, I’m a real noob at break making. Somehow my bread doesn’t get that stringy and very moist texture. Maybe it’s because I’m kneading by hand or kneading incorrectly by hand.
Any advice would be much appreciated!
Thanks for sharing your recipe :)
mandy@ladyandpups
11.30.2014at2:10 PMSharmaine: I’ve never tried this by hand, and I would imagine that if you do, you’ll really really have to break a sweat to achieve the same texture.. Maybe you’ll have to knead it for 1/2 hour vigorously or something. I’m not sure why it would need more liquid, perhaps because the longer kneading time will result to moisture loss? But 15% sounds a bit much. I would add little by little along the way. Let me know how it turns out!!
Ofis Mobilyası
01.02.2015at11:28 PMI dont have a way to mea. things in grams. I Googled a conversion for flour, and I am getting all sorts of different answers.
mandy@ladyandpups
01.03.2015at12:03 AMOfis, try to take the average of a few online conversion (3~4), and hopefully it wouldn’t be too far off.
Em
01.04.2015at11:46 PMHi, would it make a huge difference if I didn’t add the whole 7 tbsp of sugar in the second proofing? I know that’s not the point of the loaf (and that it’s supposed to be sweet), but I wanted to try this because of the “milky” flavor and not because it’s sweetened (for someone who likes bread but not sweet ones). Do you think it would it really affect the outcome?
Thank you! This bread looks dreamy :)
mandy@ladyandpups
01.05.2015at12:23 AMEm, you can of course make the loaf less sweet to your liking. I don’t think it would greatly affect the texture, but I haven’t tried before. Let us know!
Yıldırım Satılık Daire
01.05.2015at4:10 PMHey, did you use the famed- Tangzhong method in this recipe? It seems all of the real, and authentic milk loafs use that.
Yıldırım Satılık Daire
01.05.2015at4:10 PMHey, did you use the famed- Tangzhong method in this recipe? It seems all of the real, and authentic milk loafs use that. sddgdfg
mandy@ladyandpups
01.05.2015at7:06 PMYildirim: No I didn’t. But I’m still really happy about the result without that one extra step.
Bunny
01.23.2015at12:35 PMThank you for making my dream (bread) comes true! :)
If I want to turn it into a raisin toast, at which step would you recommend mixing the raisins into the dough?
mandy@ladyandpups
01.23.2015at1:10 PMBunny: I would say do it with the second proofing :)
Bunny
01.23.2015at3:53 PMThank you for the quick response, Mandy.
I tried rolling the raisins into the dough like a typical cinnamon raisin swirl bread, it did impact the bread’s fluffiness.
Any guidance on how should I roll the raisins into the dough would be greatly appreciated.
mandy@ladyandpups
01.23.2015at5:25 PMWould you be able to just knead it into the dough along with the “second proofing” step?
christine
03.28.2015at3:07 AMI j6st got your recipe from my sister and made it. This is bread! Good bread!
Pingback:汤种法 Tangzhong Coconut Milk Hot Cross Buns | Le Jus d'Orange | food and photography
03.30.2015at1:07 AMPingback:BLACK SESAME MOCHI ICE CREAM FOR EM’S BB-SHOWER | Lady and Pups – an angry food blog
03.30.2015at11:03 PMAnna
04.05.2015at11:07 AMOMG! I have been searching for this recipe. I grew up eating this loaf of bread. This bread is awesome and oh, so good. My children and I are crazy about this bread. They always want me to buy it for them every time I go to an Asian store. It’s very expensive though. A loaf costs $6.99 and it’s a very small loaf. Thank you so much for sharing the recipe. I am going to definitely try it. :)
JJ
04.24.2015at2:10 PMWhat is the dimension of your loaf pan? 20 x 10 x 6 cm?
Do you know the volume the pan holds?
Thanks so much!
mandy@ladyandpups
04.24.2015at3:49 PMI think it’s 20 x 10 x 8 (quite deep).
andrea
04.27.2015at4:41 AMWOW! I just made this bread and it turned out so perfectly I could cry! It is everything she promise delicate & stringy, the brown butter & salt added that perfect touch.
I just found your blog today and will definitely be making more recipes from here. Can’t thank you enough.
Pingback:THE BLUSHING BOULE (PURPLE YAM COUNTRY BREAD) | Lady and Pups – an angry food blog
04.27.2015at7:41 PMJo
05.03.2015at11:14 PMHi, do you mind sharing the size of your loaf pan?
mandy@ladyandpups
05.04.2015at12:59 PMJo, it’s around 20 cm x 20 cm x 9 cm.
kaede
05.14.2015at6:57 AMHi Mandy, can I substitute the heavy cream with non dairy whipping cream?
mandy@ladyandpups
05.14.2015at12:36 PMKaede, you mean nut-milk? I have never tried it before… nut-milk obviously has a much lower fat-content than heavy cream, so perhaps it would yield a light flavour.
kaede
05.17.2015at9:55 AMHi Mandy, its actually those non dairy whipping cream that are used as topping for cakes and pastries. If I’m not wrong they are made of vegetable fat/oil.
Sharon Wu
05.26.2015at11:01 PMHi ladyandpups,
Thank you for this wonderful recipe. I’m obsessed with milk bread and have been making it fervently for about a year now. I’ve used Christine’s Recipes for Hokkaido milk toast and pai bao, recipes that take 3 days from the Fresh Loaf, and others. Your recipe is the best. I’ve used it three times now, shaped into traditional loaves, pullman toast, and buns with coconut filling. There is a noteworthy improvement in flavor from the 24 hour refrigerator proof step but with the quick rise, the result is still fabulous. I love all your work!
Sharon
mandy@ladyandpups
05.26.2015at11:47 PMSharon, milk bread is my favorite too! Glad it worked out for you :)
Silvia
02.26.2016at8:18 PMDear Sharon,
I would like to know whether you could share your milk récipes with me :-)
I am from Barcelona, and just made this wonderful milk bread, fabolous!
Thanks,
Sílvia.
Ashleigh@Casually Unexpected
05.29.2015at9:35 AMahhhh! I love this bread so much I definitely need to try and make it myself! Thanks for sharing
ellie | fit for the soul
06.02.2015at7:30 AMDuuuuude~~~this was by far THE best bread I’ve ever ever made, Mandy!!!! thank yo uthank you thankkk youuuu. I modified it a tiny bit and used it as a base for marbled taro bun a la 85C degrees bakery style, and ohmahgoodness is it soft & luscious. You’re such a culinary inspiration for me, girl! <3 Hope life is grand this week!
Rory
06.19.2015at1:56 PMHi Mandy,
I happen to have some milk powder at home and I want to use it in this recipe. Would you tell me when should i put it and the quantity as well? Thank you so much!
Rebecca
09.28.2015at10:22 PMSo sad to see you use the word “retarded” in such a way. Hopefully we as a society one day will mature beyond using such slurs.
“I know… what an unnecessary and retarded idea.”
I think I’ll pin elsewhere.
Glen
11.09.2015at4:24 AMThe name threw me, I know this as milk bread. Milk toast to me and my generation, is an entirely different dish. I love milk bread and will give this a try. Milk toast is a breakfast dish that my mom made when I was a kid back in the 50’s. Toast with a milk gravy spooned on top. Sometimes she added a chipped beef to it. (Didn’t care for that) I loved the plain milk toast version. Anyone else have these memories?
Glen
12.08.2015at6:20 AMDon’t cover with foil without oil spray first. My no is mistake, but would have been nice for layPup to make the point. Foil stuck to bread to a ruined what looked to be an awesome loaf.
mandy@ladyandpups
12.08.2015at2:22 PMGlen, oops I’m so sorry about that! Thanks for pointing that out!
Kim
05.15.2016at8:15 AMHi! I just made a braided loaf today. Started at about 10am and am currently noshing on the steamy, crusty loaf fresh out of the oven with my parents right now at 5pm. It’s sooooo good! My mouth is full as I type. Definitely a keeper recipe. I tried sprinkling on a pinch of brown sugar when I rolled the brown butter for a bit of interest and it’s delicious. The 1 1/2 hour 2nd proofing and 40min bake times were a little too long for my environment and oven so I’ll tweak for next time. But there will absolutely be a next time. And a time after that. And a time after that. And–I love to but rarely bake breads because I tend to be unlucky with them but this recipe was so easy to follow. You’re a recipe treasure, Mandy, and I’m so glad I found your blog. :)
Ayi
06.02.2016at11:51 PMHello, Mandy — thank you for the recipe. I do have milk powder at hand. Would love to use it. Do you mind sharing the measurements? Thanks!
Mimi
07.19.2016at8:02 AMHi! This looks so yummy and soft and id like to give it a try. But I have a question. What size loaf pans did you use?
Coco
07.19.2016at11:06 PMJust tried this. It is the most delicious bread that I have ever made! Thank you so much! I have been searching and trying all kinds of milk bread recipes for a while and even bought a book to study. Your recipe turned out the best by far! I also tried your sticky rice bread recipe. It is also great, but I like this one slightly more because of the milk flavor. Thanks again, great job!
Mimi
08.12.2016at1:35 AMHow would I do this with active dry yeast? I’ve been wanting to try it but I don’t have any instant dr yeast.
mandy@ladyandpups
08.12.2016at5:44 AMMimi, active dry yeast should do :)
Pingback:Soul Snacks {Food Edition} - Ciao Chow Bambina
09.14.2016at12:25 PMq
12.06.2016at10:32 AMthis is by far the best milk bread recipe ever !! i have never baked anything in my life prior to being a wife and this turned out sooooo yum !!! totally mesmerised ! thank u so much for such a detailed and yummy recipe. and thank u so so so so much for taking so much time just to make such wonderful and intriguing discoveries not only in this recipe but in all of your recipes ! and sharing them with us!!!! i am becoming your ambassador among my friends cz everytime they ask how did i come up with something so yum i always link them back to ur blog! i’m trying to try every single recipe on your blog!! best blog ever !looking forward to your next post!!n by the way, how long can i keep the frozen dough in the freezer ?
mandy@ladyandpups
12.06.2016at2:10 PMQ, thanks for the endorsement! I’m glad you enjoyed the bread like I did :). I wouldn’t freeze the dough for more than a month just to prevent frost bites. Hope this helps.
candice
05.18.2017at1:09 AMi made it today for a doctor friend who took care of my father and it looks and smells great! i have never achieved a window pane when I knead bread but using japanese flour allowed me to push kneading beyond my fears. it was a beatiful dough to work with and it rose higher than I expected. i hope my friend will like homemade gift. :-) thank you for this very detailed post.
dv8
02.22.2018at3:23 AMwhere i come from sweet breads are made using egg yolks – as many as 10 of them in festive goodies – and get praise for bright yellow colour. i have never seen yeast bread made using egg whites only so there was no way i would not try this recipe. the only change i made was to reduce sugar.
my dough rose in the fridge almost straight away to deflate slightly afterwards, much like it normally does. i proofed it for about 14 hours.
in the second round of kneading it was a bit shaggy and sticky but still easy to work with, especially after it rested again. i did not add any more flour but dusted the working surface and the dough as needed.
the result was great, very soft and delicious bread.
i am looking forward to your improved hokkaido buns with roux.
Tania Leung
03.24.2018at7:28 AMDid you used powdered sugar or granulated sugar in the second proofing?
mandy@ladyandpups
03.24.2018at12:50 PMTania, I believe it was powdered sugar :)
Tania Leung
03.24.2018at8:04 PMThanks for replying so quickly! I’m going to try the recipe tonight!
Claire
04.25.2018at7:16 AMWe have milk powder in our pantry. It’s used for milk teas and such!
Cecília Almeida
05.16.2018at11:27 PMHello! Is it active dry yeast or instant yeast? Thanks!
mandy@ladyandpups
05.17.2018at1:25 AMInstant dry yeast ;)